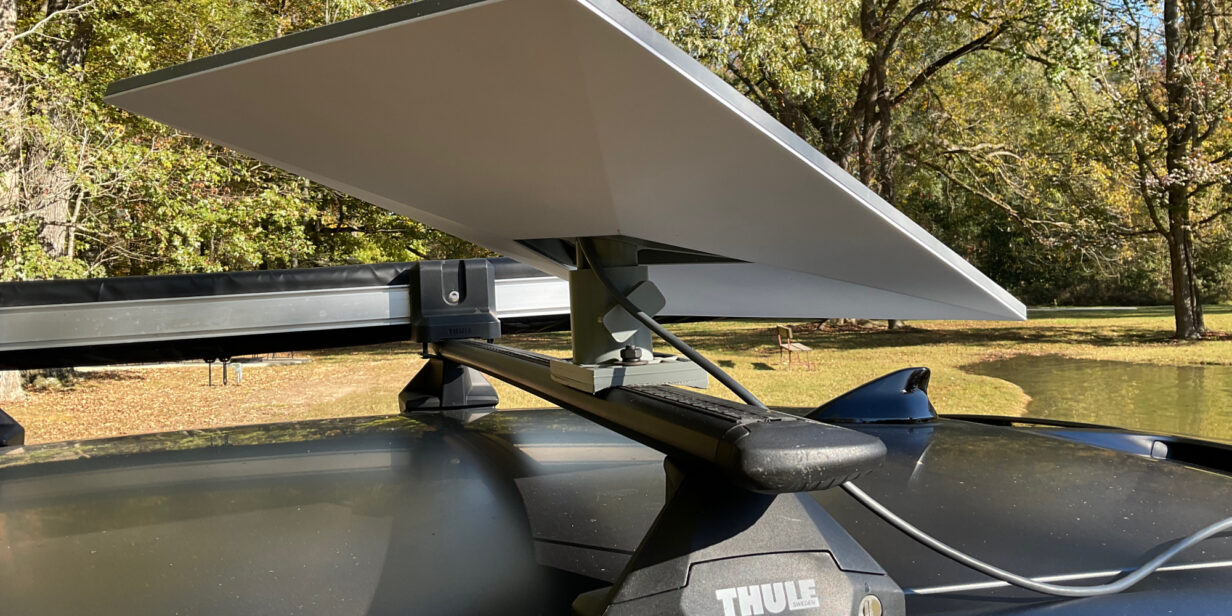
To achieve a reliable, fast, unlimited internet connection, regardless of my location on the continent, Starlink seems like the best solution. I work in constant sync with my team members. Besides video conference meetings, we often need to exchange large files since we work in multimedia. In this context, as long as we follow best practices, Starlink performs without any issues.
For my daily routine, my goal was to have a simple and quick solution for setting up, operating, and storing Starlink. The "Standard Kit v.4" currently sold in Canada is bulkier and more power-hungry than the mini version. However, it offers faster speeds and a more reliable connection. Given my needs and usage context, the size and energy consumption were not an issue.
The kit includes a power supply, a router, and the antenna. To simplify daily use, I chose a permanent installation for the router and greater flexibility for the antenna setup. Here's where and how the equipment is installed.
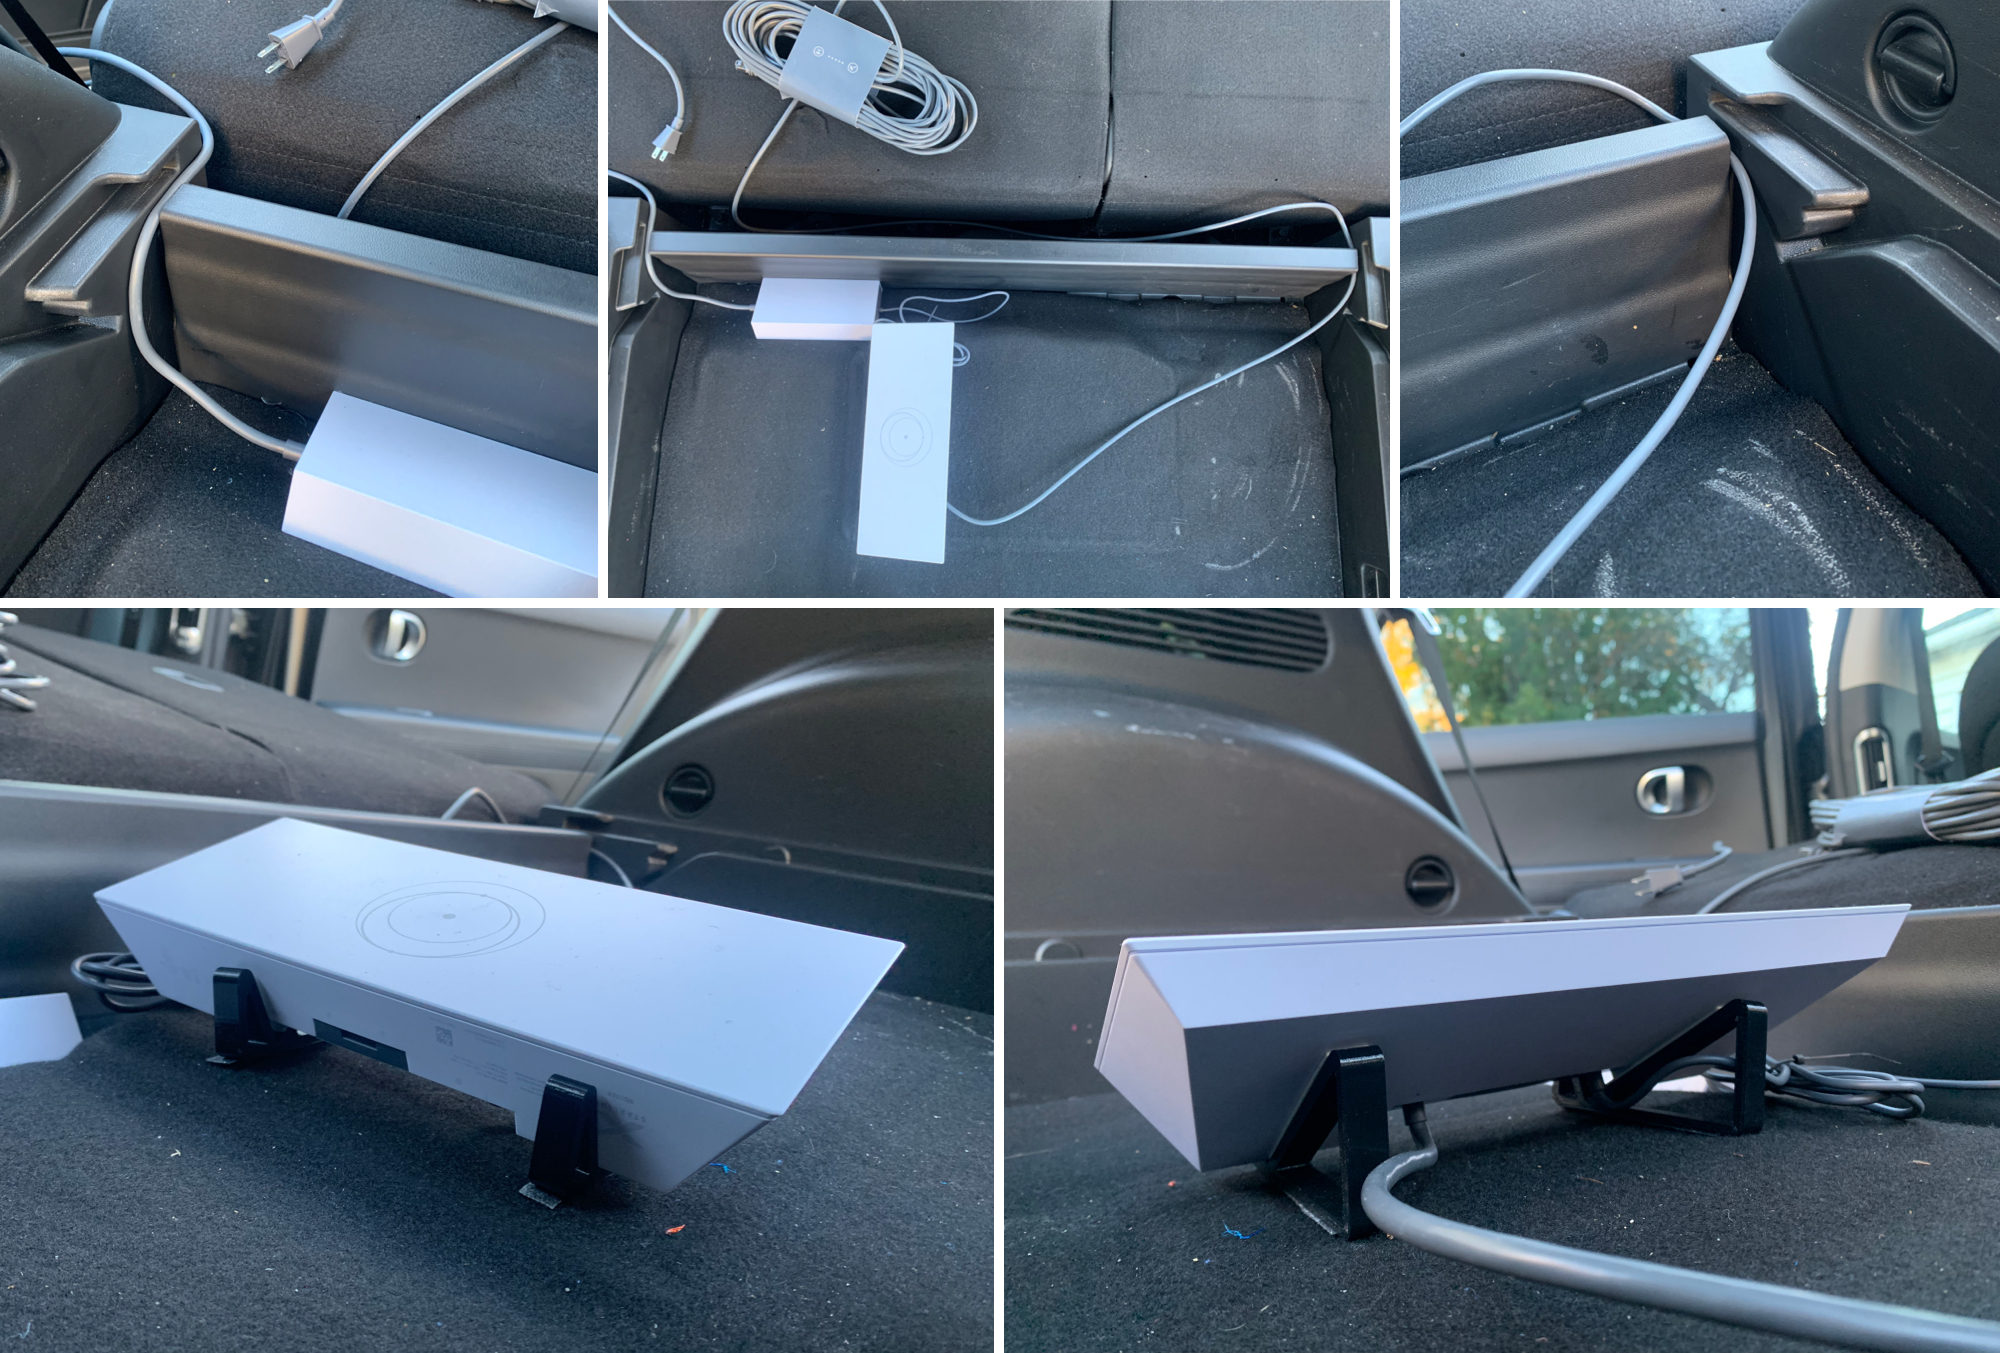
Permanent Router Installation
Under the rear trunk floor, there is a storage space. This is where I install the router along with its power supply. Everything is plugged in permanently. As soon as I connect my mini extension cord to the V2L, everything starts automatically. In terms of durability, during my last trip, I deployed and connected the system more than sixty times over a period of about 30 days without ever needing to access the router.
The antenna on the car
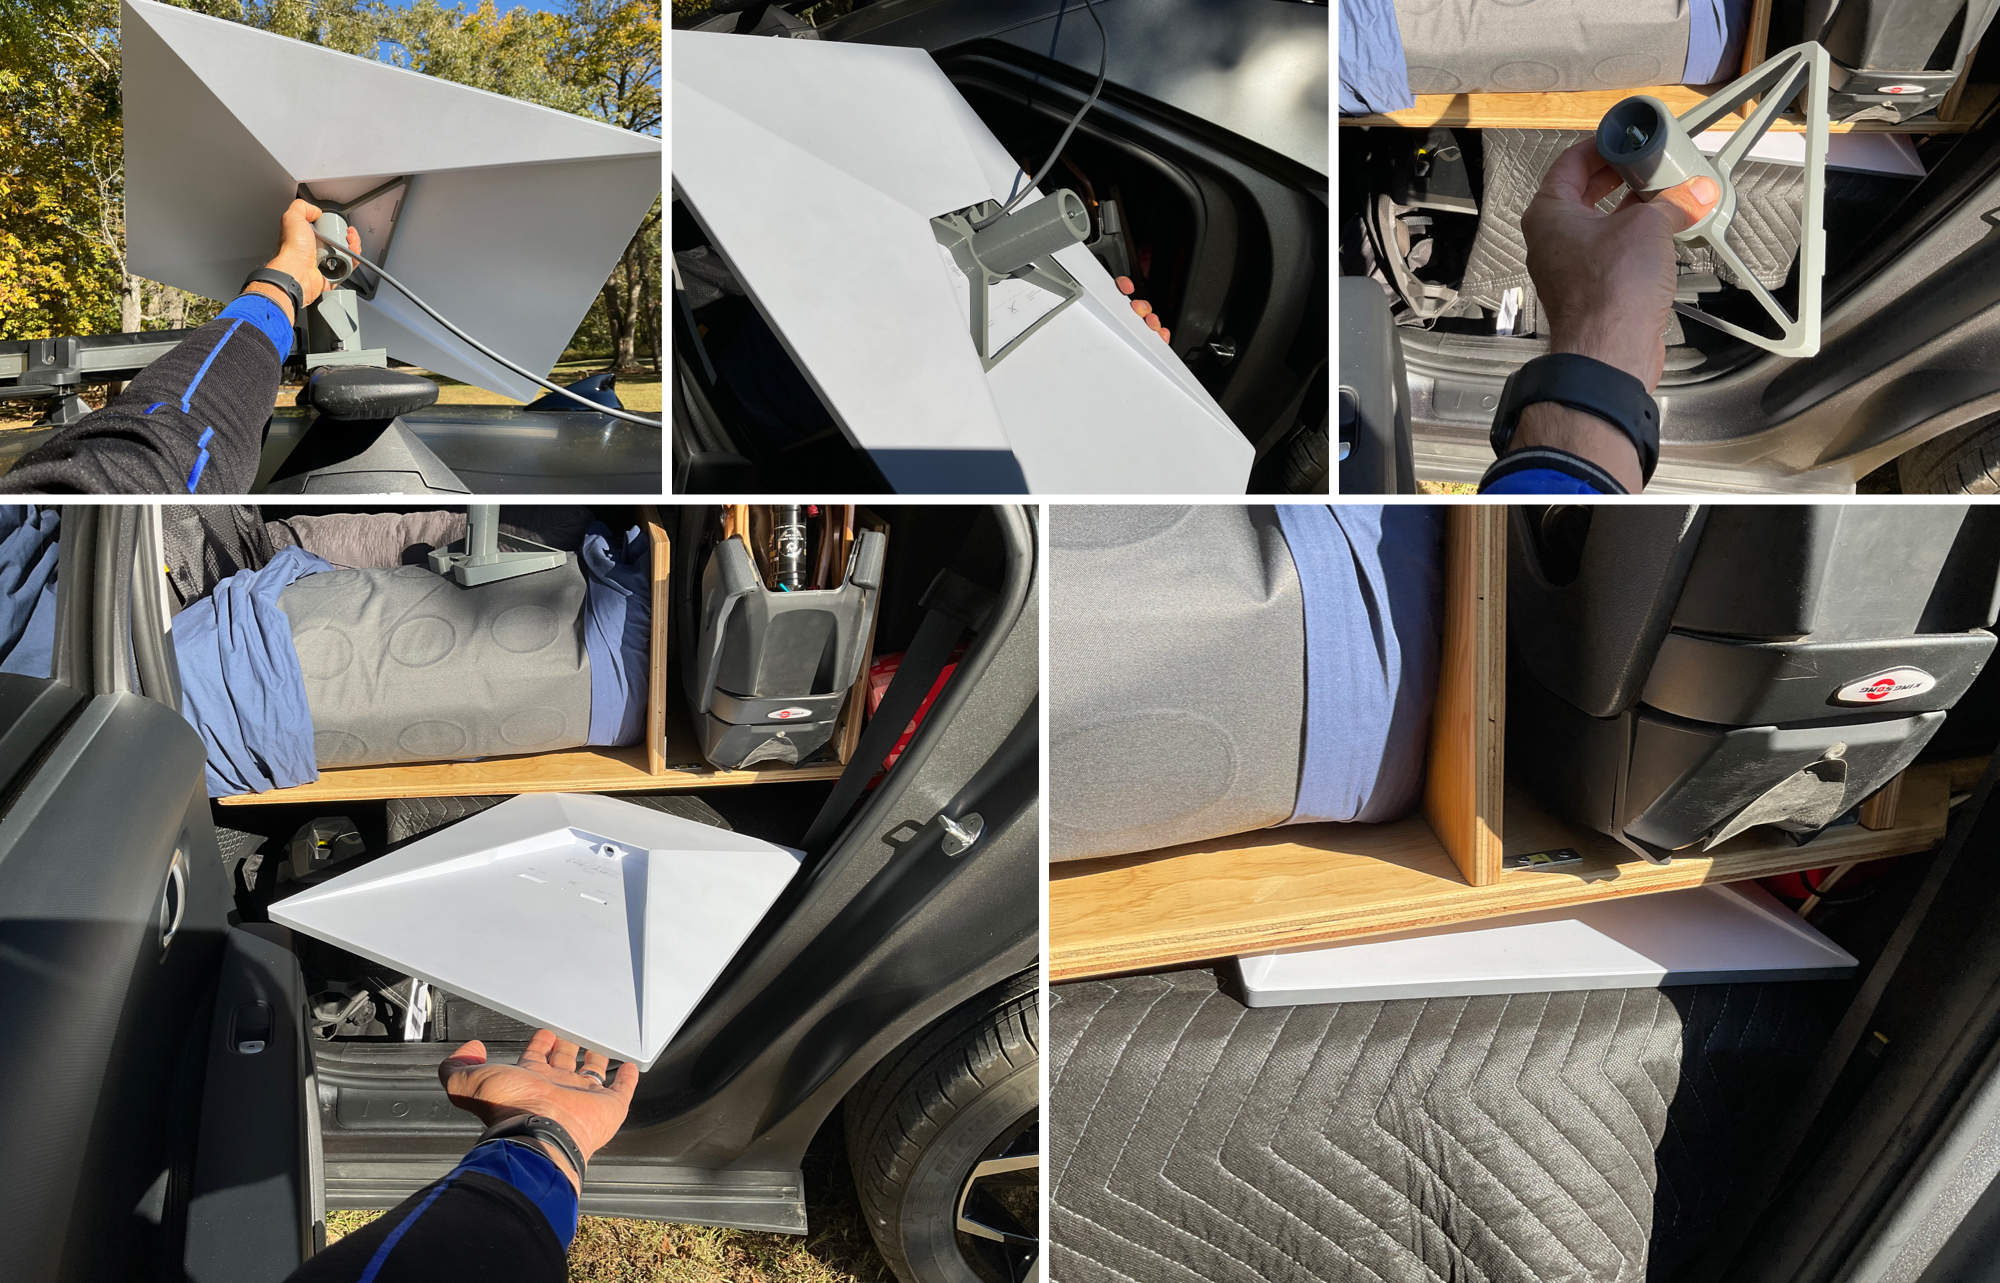
Most of the time, I install the antenna directly on the roof of the car. Whether at a campsite or in a parking lot, it's convenient and quick. To secure it, I use a mount that I specifically designed for this situation. The link for the 3D printing of the parts is available at the end of the article.
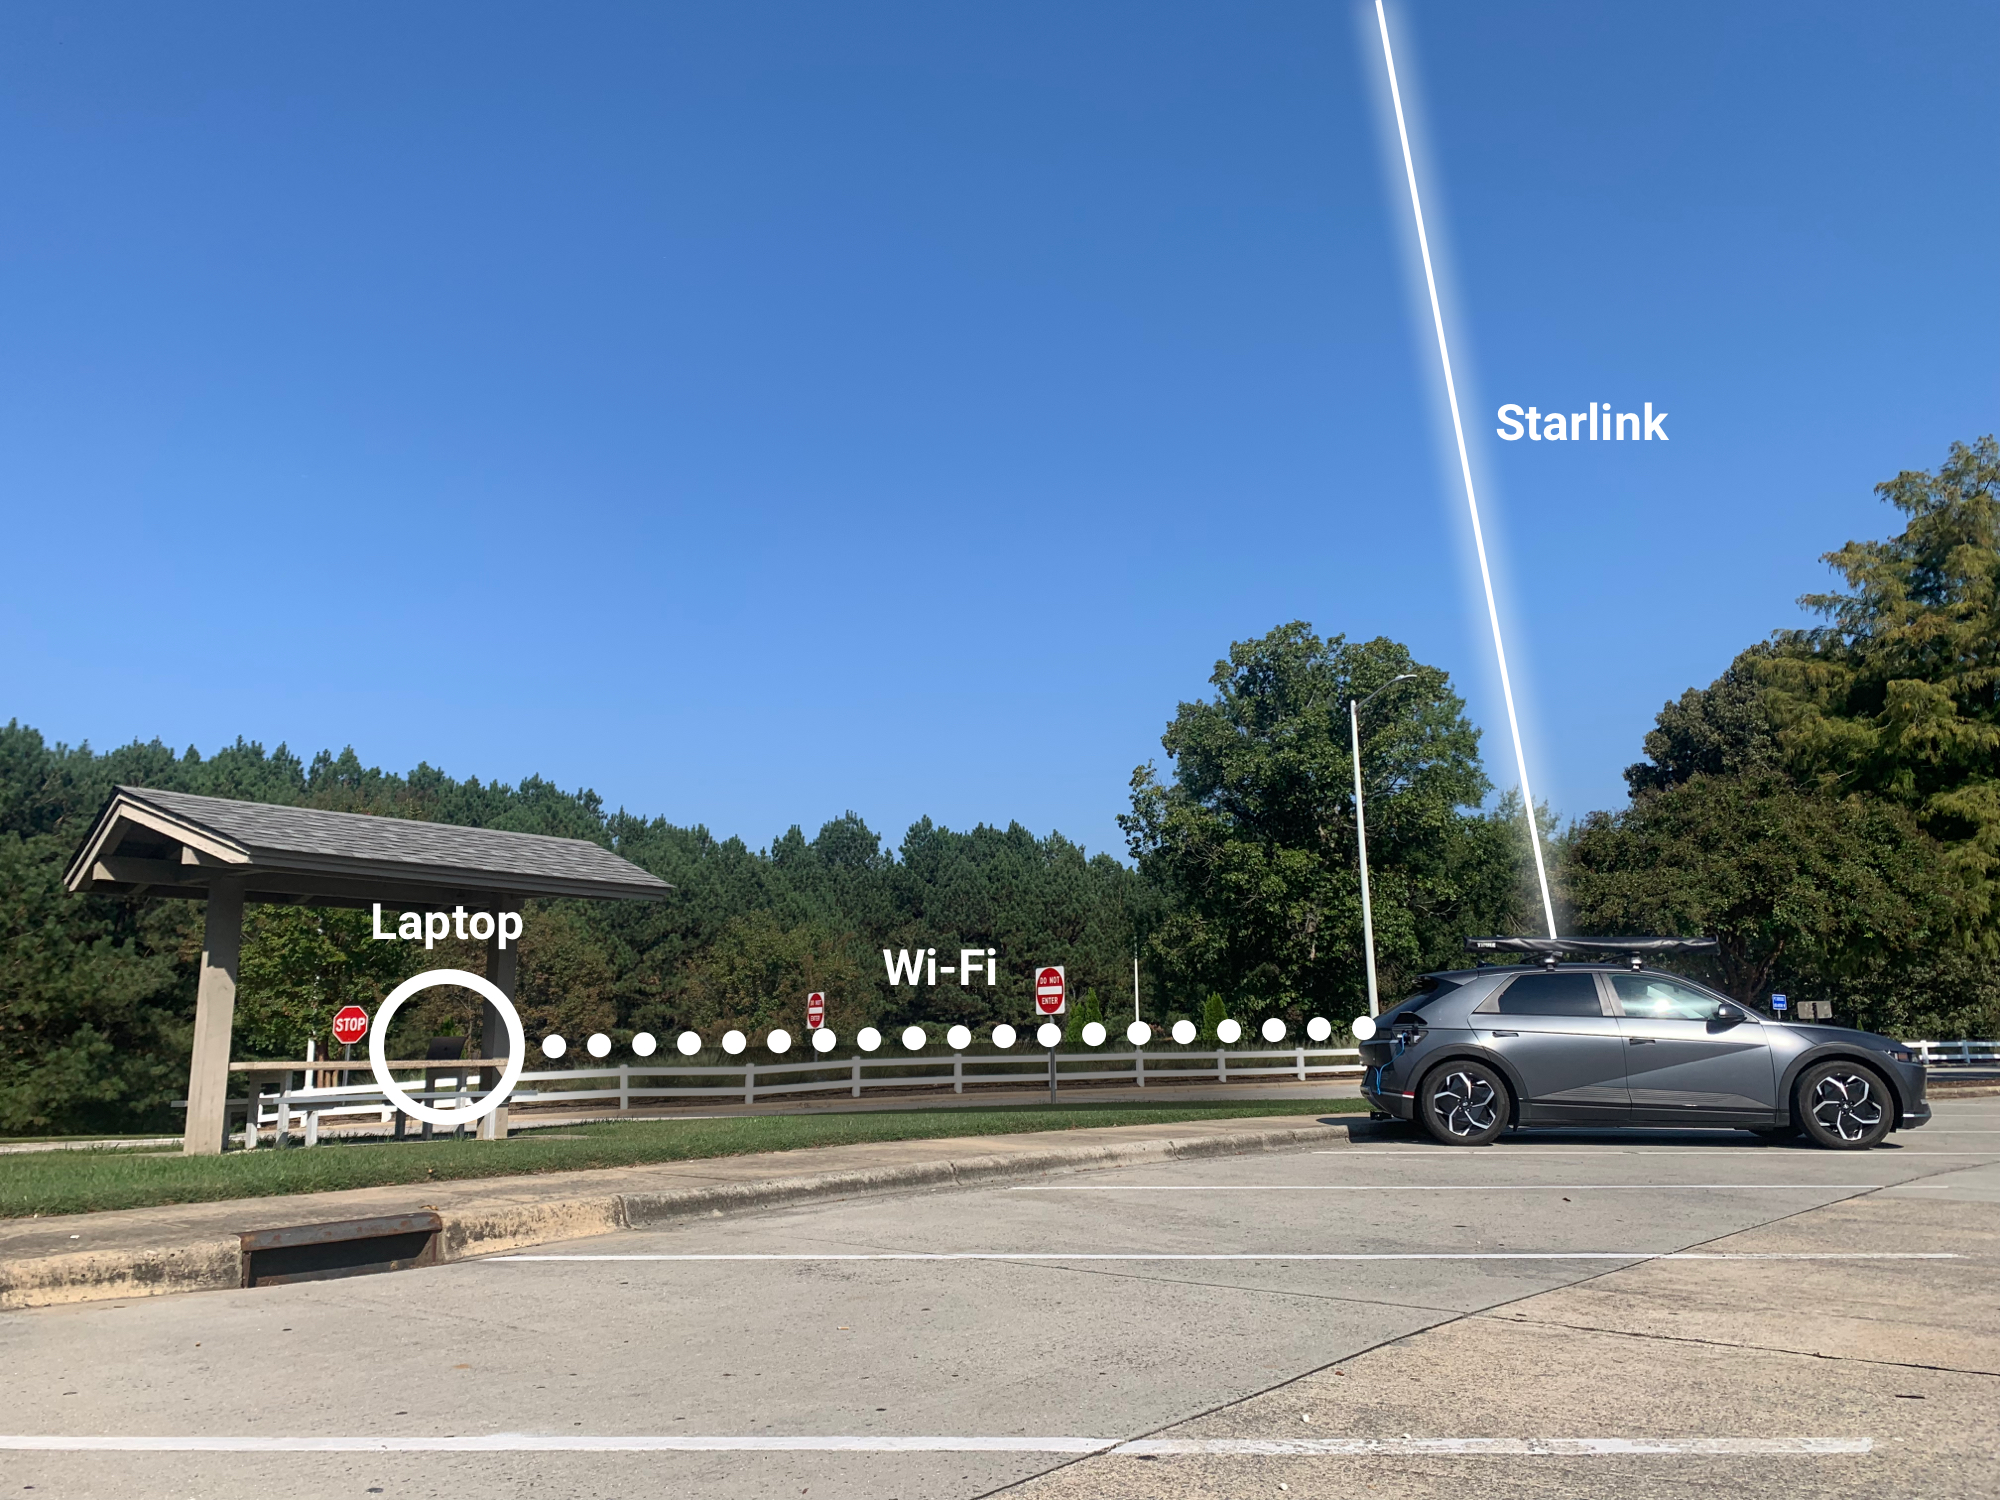
With the router in the car, I have an effective Wi-Fi hotspot that allows me to work a good distance away from it.
The antenna far from the car
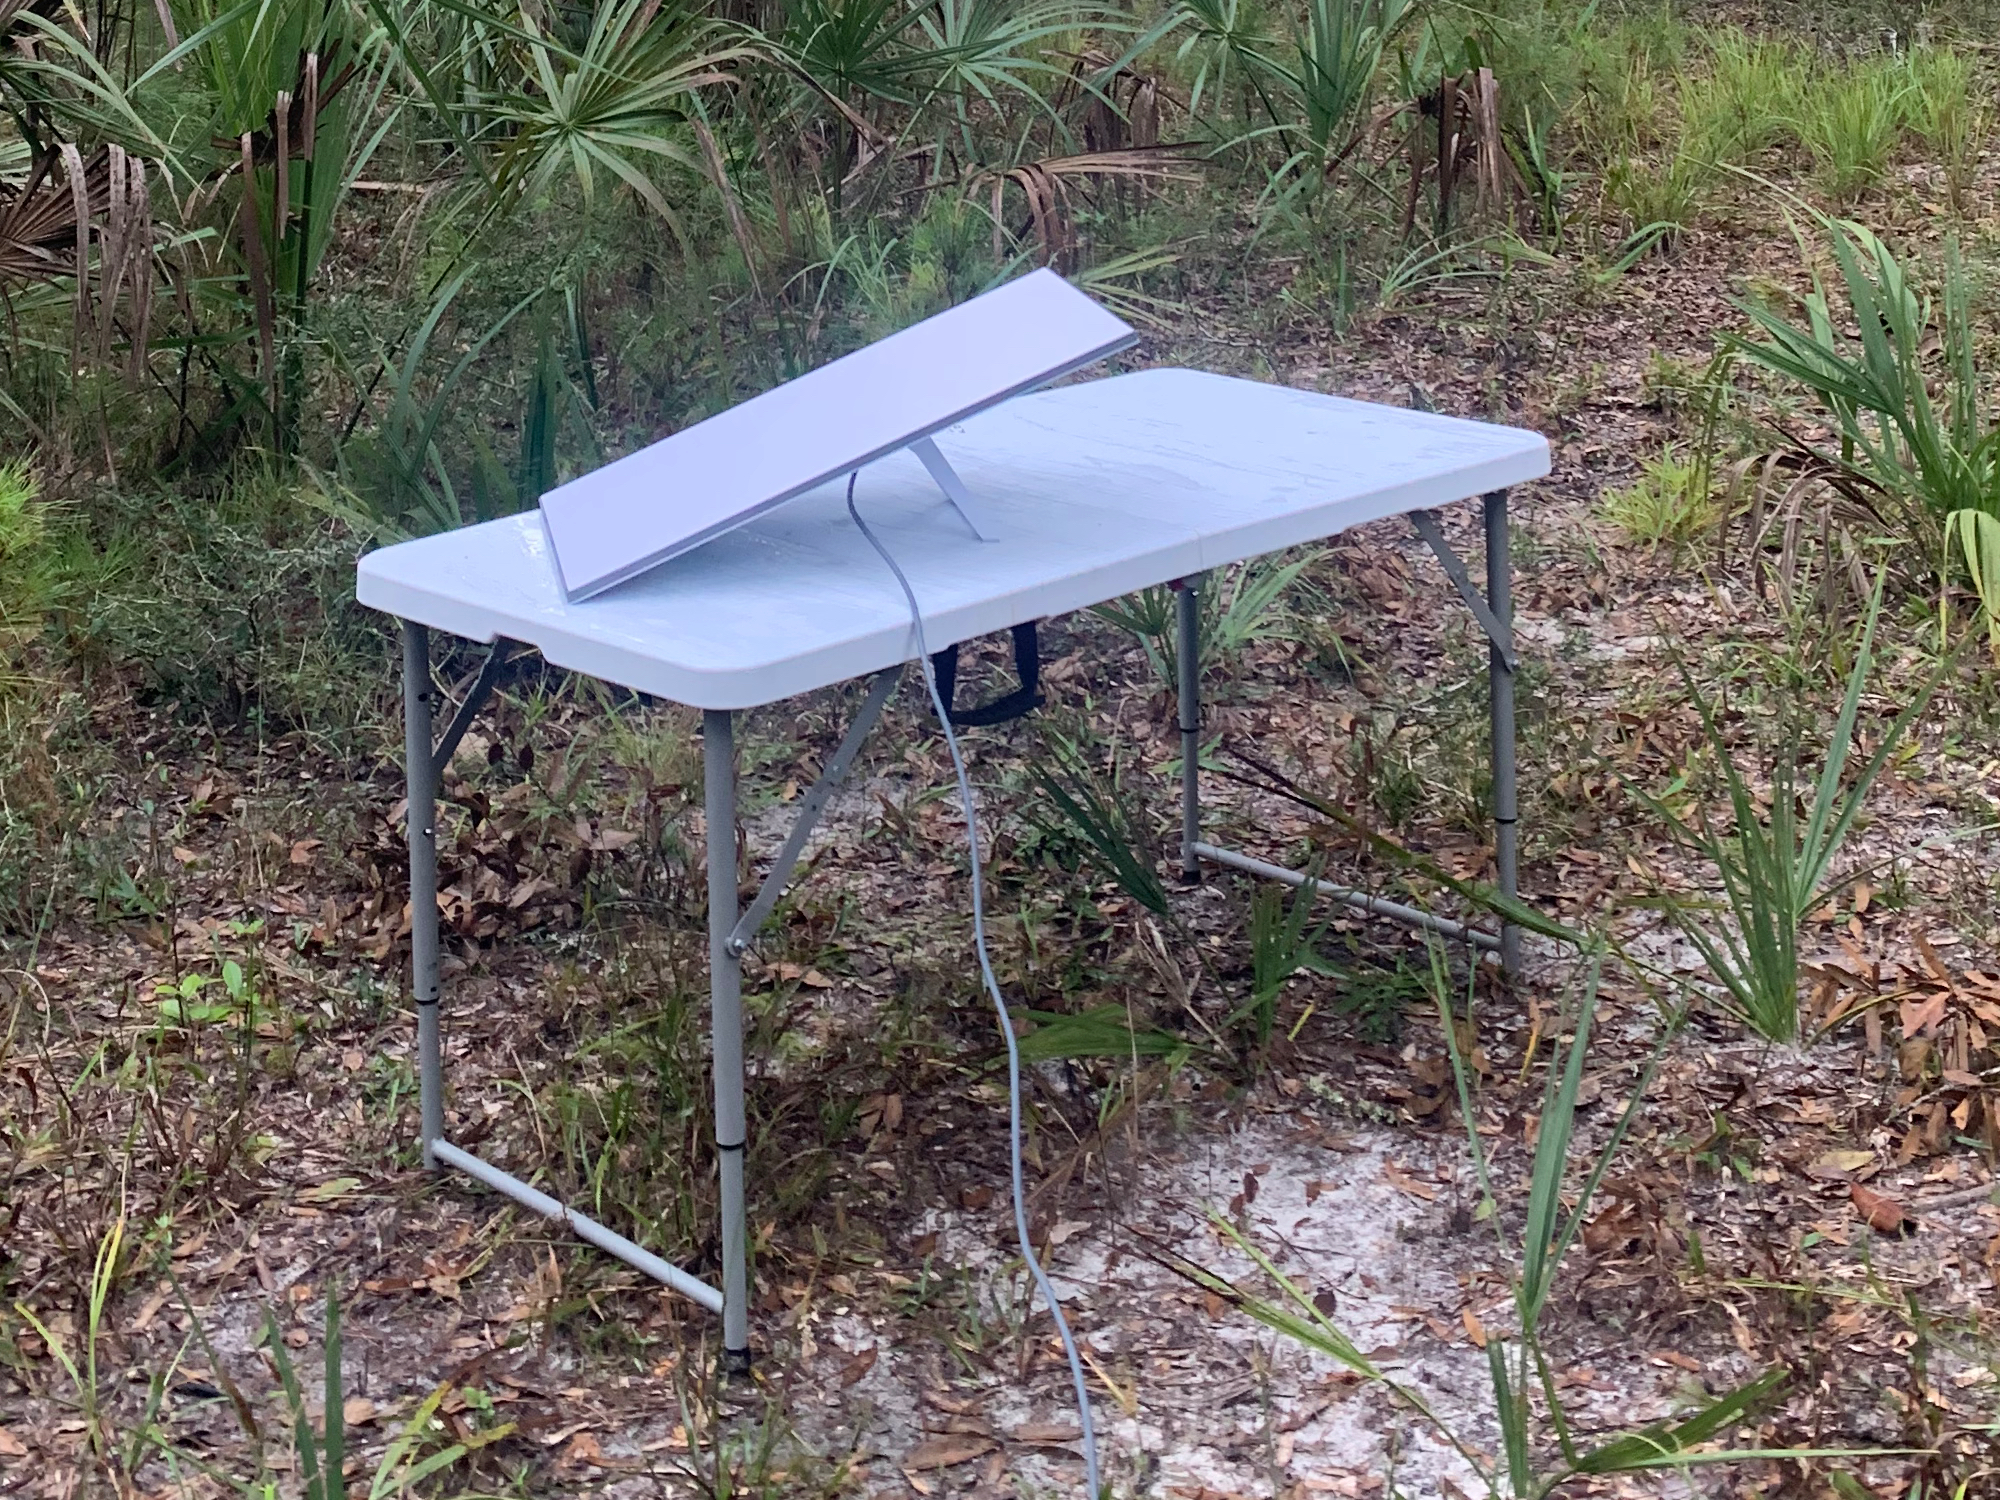
Occasionally, it can be challenging to position the car in a spot with a clear view of the sky, free from trees. It’s during these times that I need to set up the antenna a certain distance from the car. In these rare cases, I use the folding table to place the antenna on its original mount. Sometimes, I simply set it down on the ground.
Storage
When I uninstall the antenna to hit the road again, I detach the power cable and the base, which is simply clipped on. I slide the antenna under the platform and roll up the cable to leave it in the rear trunk. The whole operation takes about 30 seconds!
App and Tips
The Starlink app, which is used to configure the router, also helps to properly orient the antenna and check for any objects or trees that may obstruct the view of the sky. It works really well. It can be helpful to use it to ensure you have the best possible connection.
Generally, obtaining a connection is quite quick. However, I would say that the worst enemy of Starlink is trees. The connection can work through branches, but certainly with less effectiveness. In the case of dense leafy trees, it hardly works at all. The biggest blocker for the signals is moisture. The water contained in the leaves interferes more than dry branches. The more interference there is, the more interruptions will occur during video conferences, which can be frustrating. If the goal is to hold meetings, it's essential to ensure a perfectly clear view of the sky.
Some of the items referenced in this article can be found by following the links below.
Purchased Equipment:
– Starlink Standard Kit https://www.starlink.com/ca/roam
– Starlink Roaming Plan https://www.starlink.com/ca/roam
– T-Bolts https://amzn.to/3zSozKs
The Thule rack for the IONIQ 5 consists of 3 items:
– Thule WingBar Evo 135cm https://amzn.to/3YIMkgf
– Thule Evo support https://amzn.to/3YfGrah
– Thule Kit for IONIQ 5 https://amzn.to/4dO5uqF
Custom-Made Equipment:
– Antenna Mount https://www.printables.com/model/1063283-starlink-v4-roof-rack-mount
– Router Mount https://www.printables.com/model/1063486-starlink-router-stand
*By using my links to order from Amazon, you help me cover hosting costs and keep this blog ad-free. Thank you!

