If you’re reading this article, chances are you’re disappointed with the sound quality in your IONIQ 5. And rightly so — it’s seriously underwhelming.
This project is for those who want to upgrade the sound quality in their IONIQ 5 (2022 to 2024 models without the BOSE system) without breaking the bank. For the 2025 version, I can’t guarantee parts compatibility.
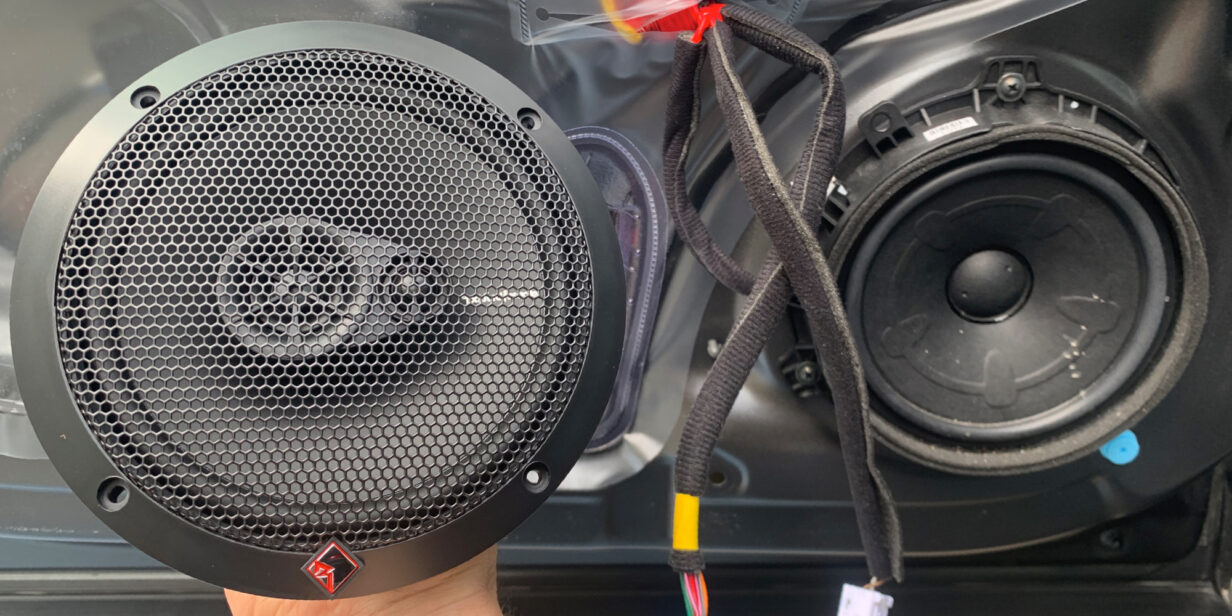
Sure, I could’ve gone further: replaced the amp, added a parametric EQ, a subwoofer, crossovers, or even soundproofed the doors. But I went for a simple, accessible, and honestly very effective solution: replacing the four door speakers. It’s an easy upgrade that, in my opinion, is absolutely worth it.
If you're looking for an even cheaper option, you can just replace the two front speakers.
This guide is based on the driver’s side installation. The steps are exactly the same on the passenger side.
*I’m not a professional. Just a passionate DIYer sharing my experience.
Front Speakers
To remove the door panel, you first need to take off the trim covering the tweeter (high-frequency speaker).
*Use plastic trim tools to avoid damaging the surfaces.
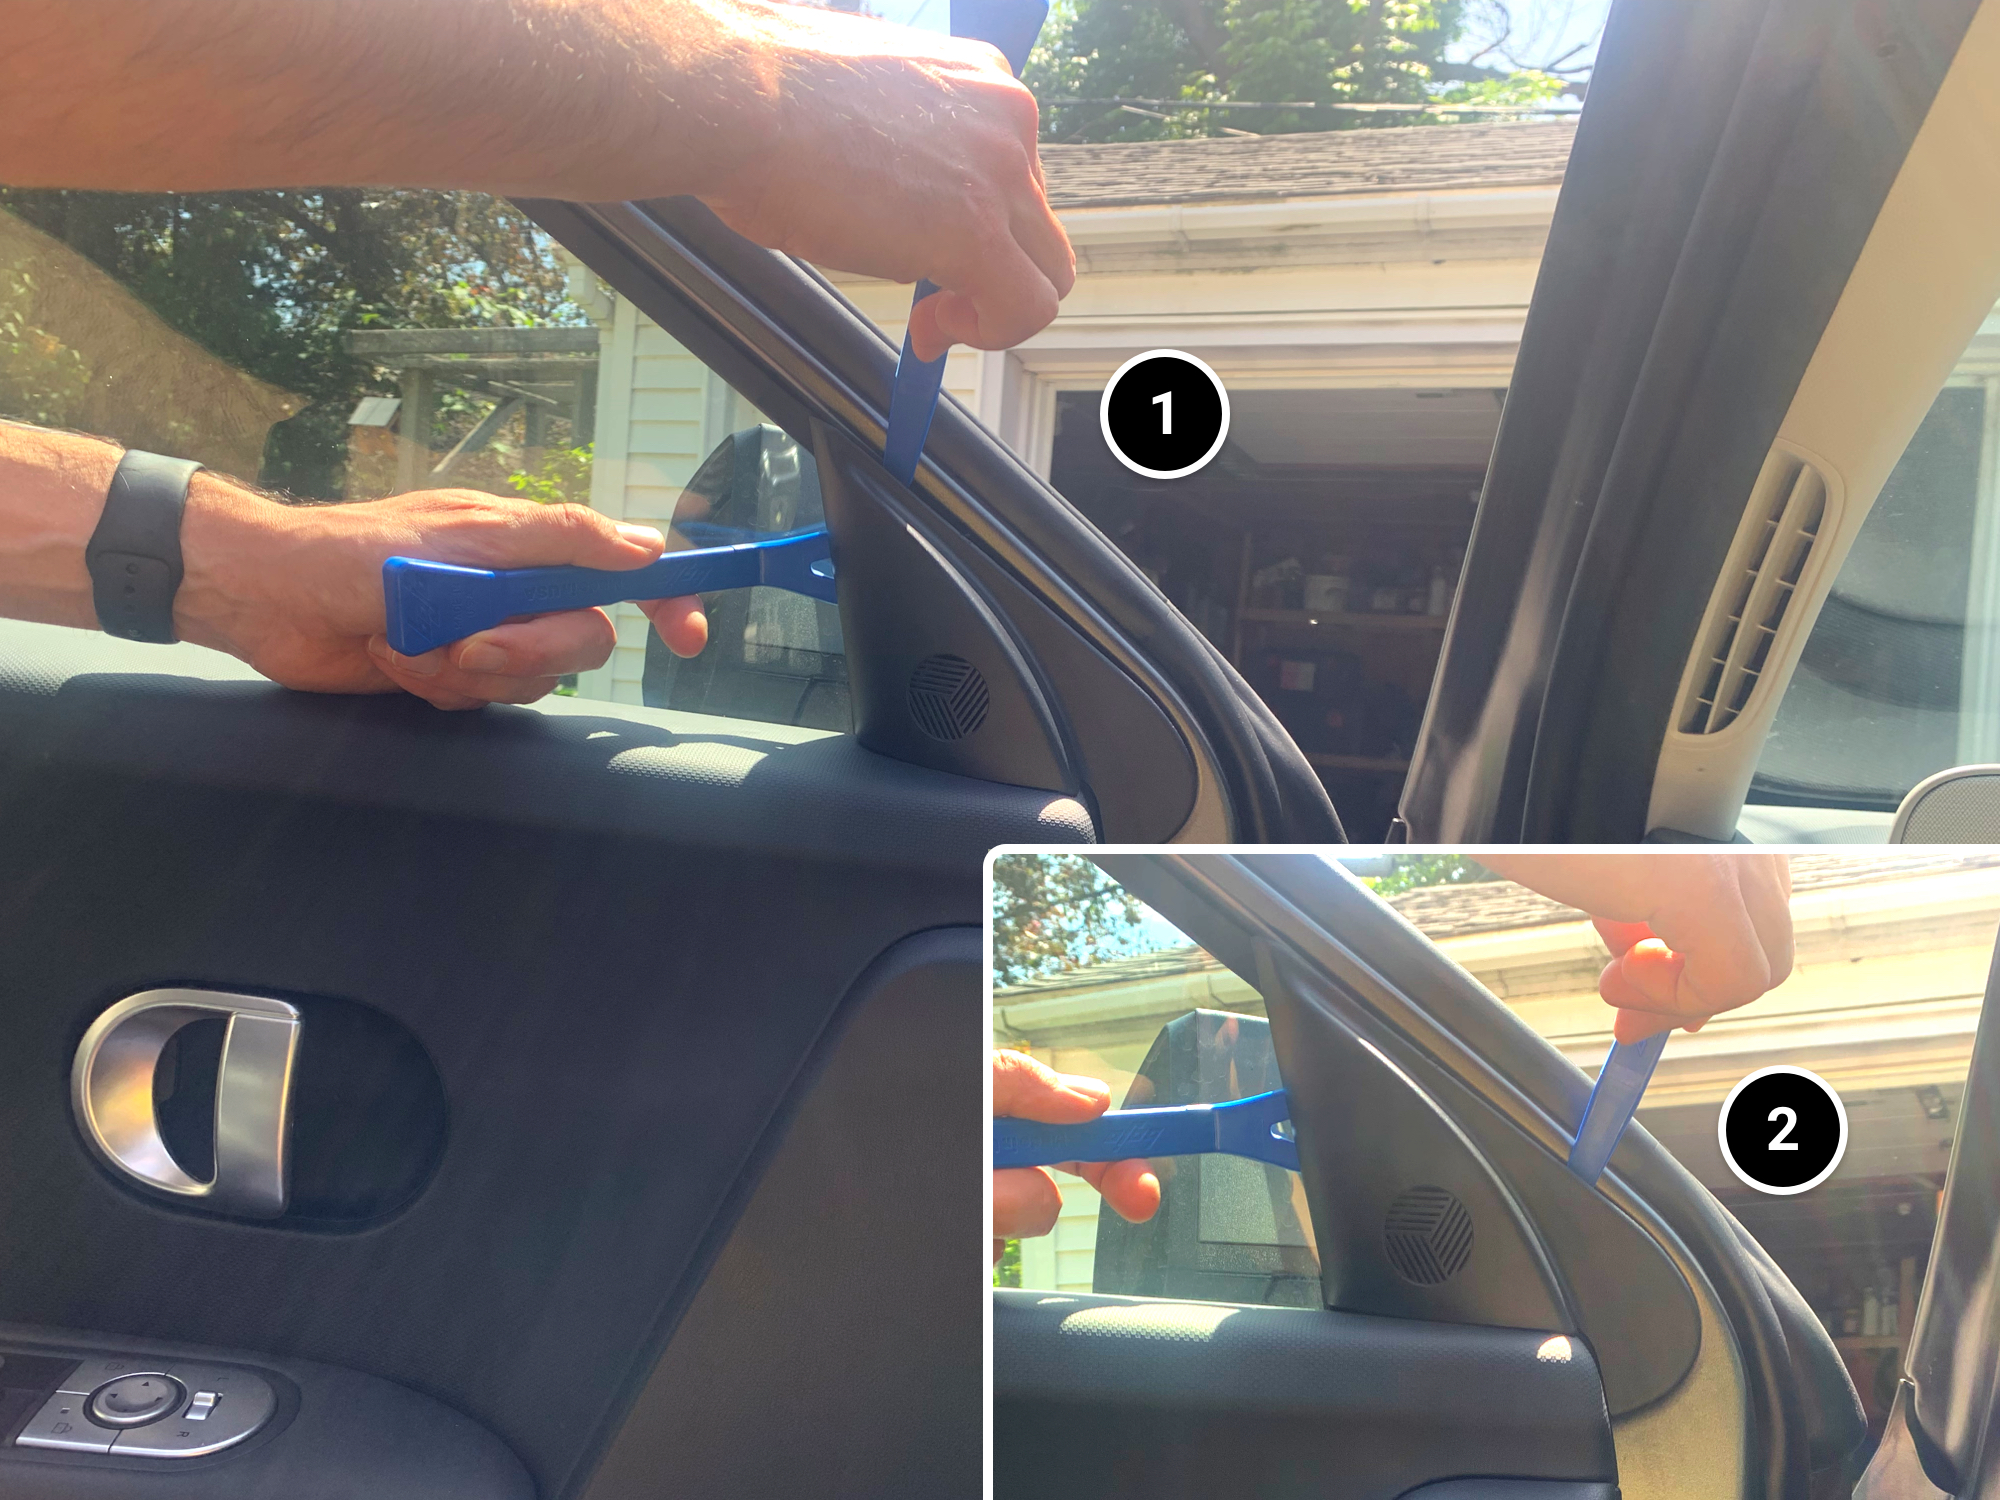
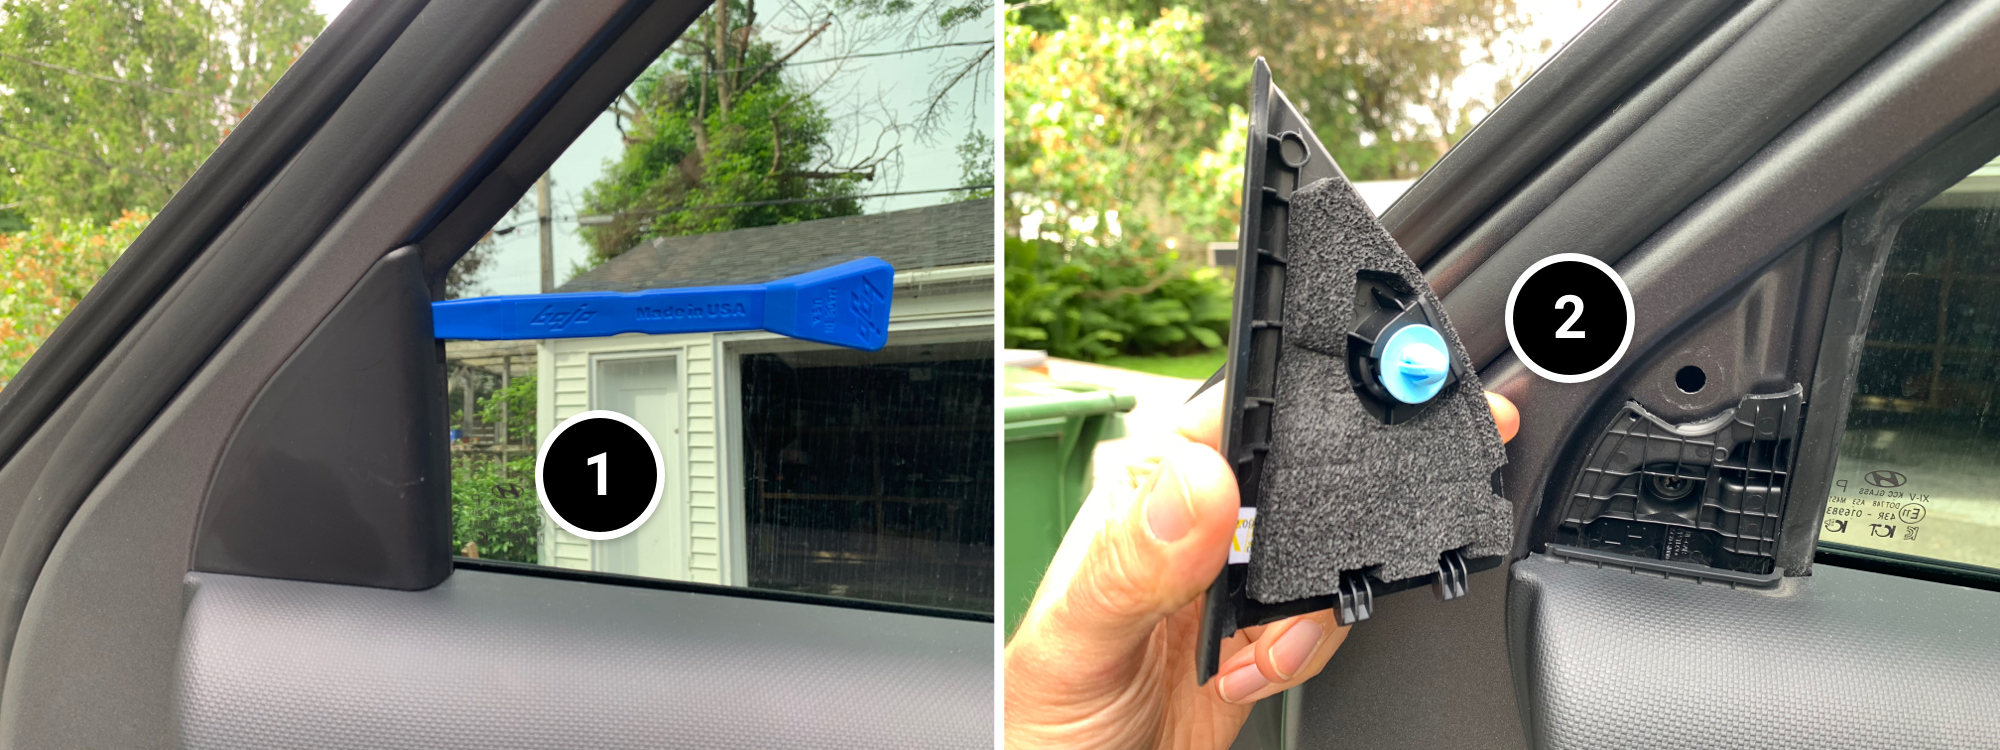
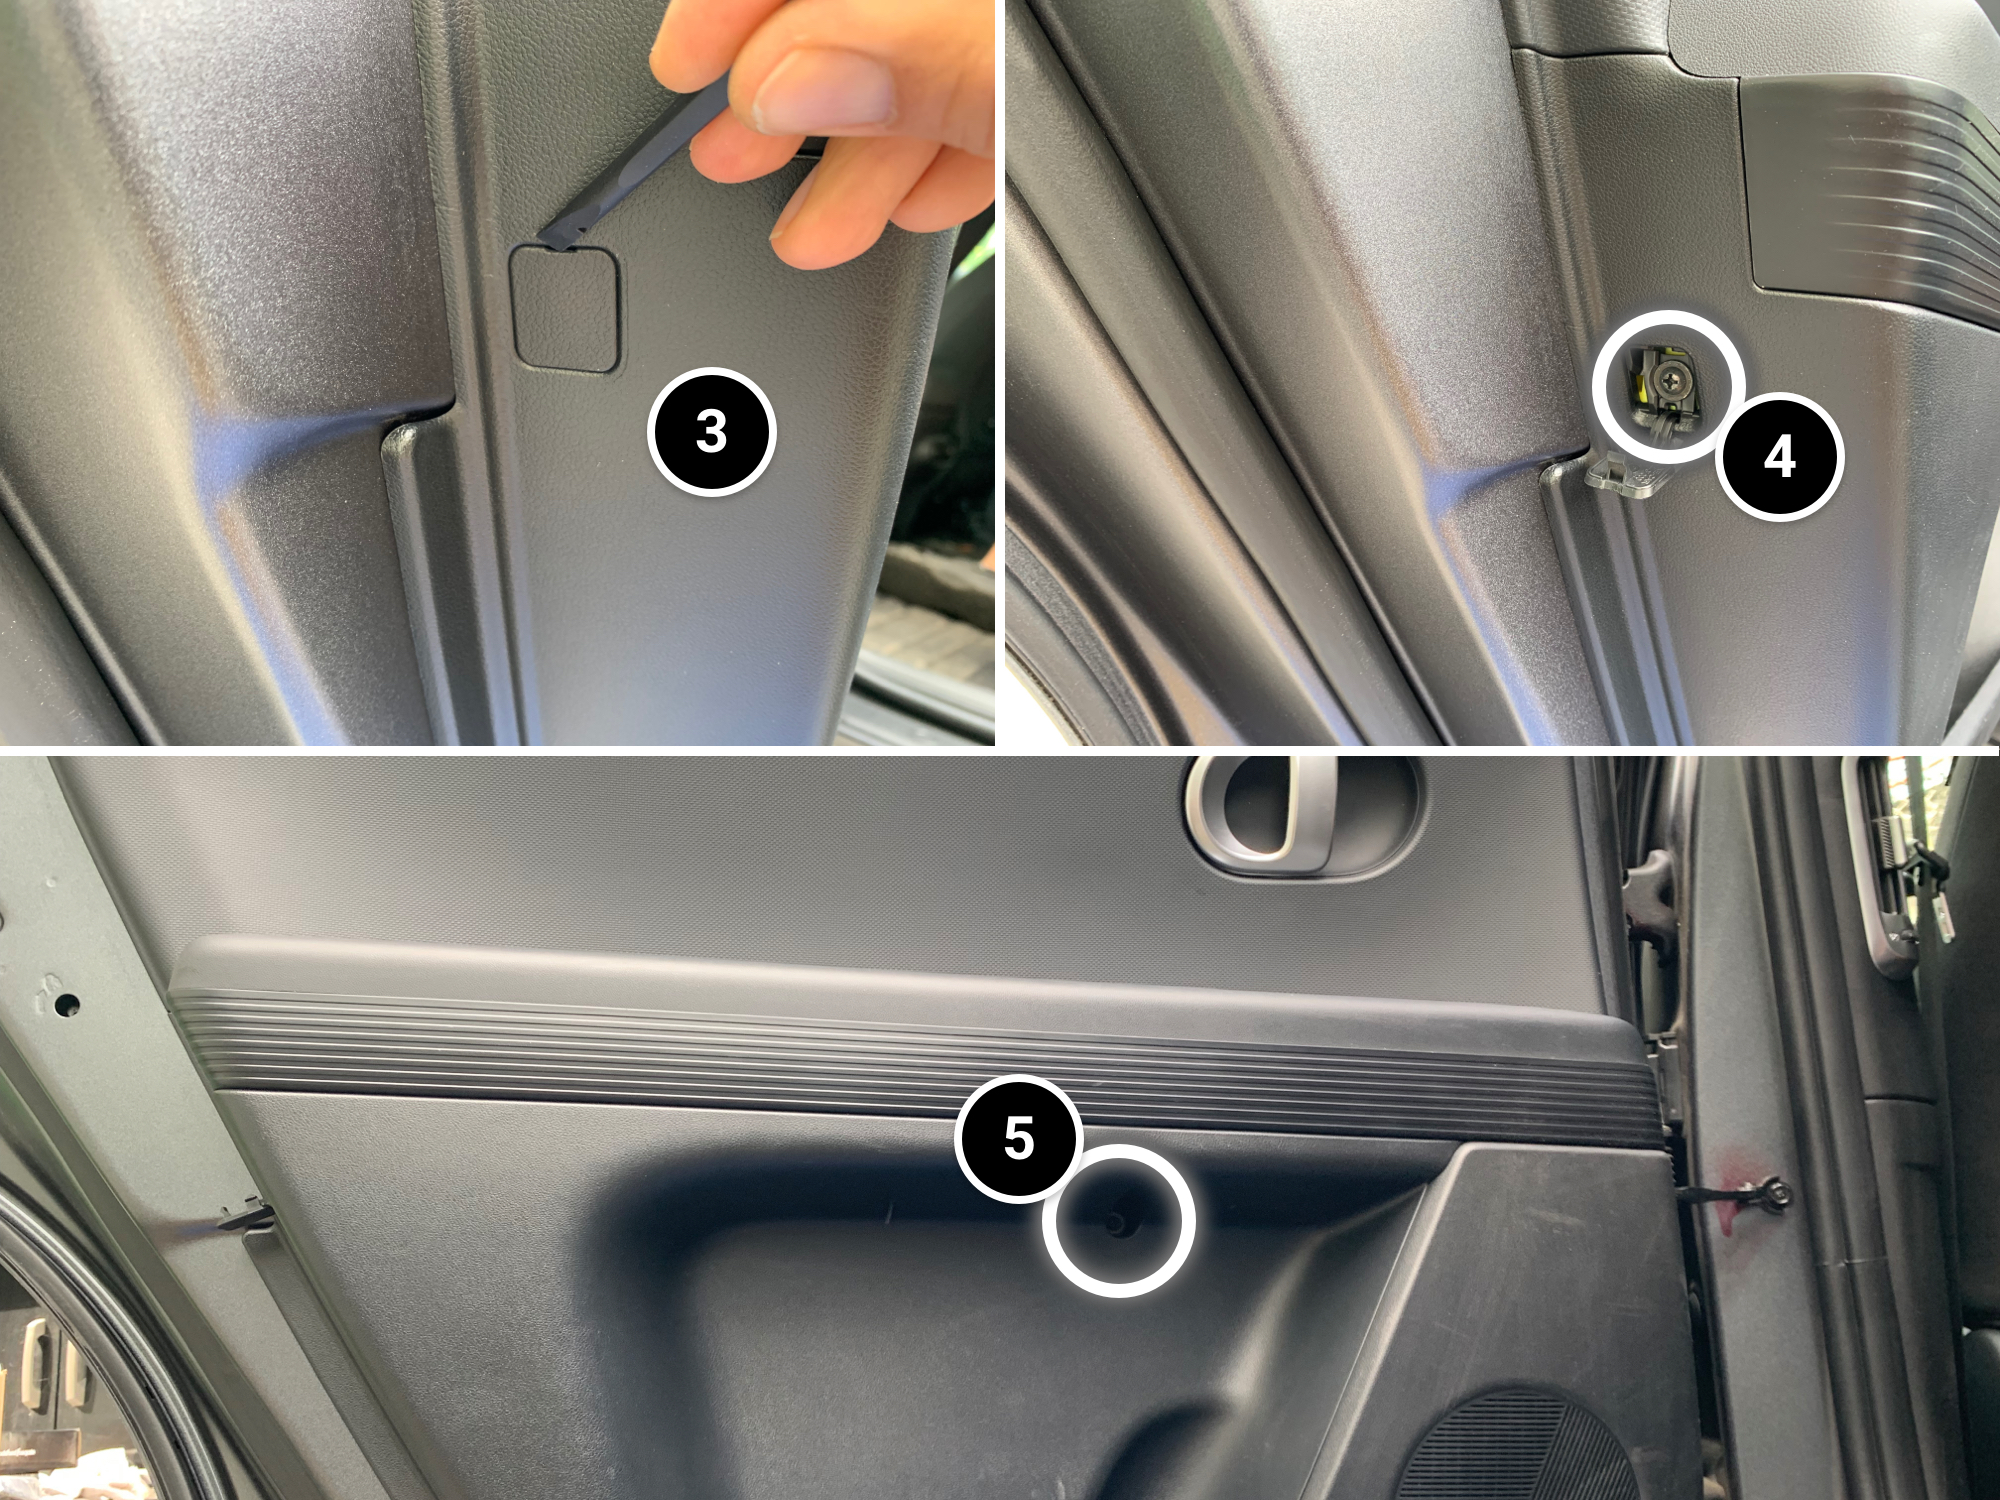
1- Start by inserting your tool in the top corner — it’s the least tight spot.
2- Work your way down slowly. Two metal clips hold the trim in place. Don’t yank it — you might damage the tweeter wires.
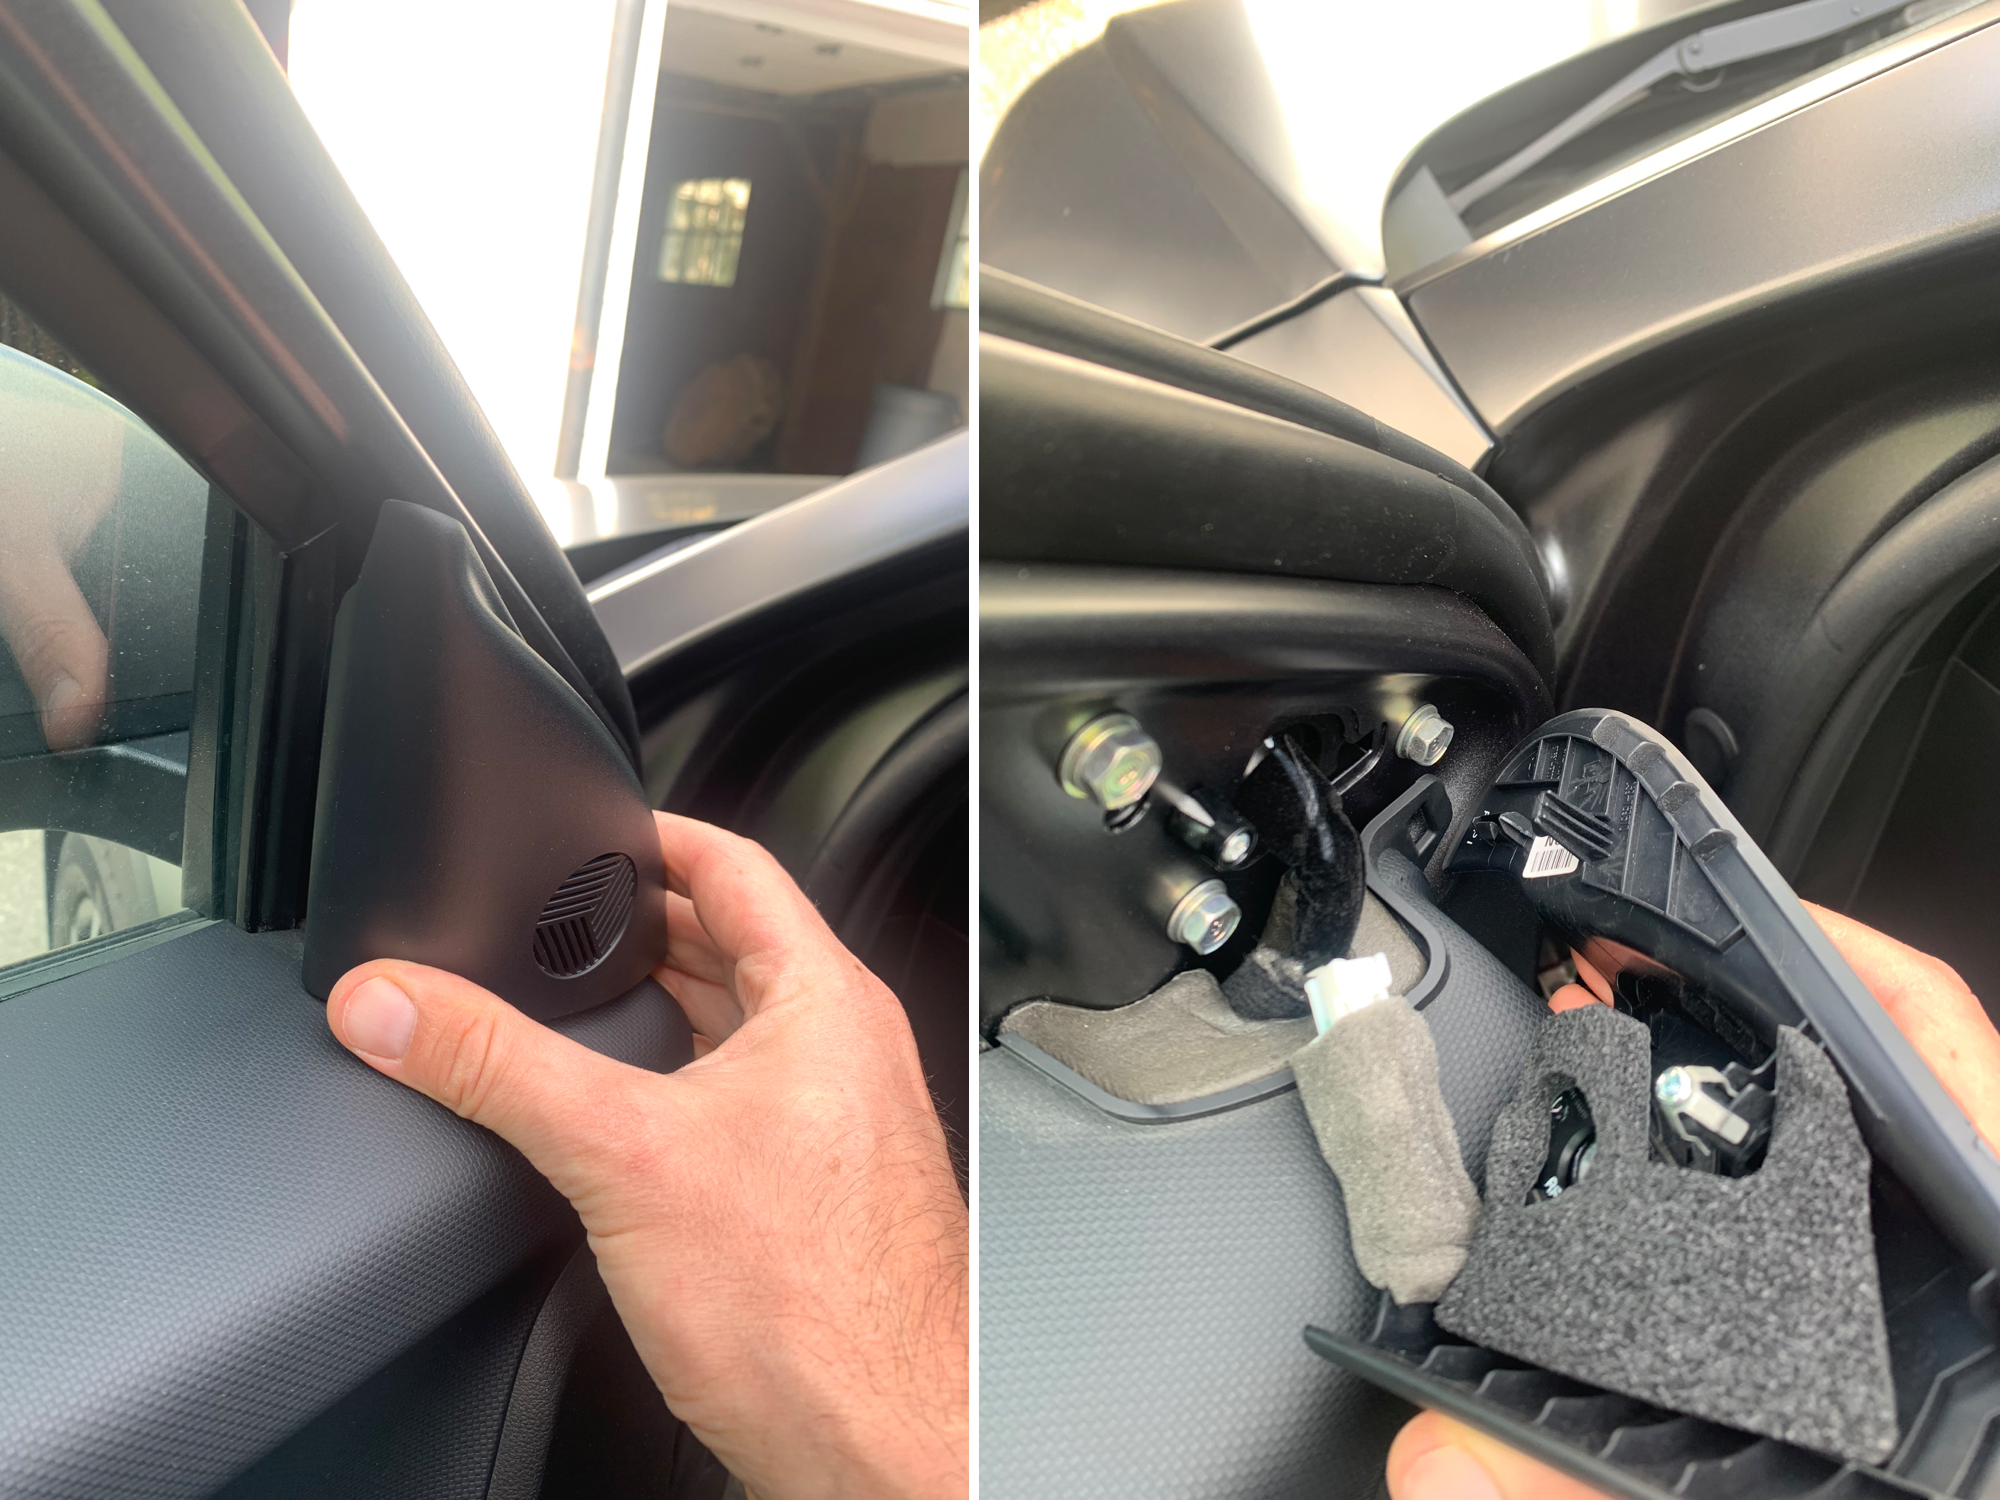
Once the clips are out, you can either disconnect the connector or simply let the trim hang by the wire.
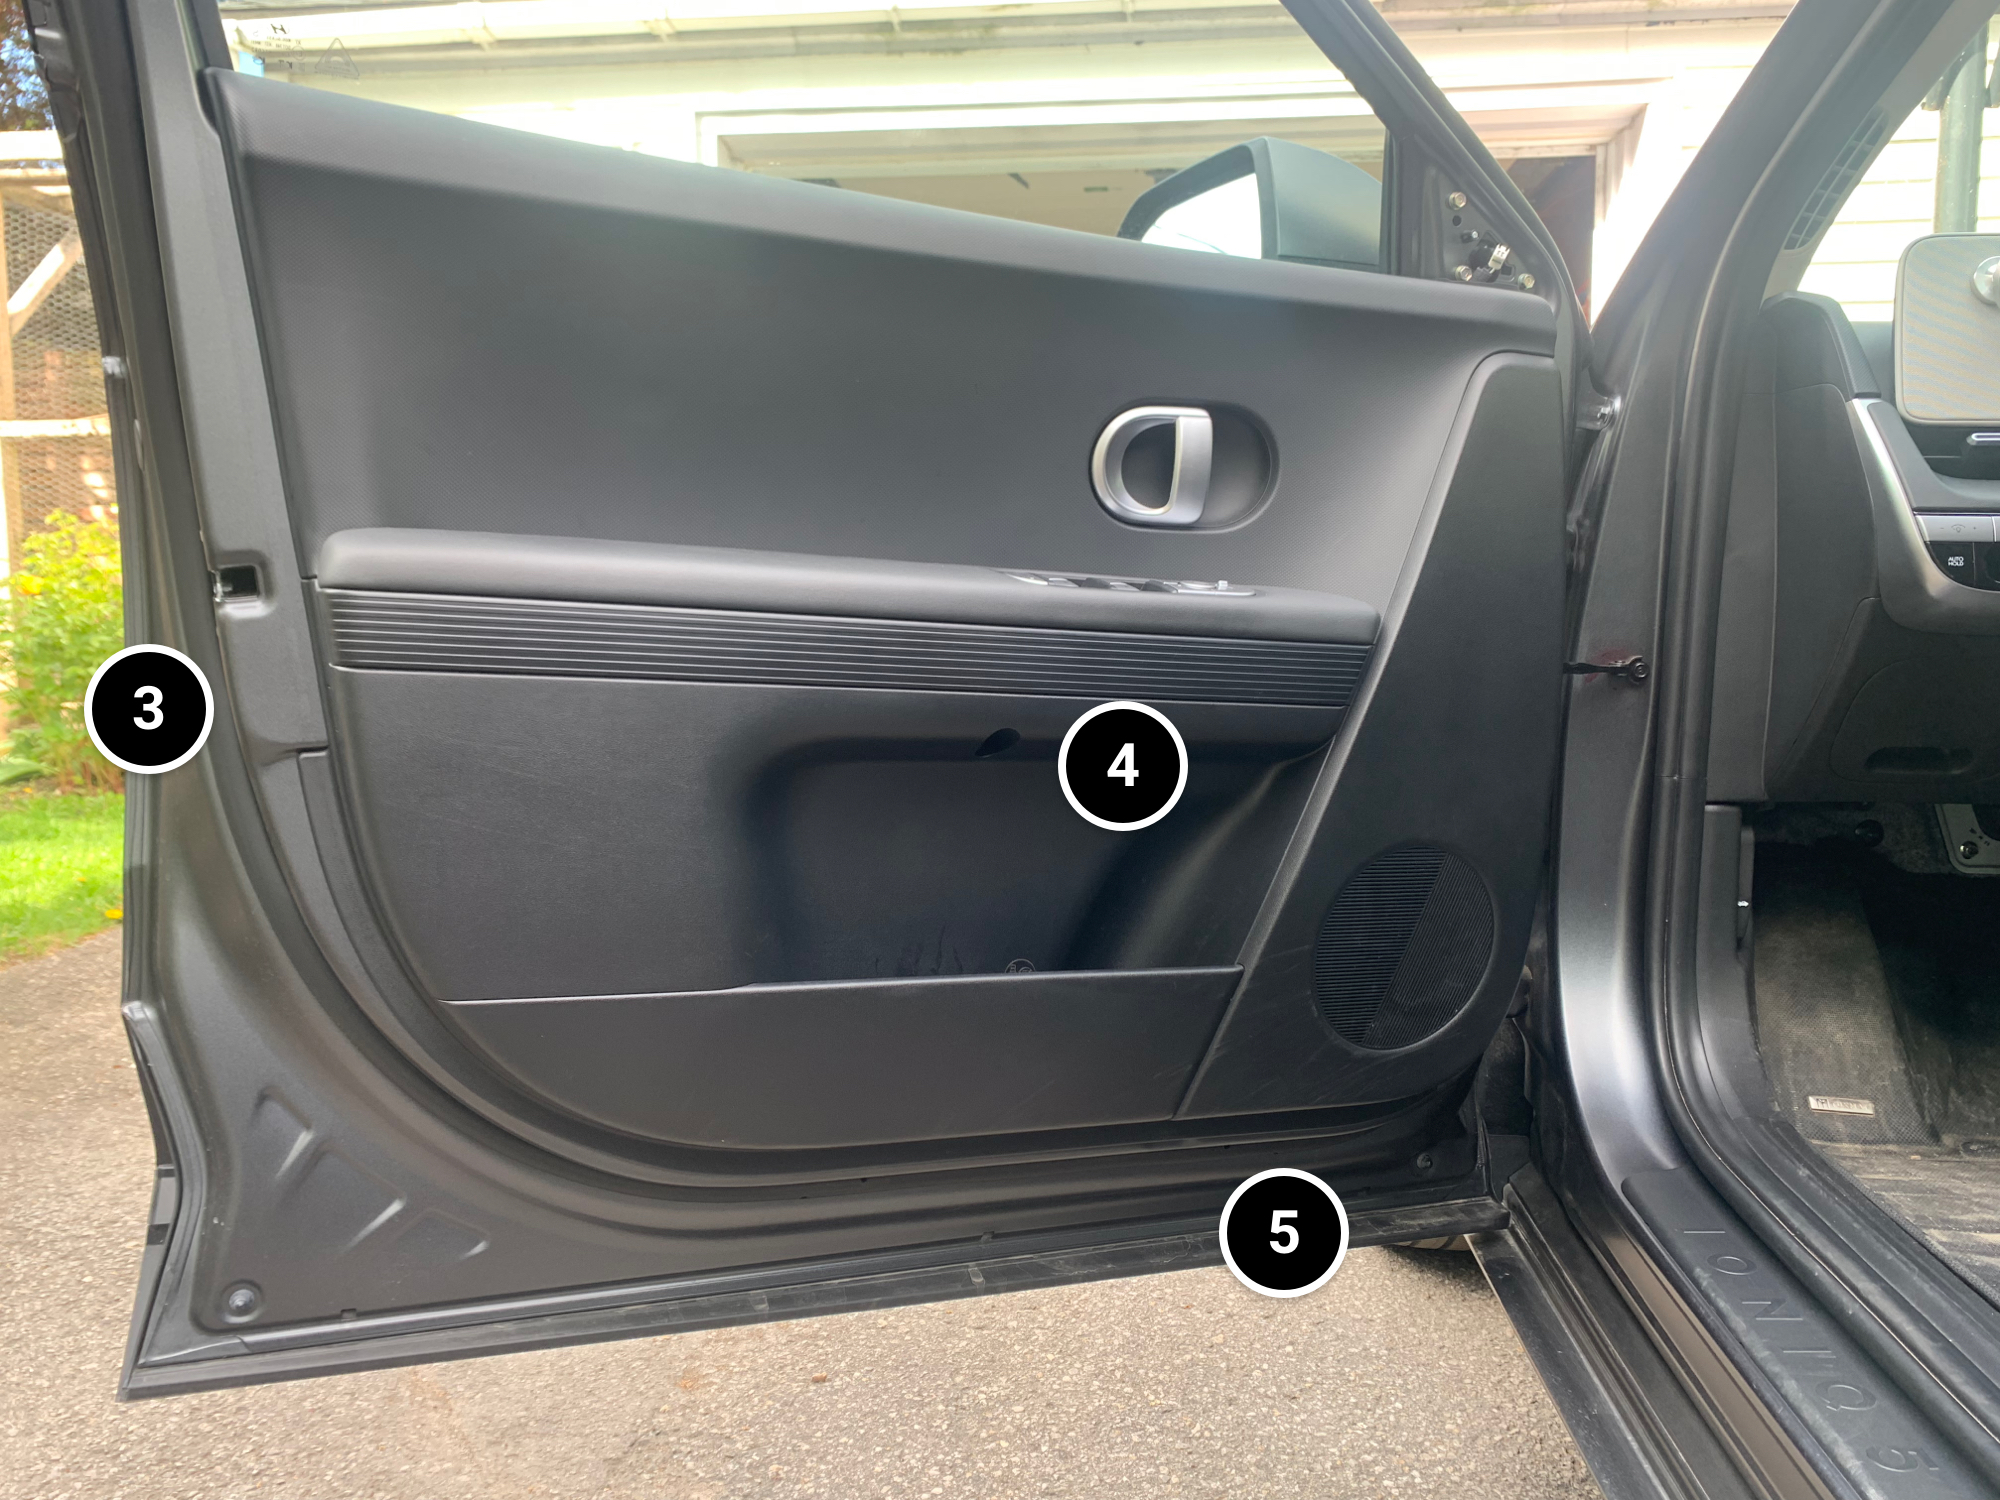
Now it’s time to remove the entire door panel. Start by removing two screws (steps 3 and 4), then use your plastic tools to unclip the panel starting at the spot shown in step 5.
3- First screw
4- Second screw
5- Starting point for inserting the tool
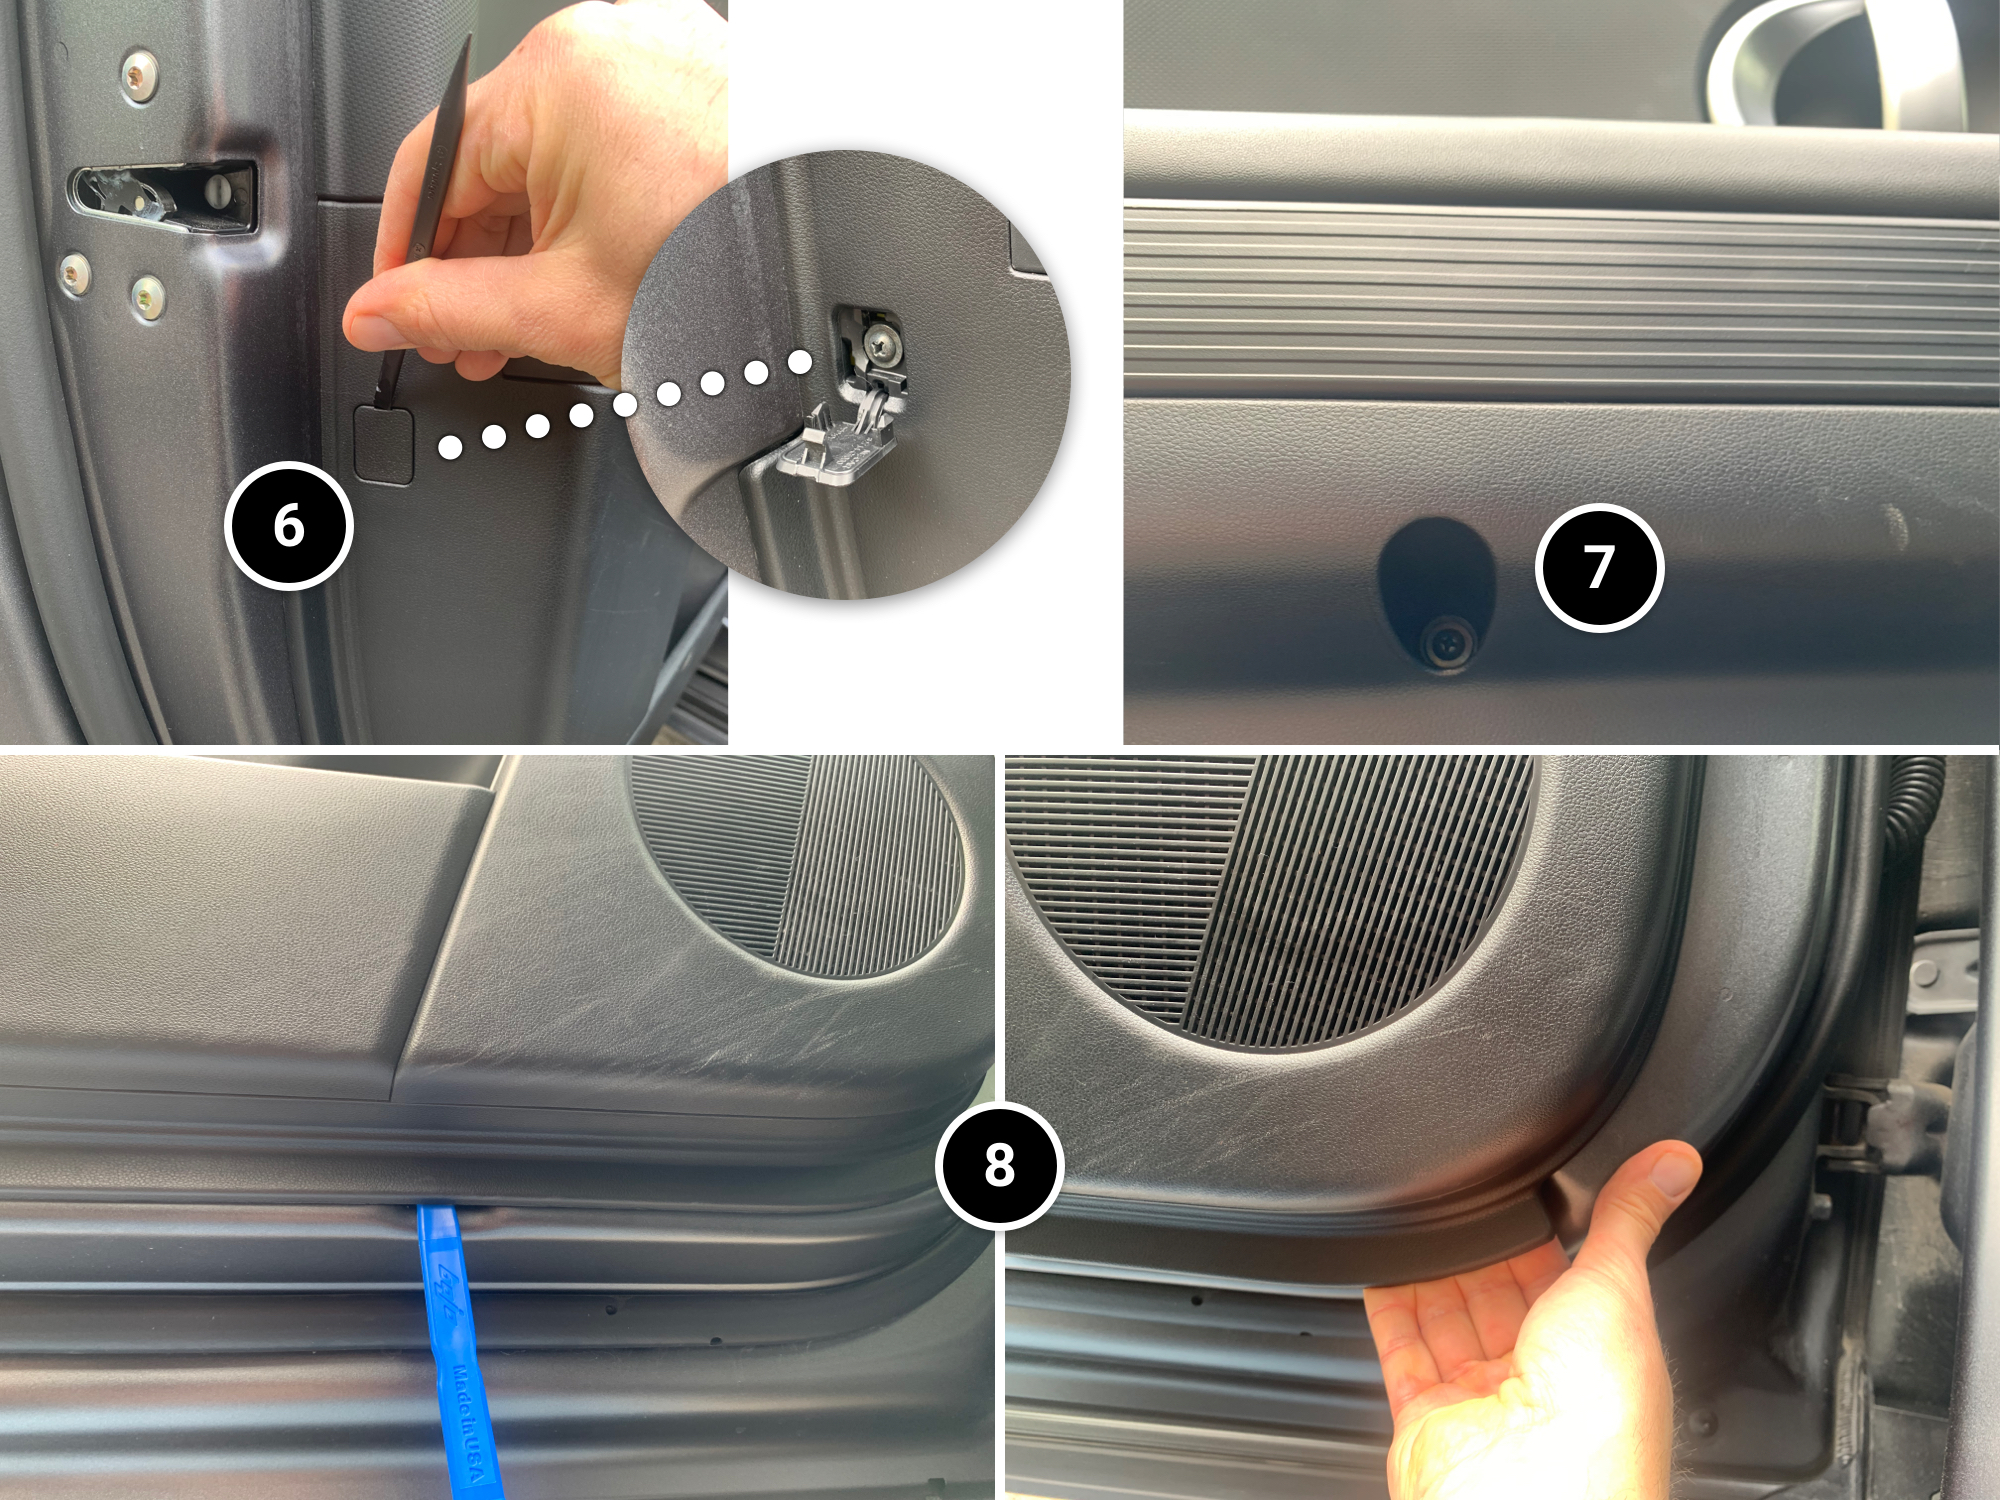
6- Gently pop open the small flap with a plastic tool and remove the screw behind it.
7- Remove the second screw.
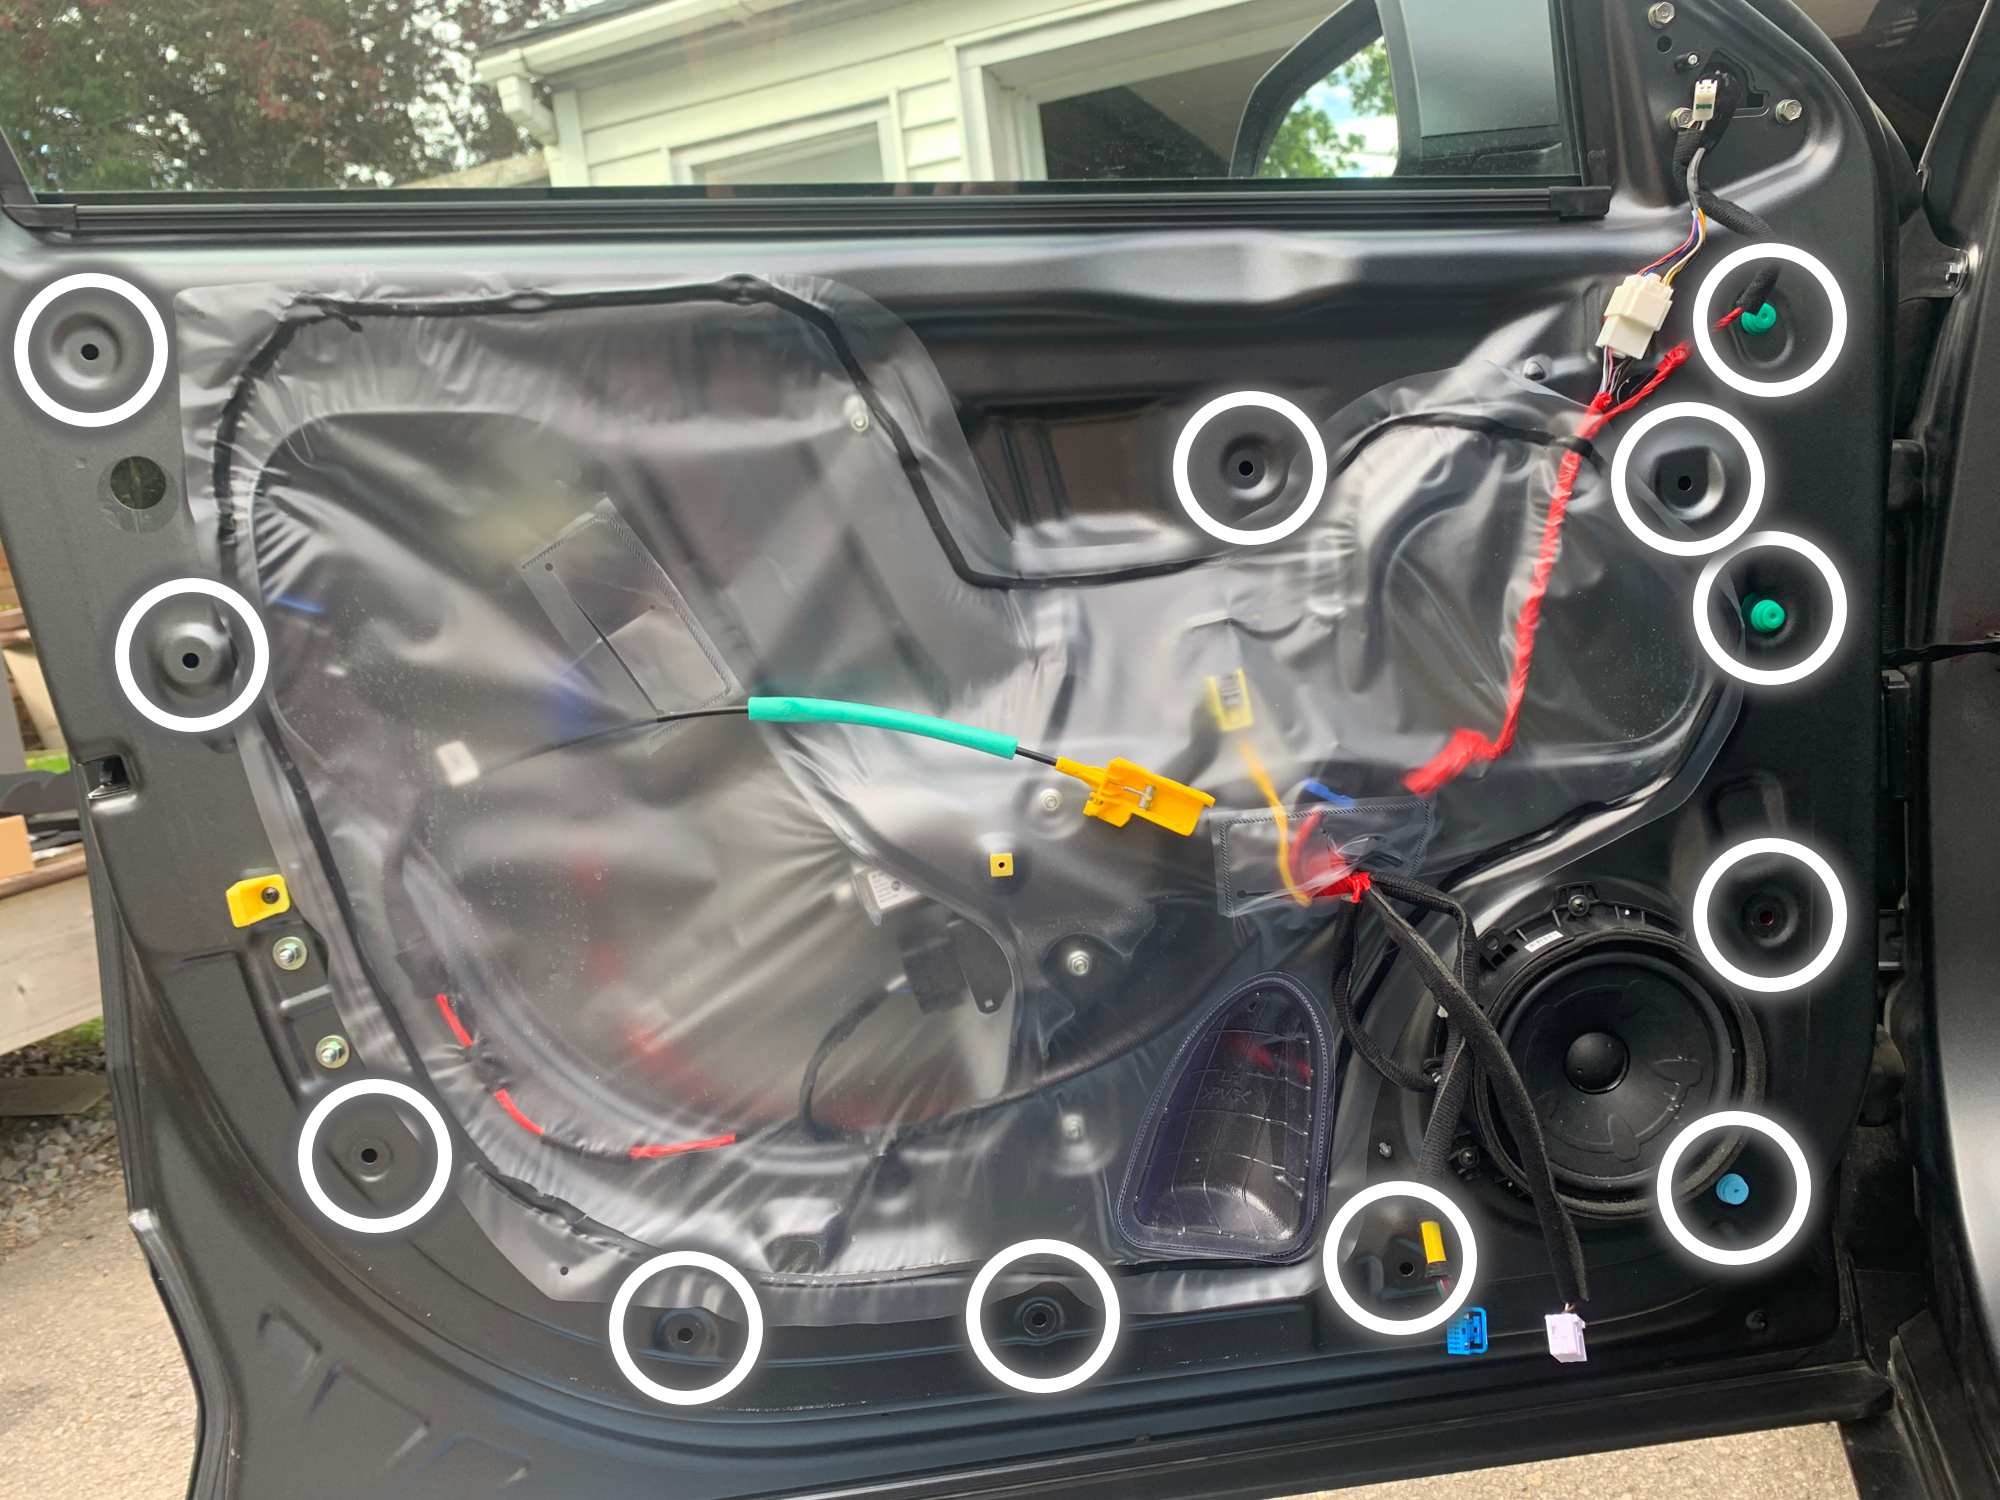
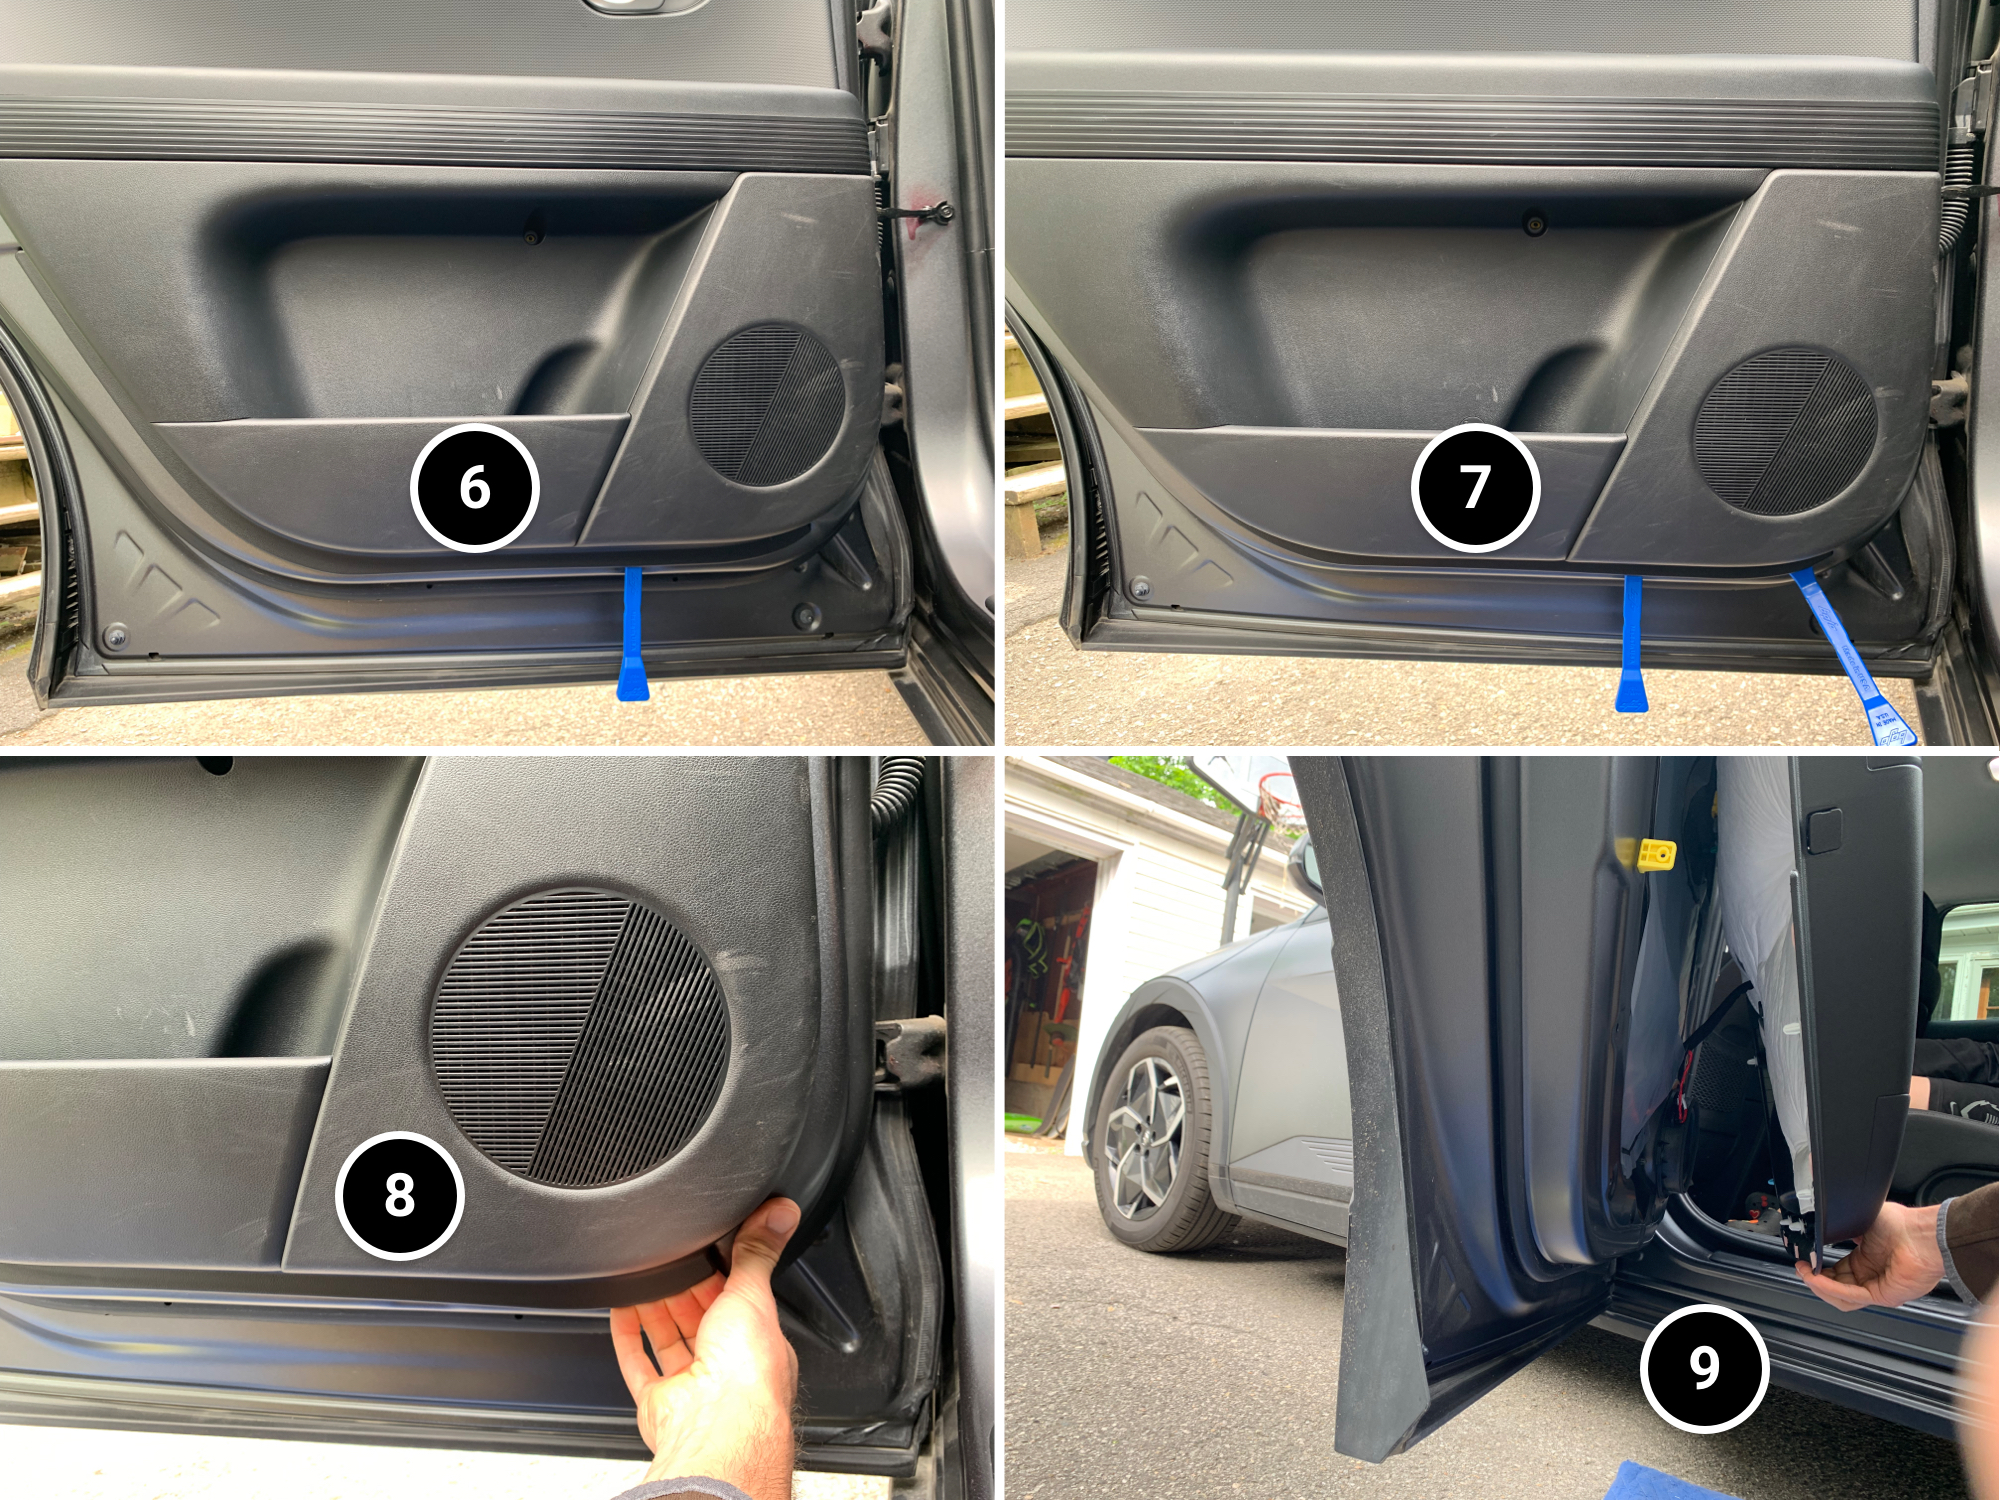
8- Under the door, there’s a designated spot for inserting your tool. As shown in the image, pull gently using the tool and your left hand, then insert your fingers from the other hand. Once this is done, you can use only your hands to pull the panel off and release all the clips around the edge. The clips are tight — it takes some force, especially at the start.
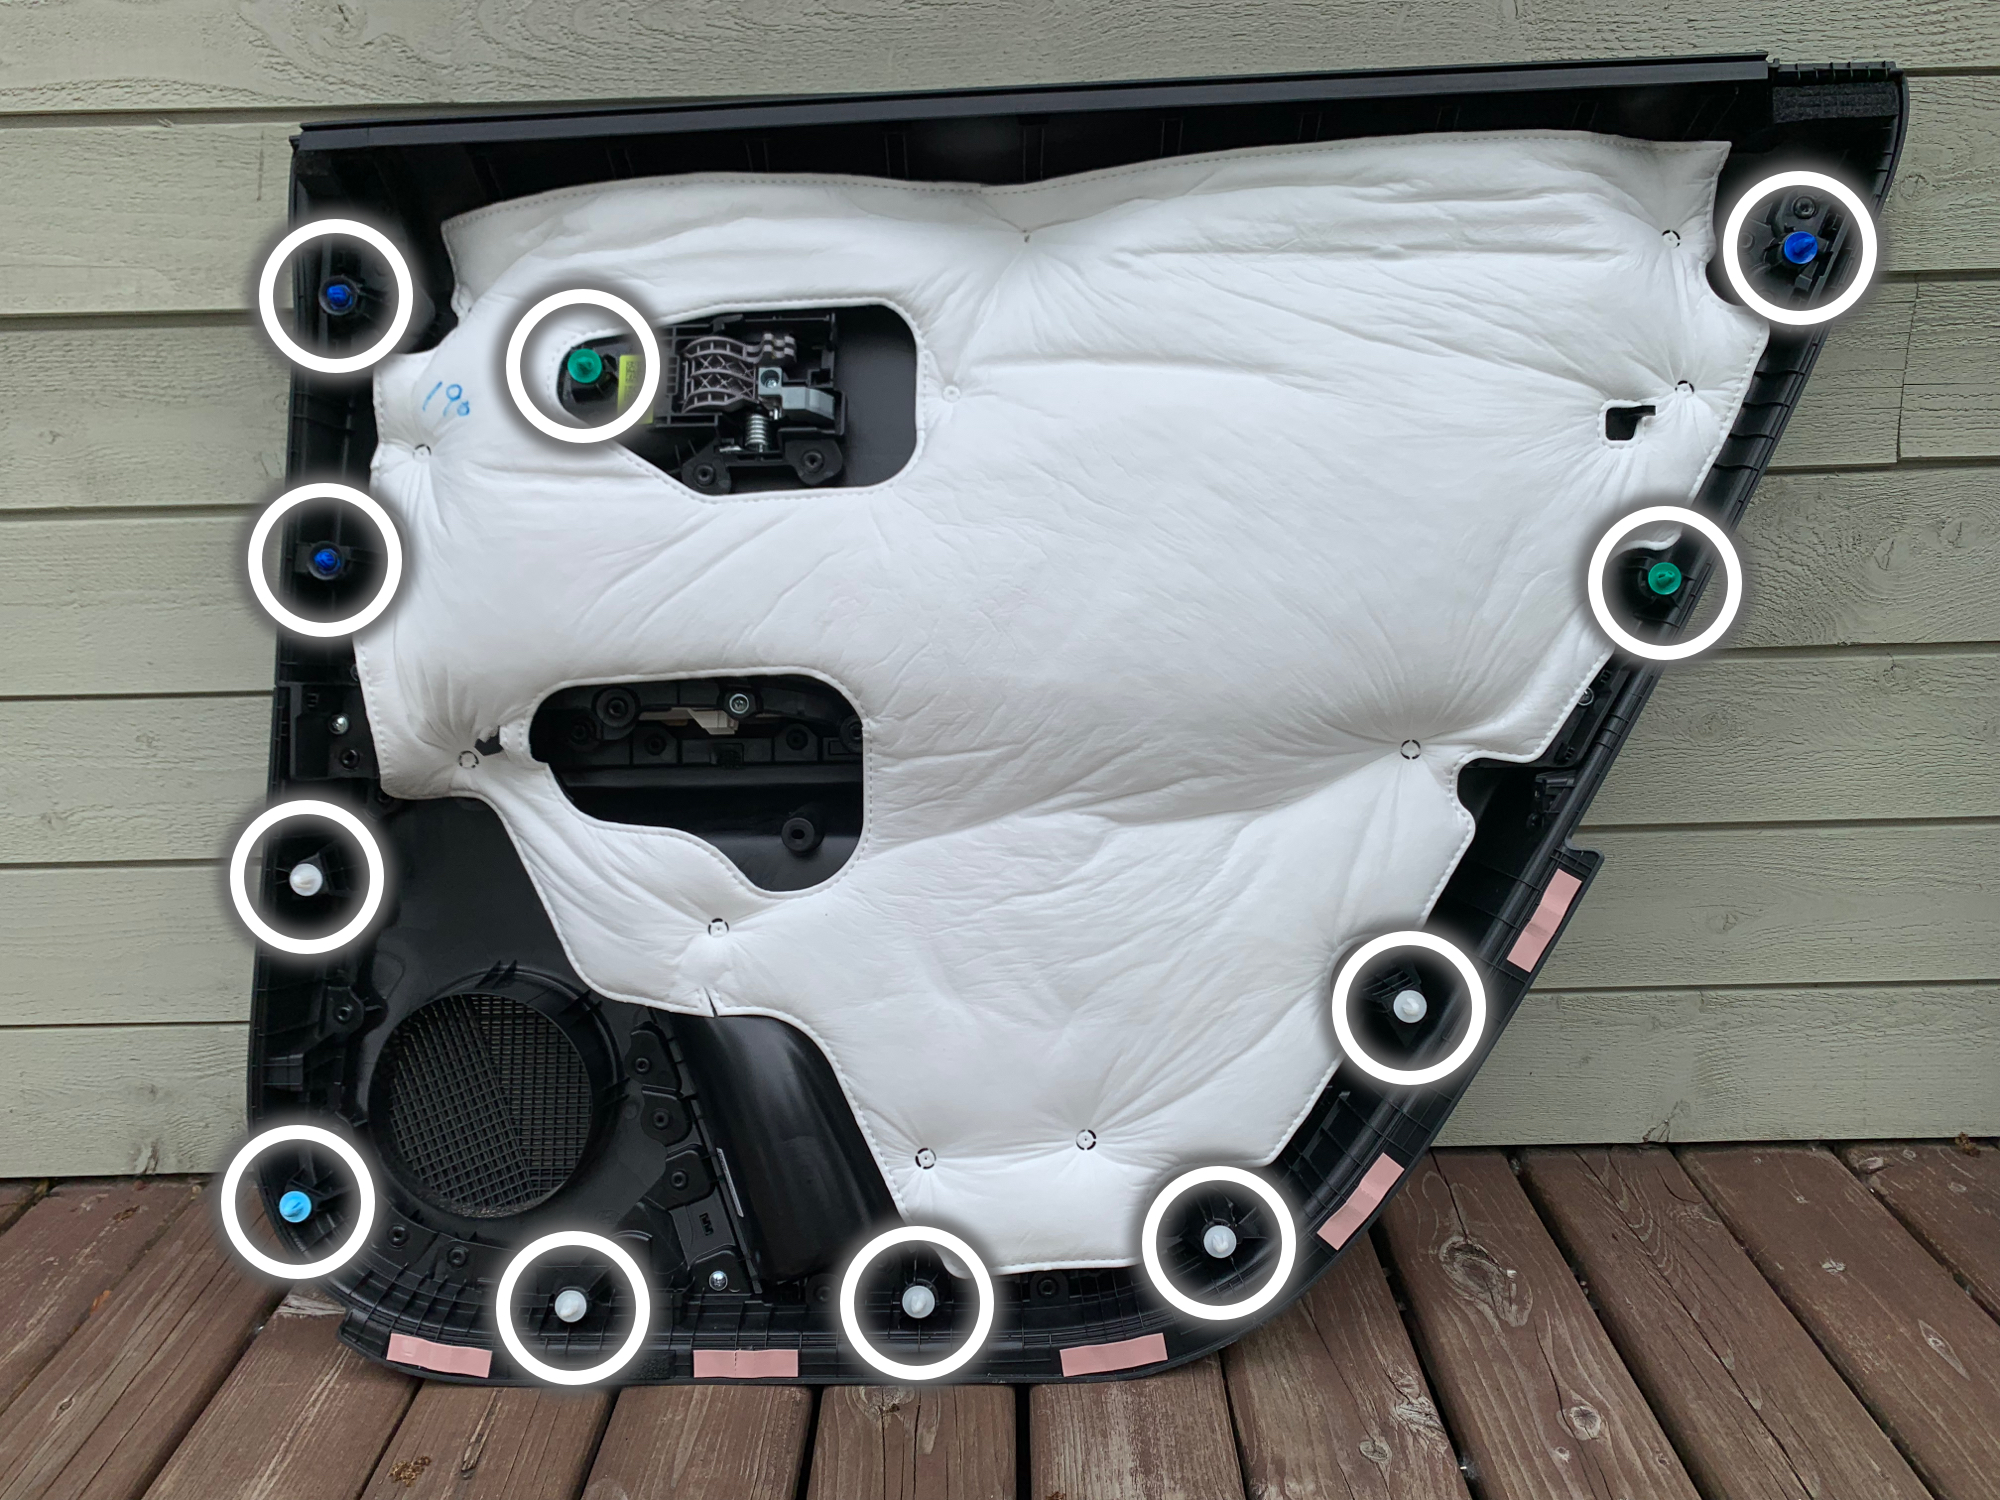
Visual map of all 12 clips to help you strategize pulling the panel.
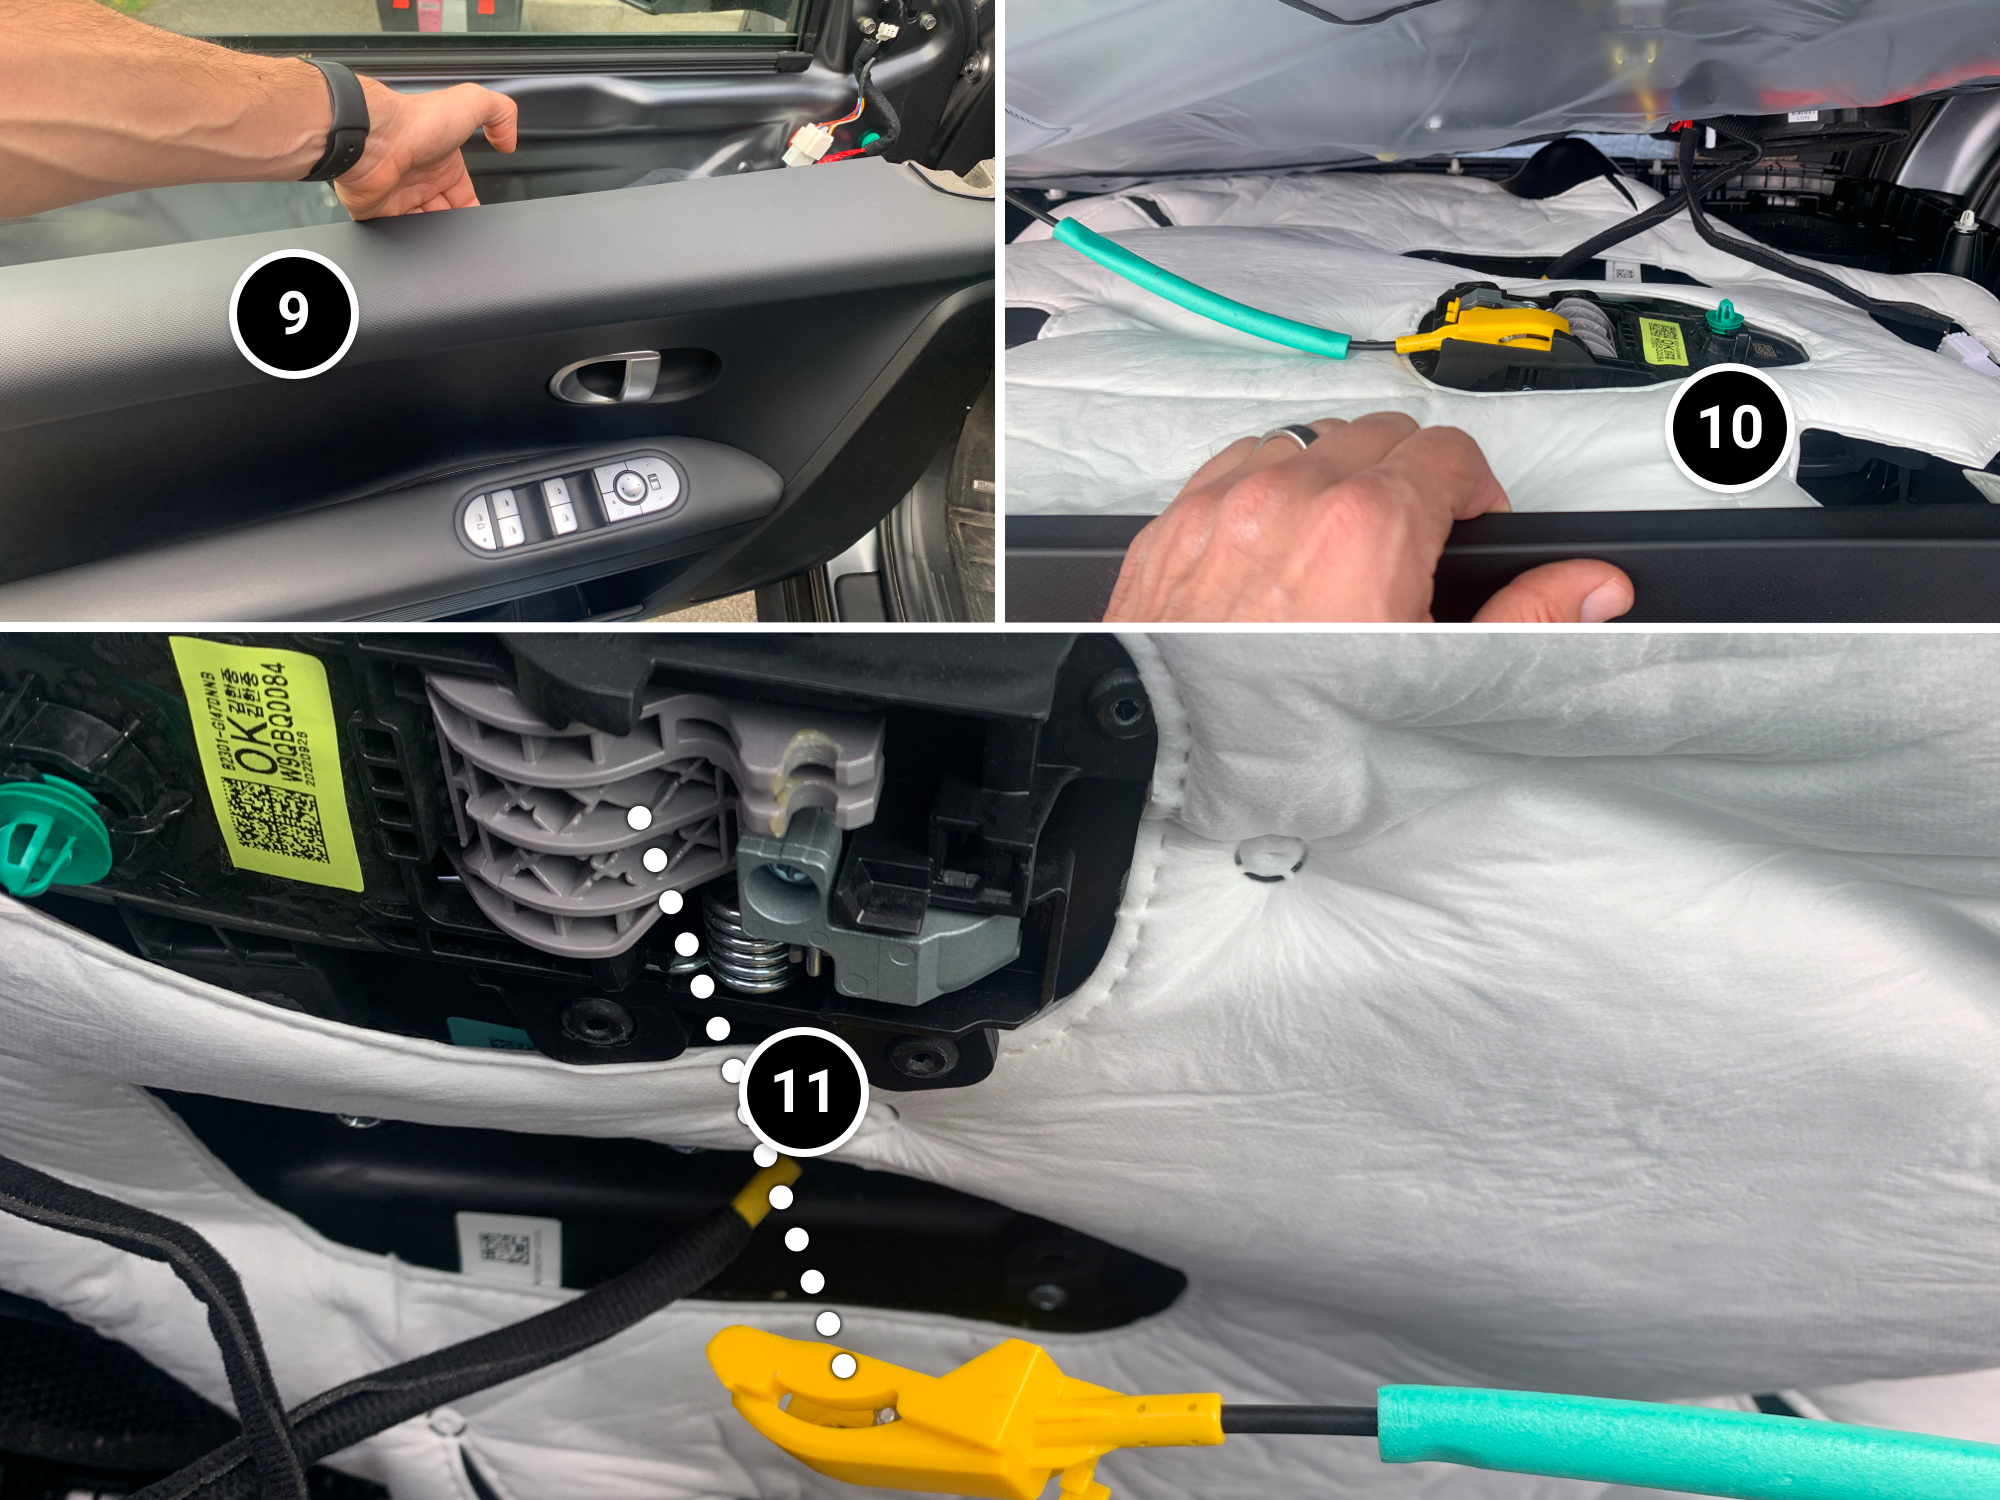
9- Once all clips are detached, hold the panel with one hand.
10- With the other hand, reach for the yellow piece…
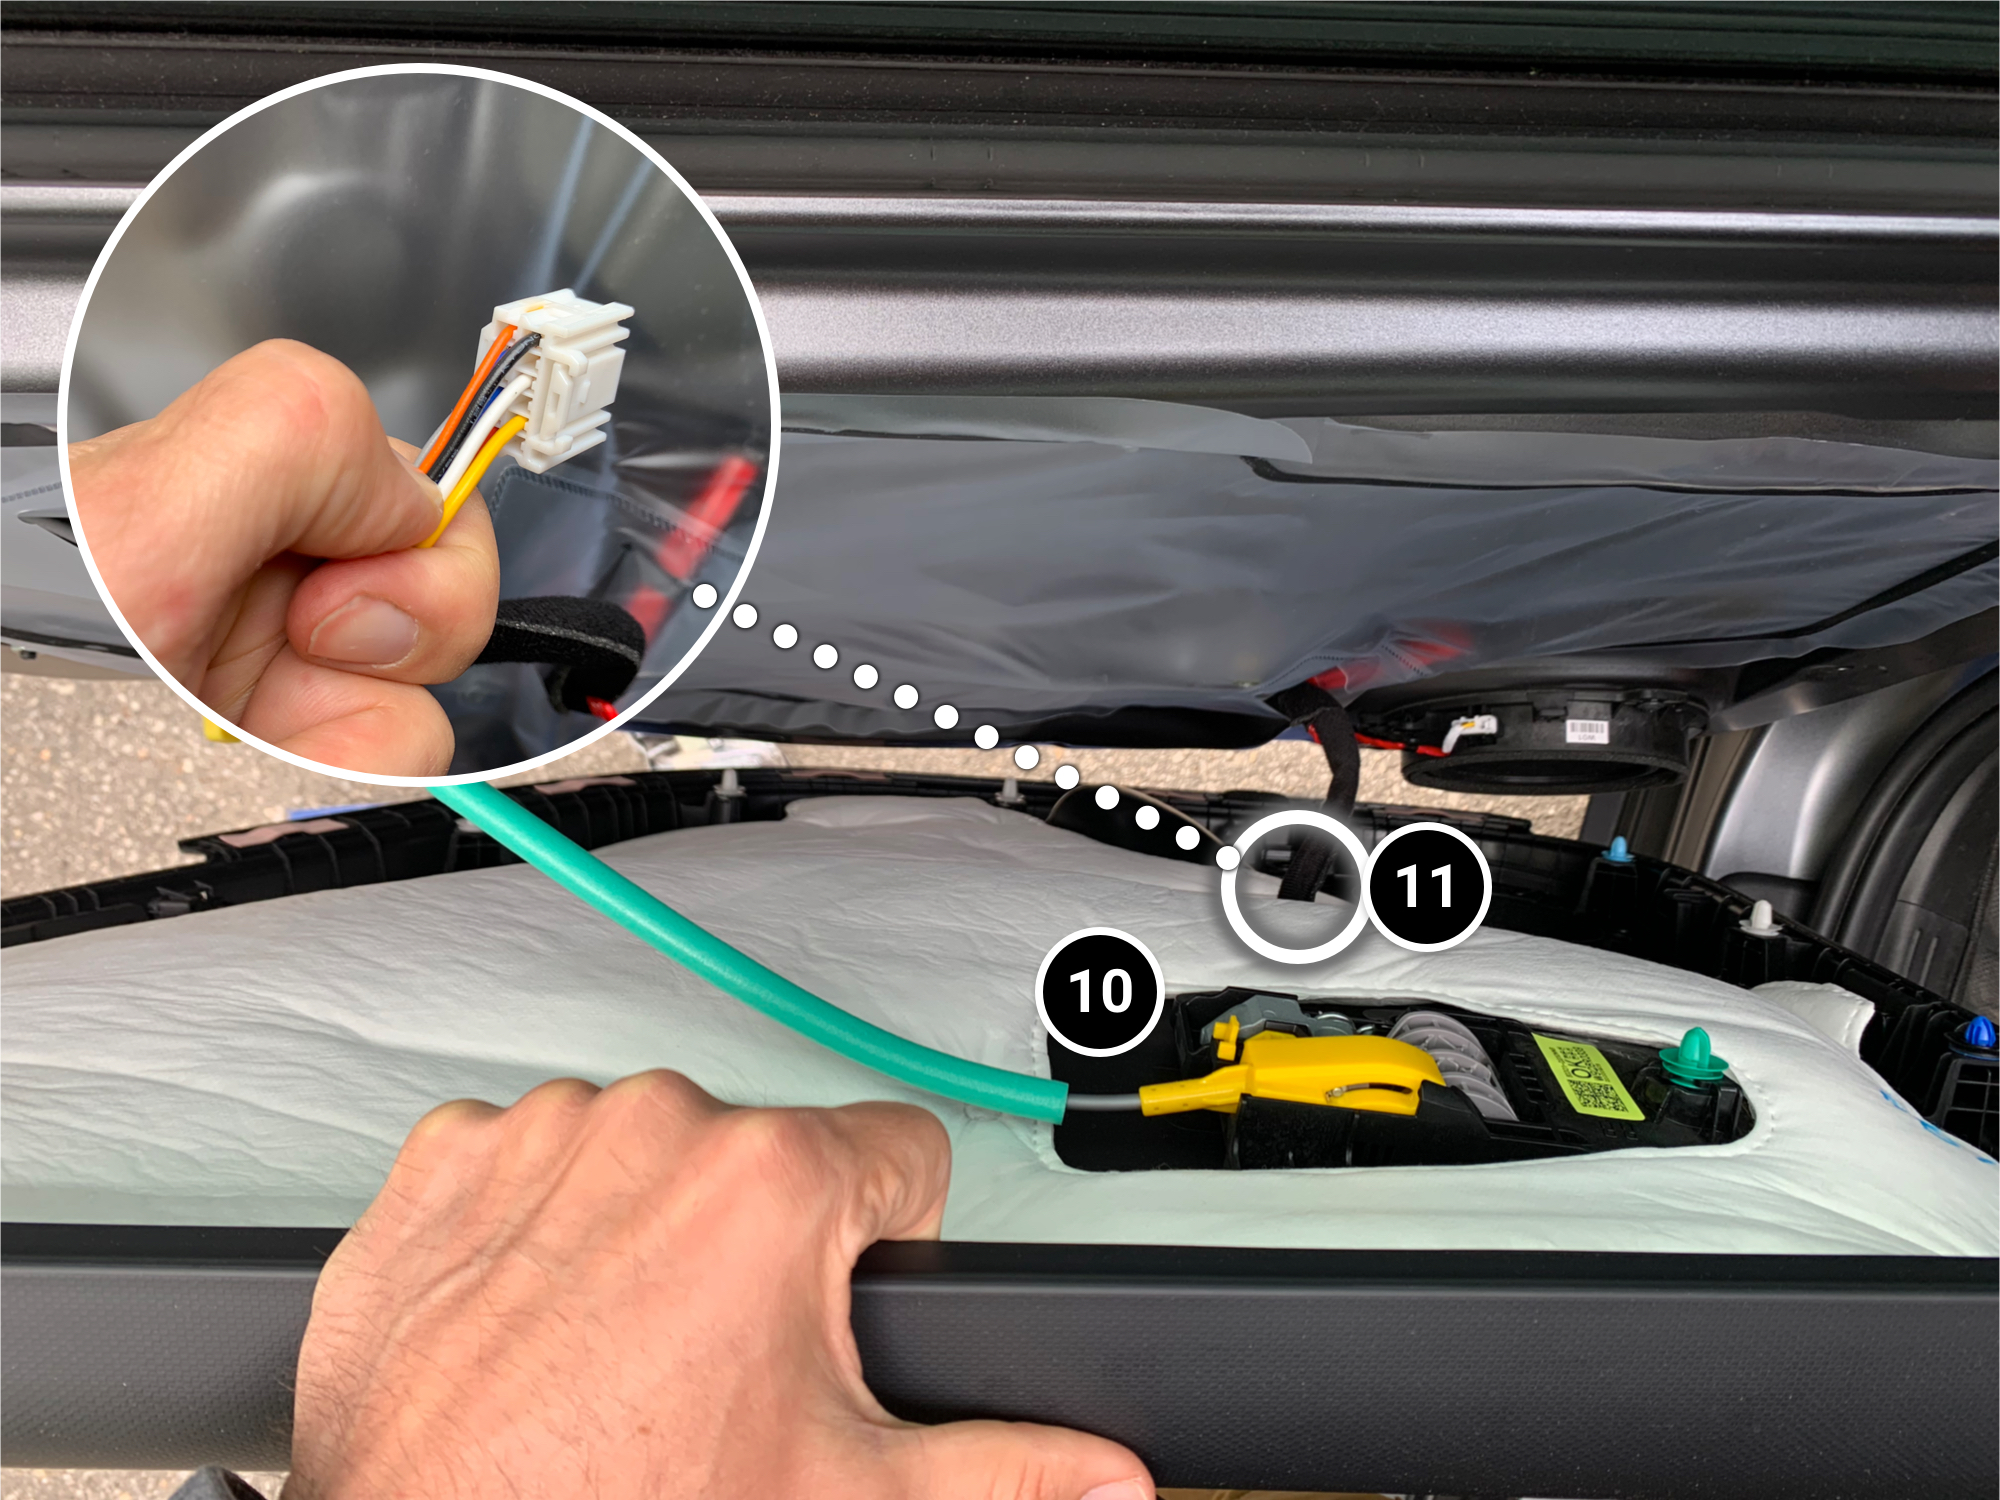
11- … and disconnect it from its mechanism. That’s the mechanical linkage between the door handle and the latch cable.
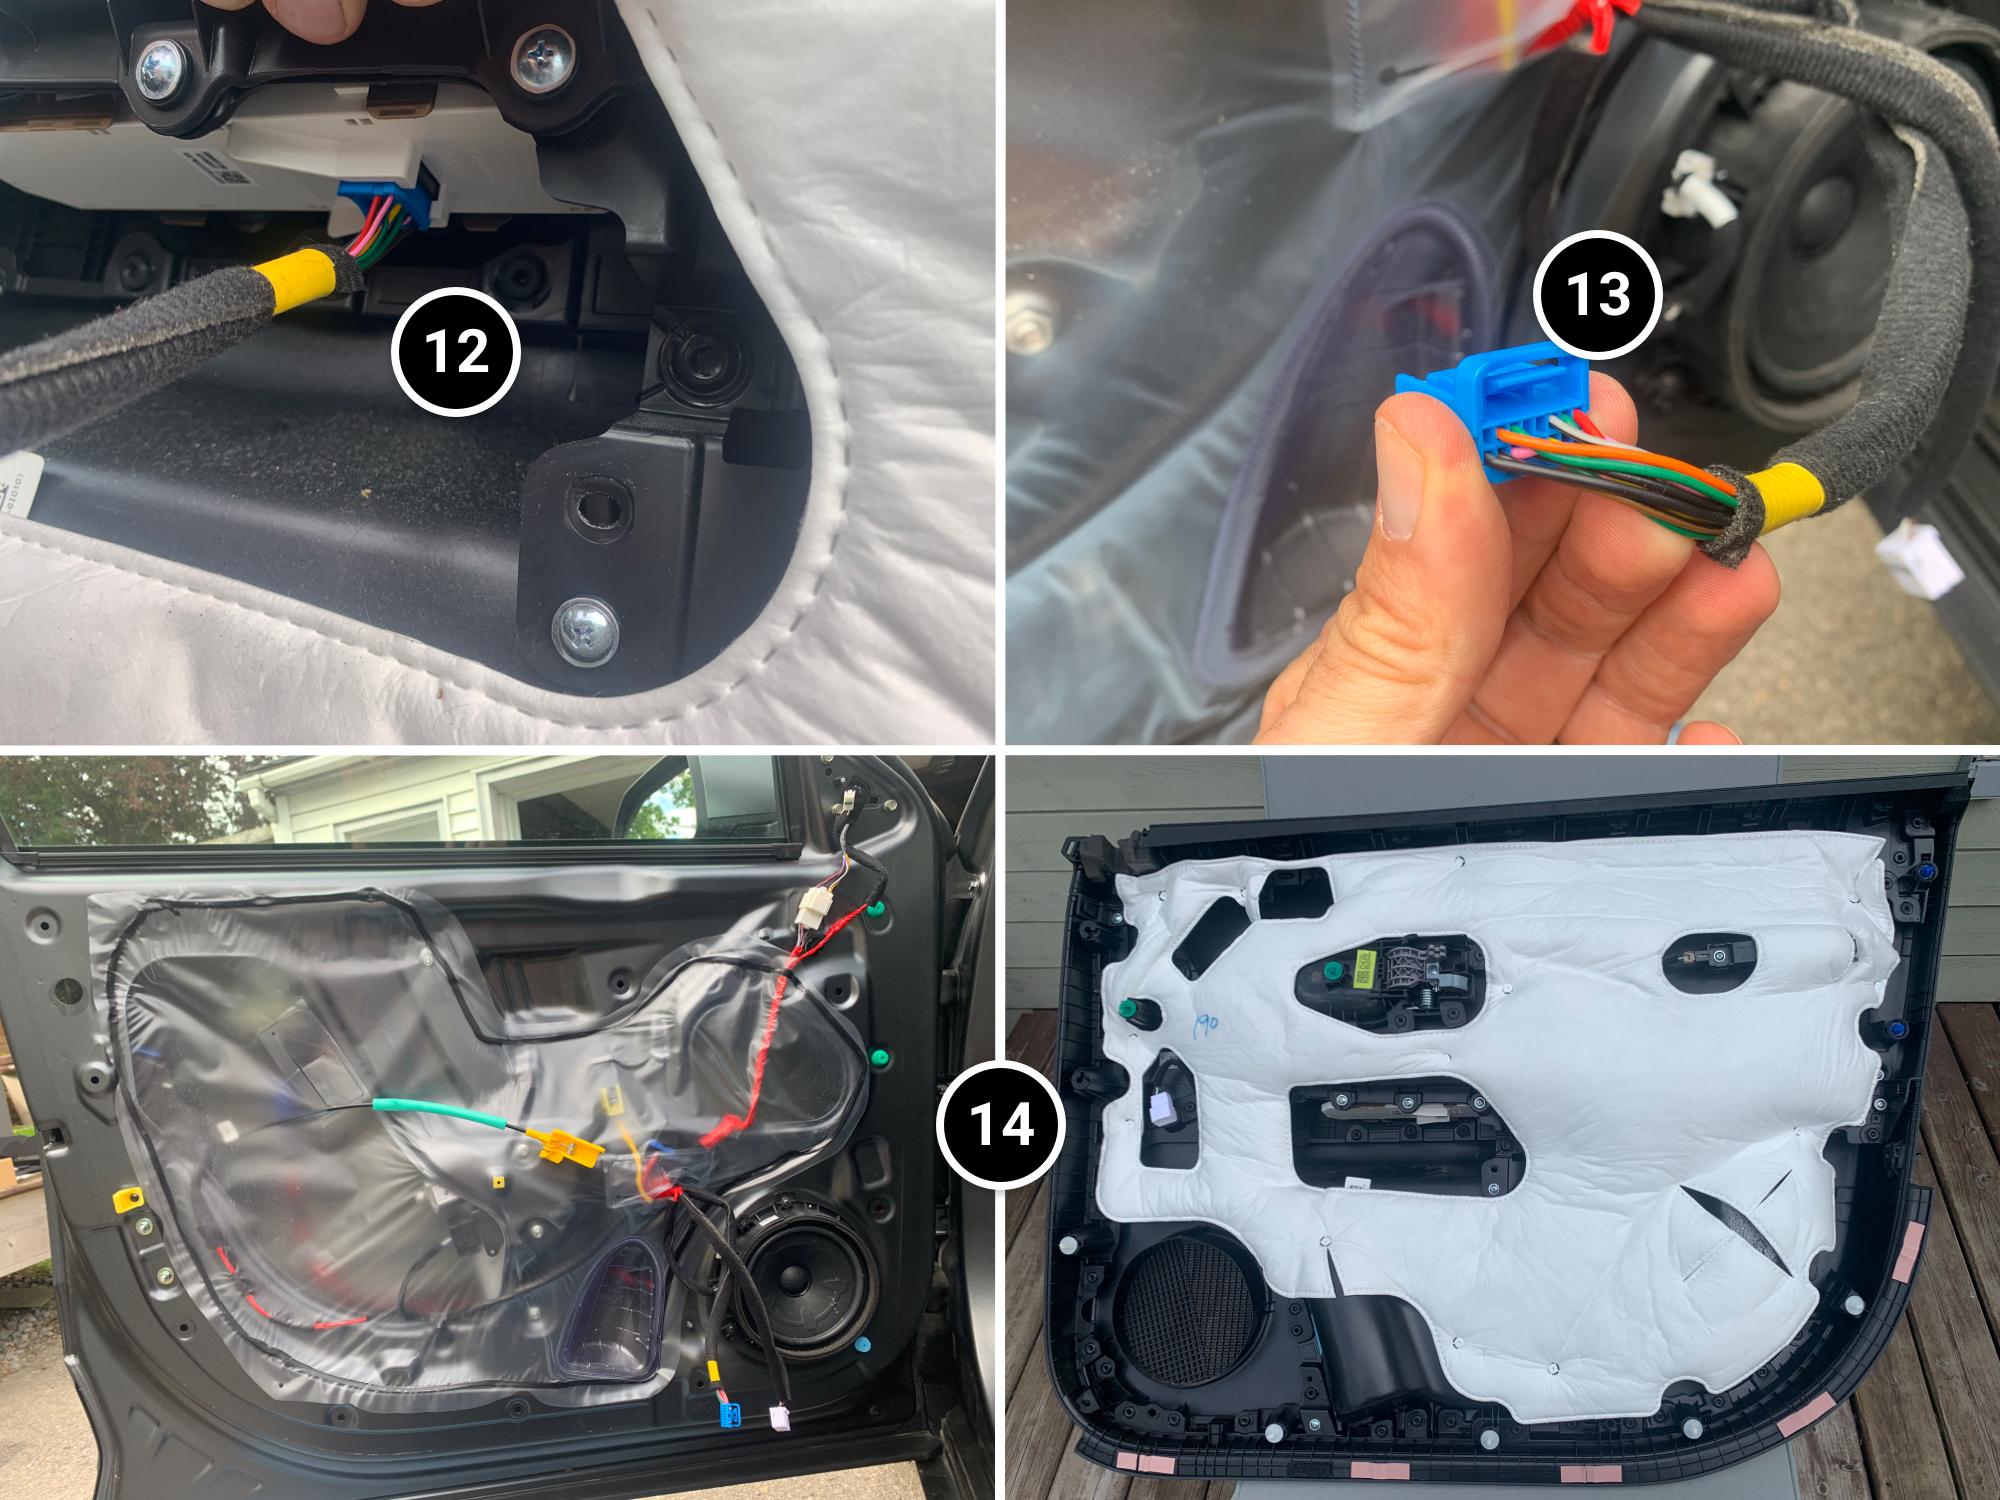
12- There’s one more connector to unplug.
13- This one is trickier to reach and has a locking tab. Expect a bit of a stretch.
14- Once everything is disconnected, the whole panel is a single piece you can set aside.
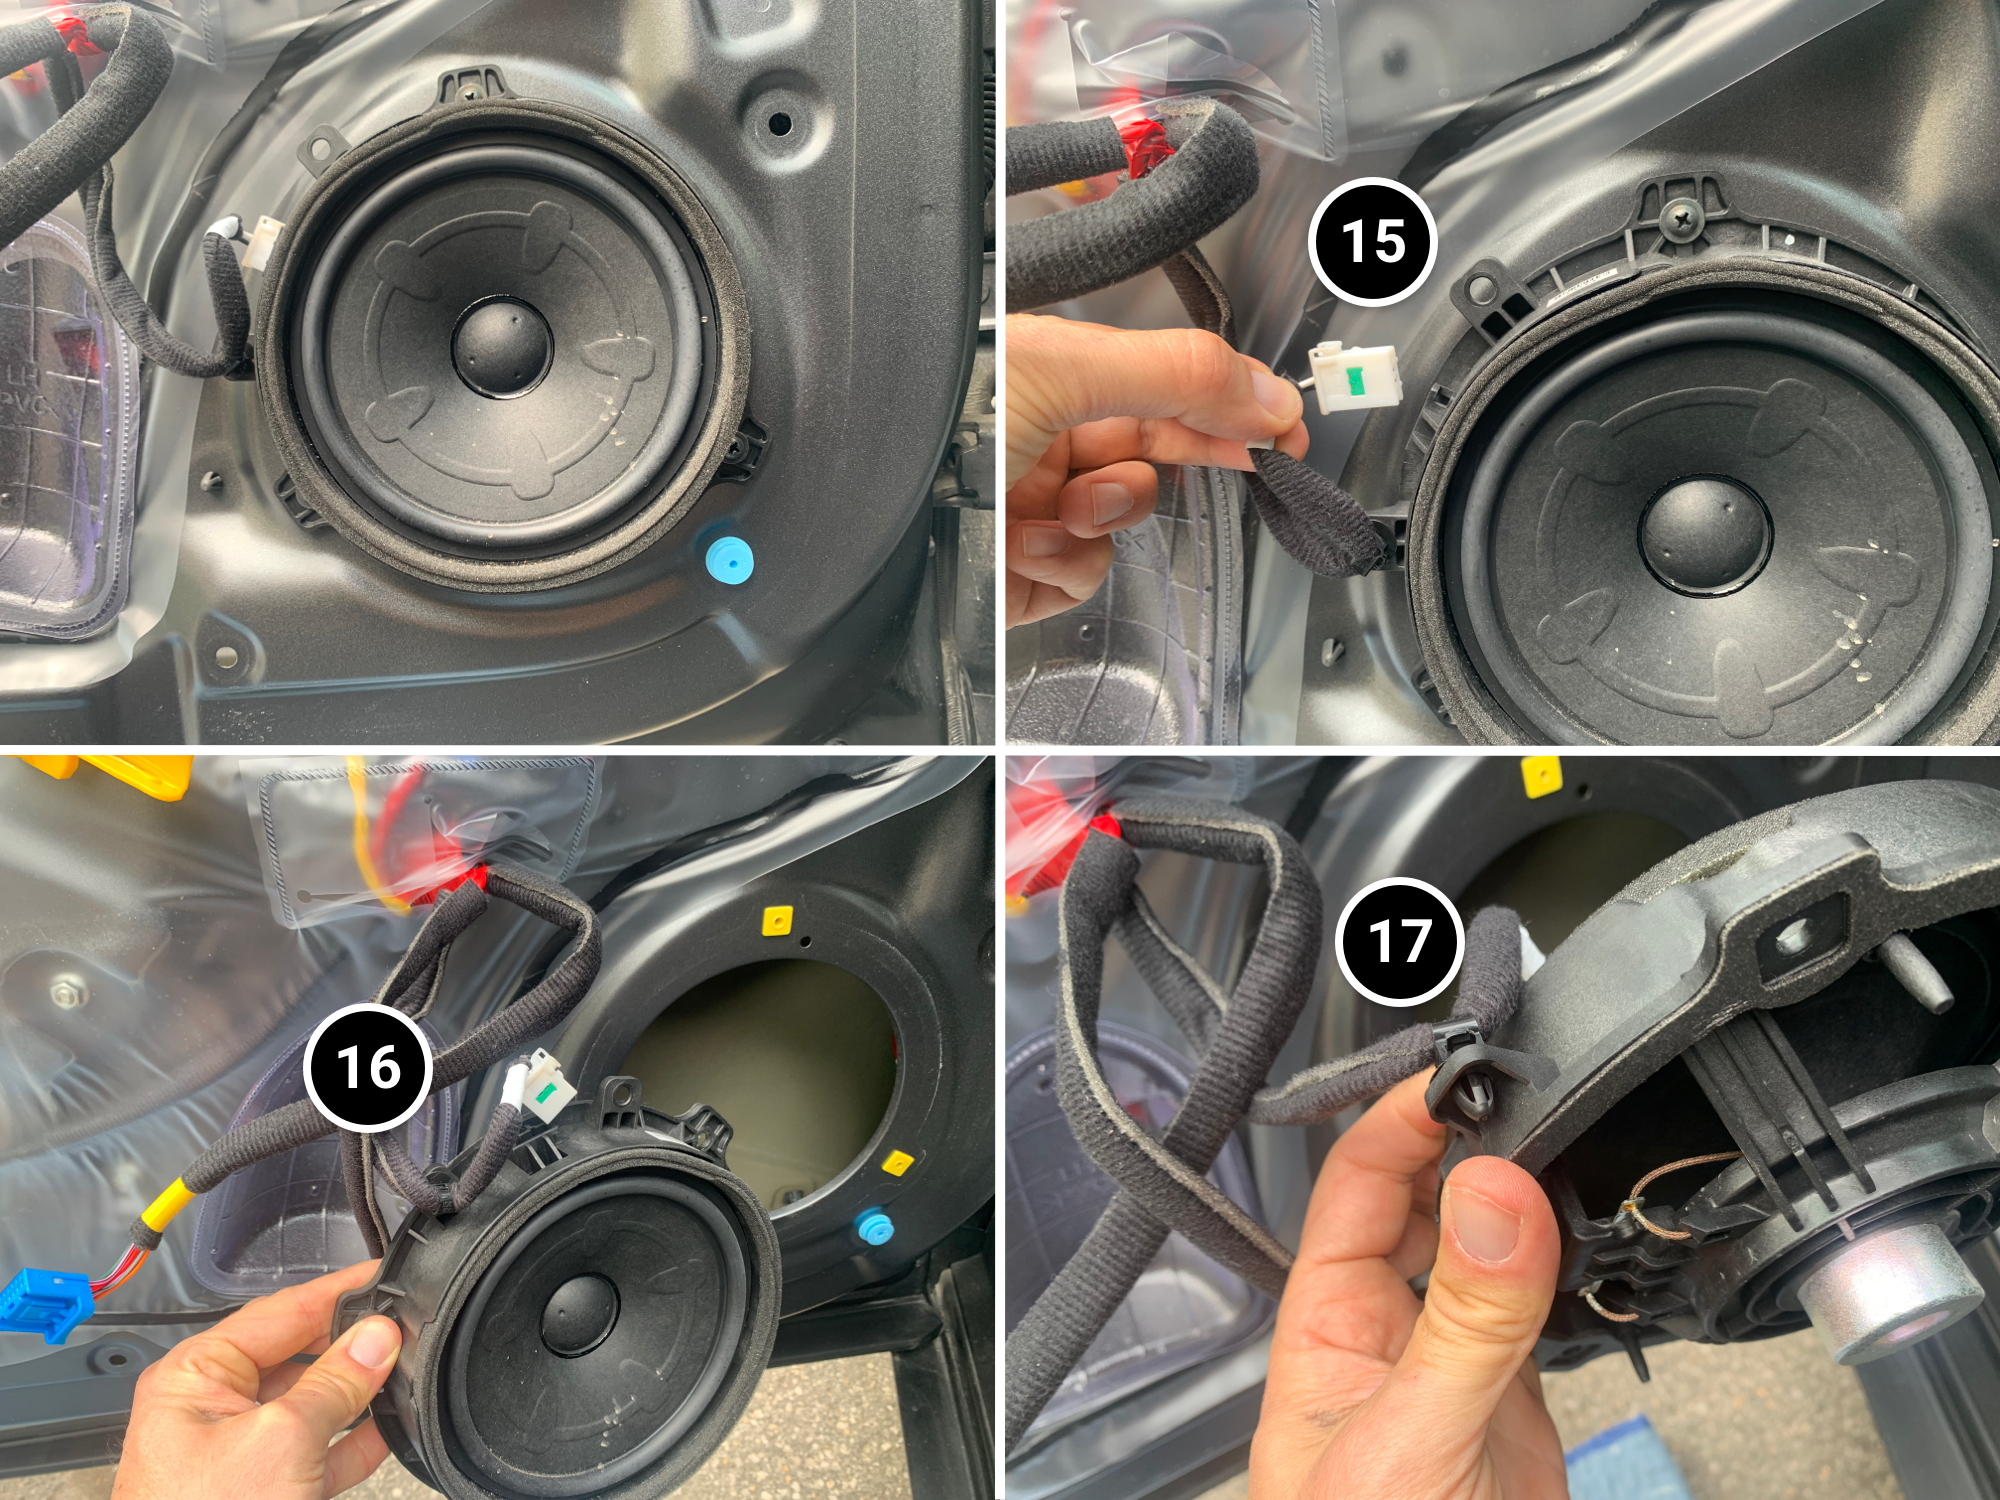
Removing the Stock Speaker
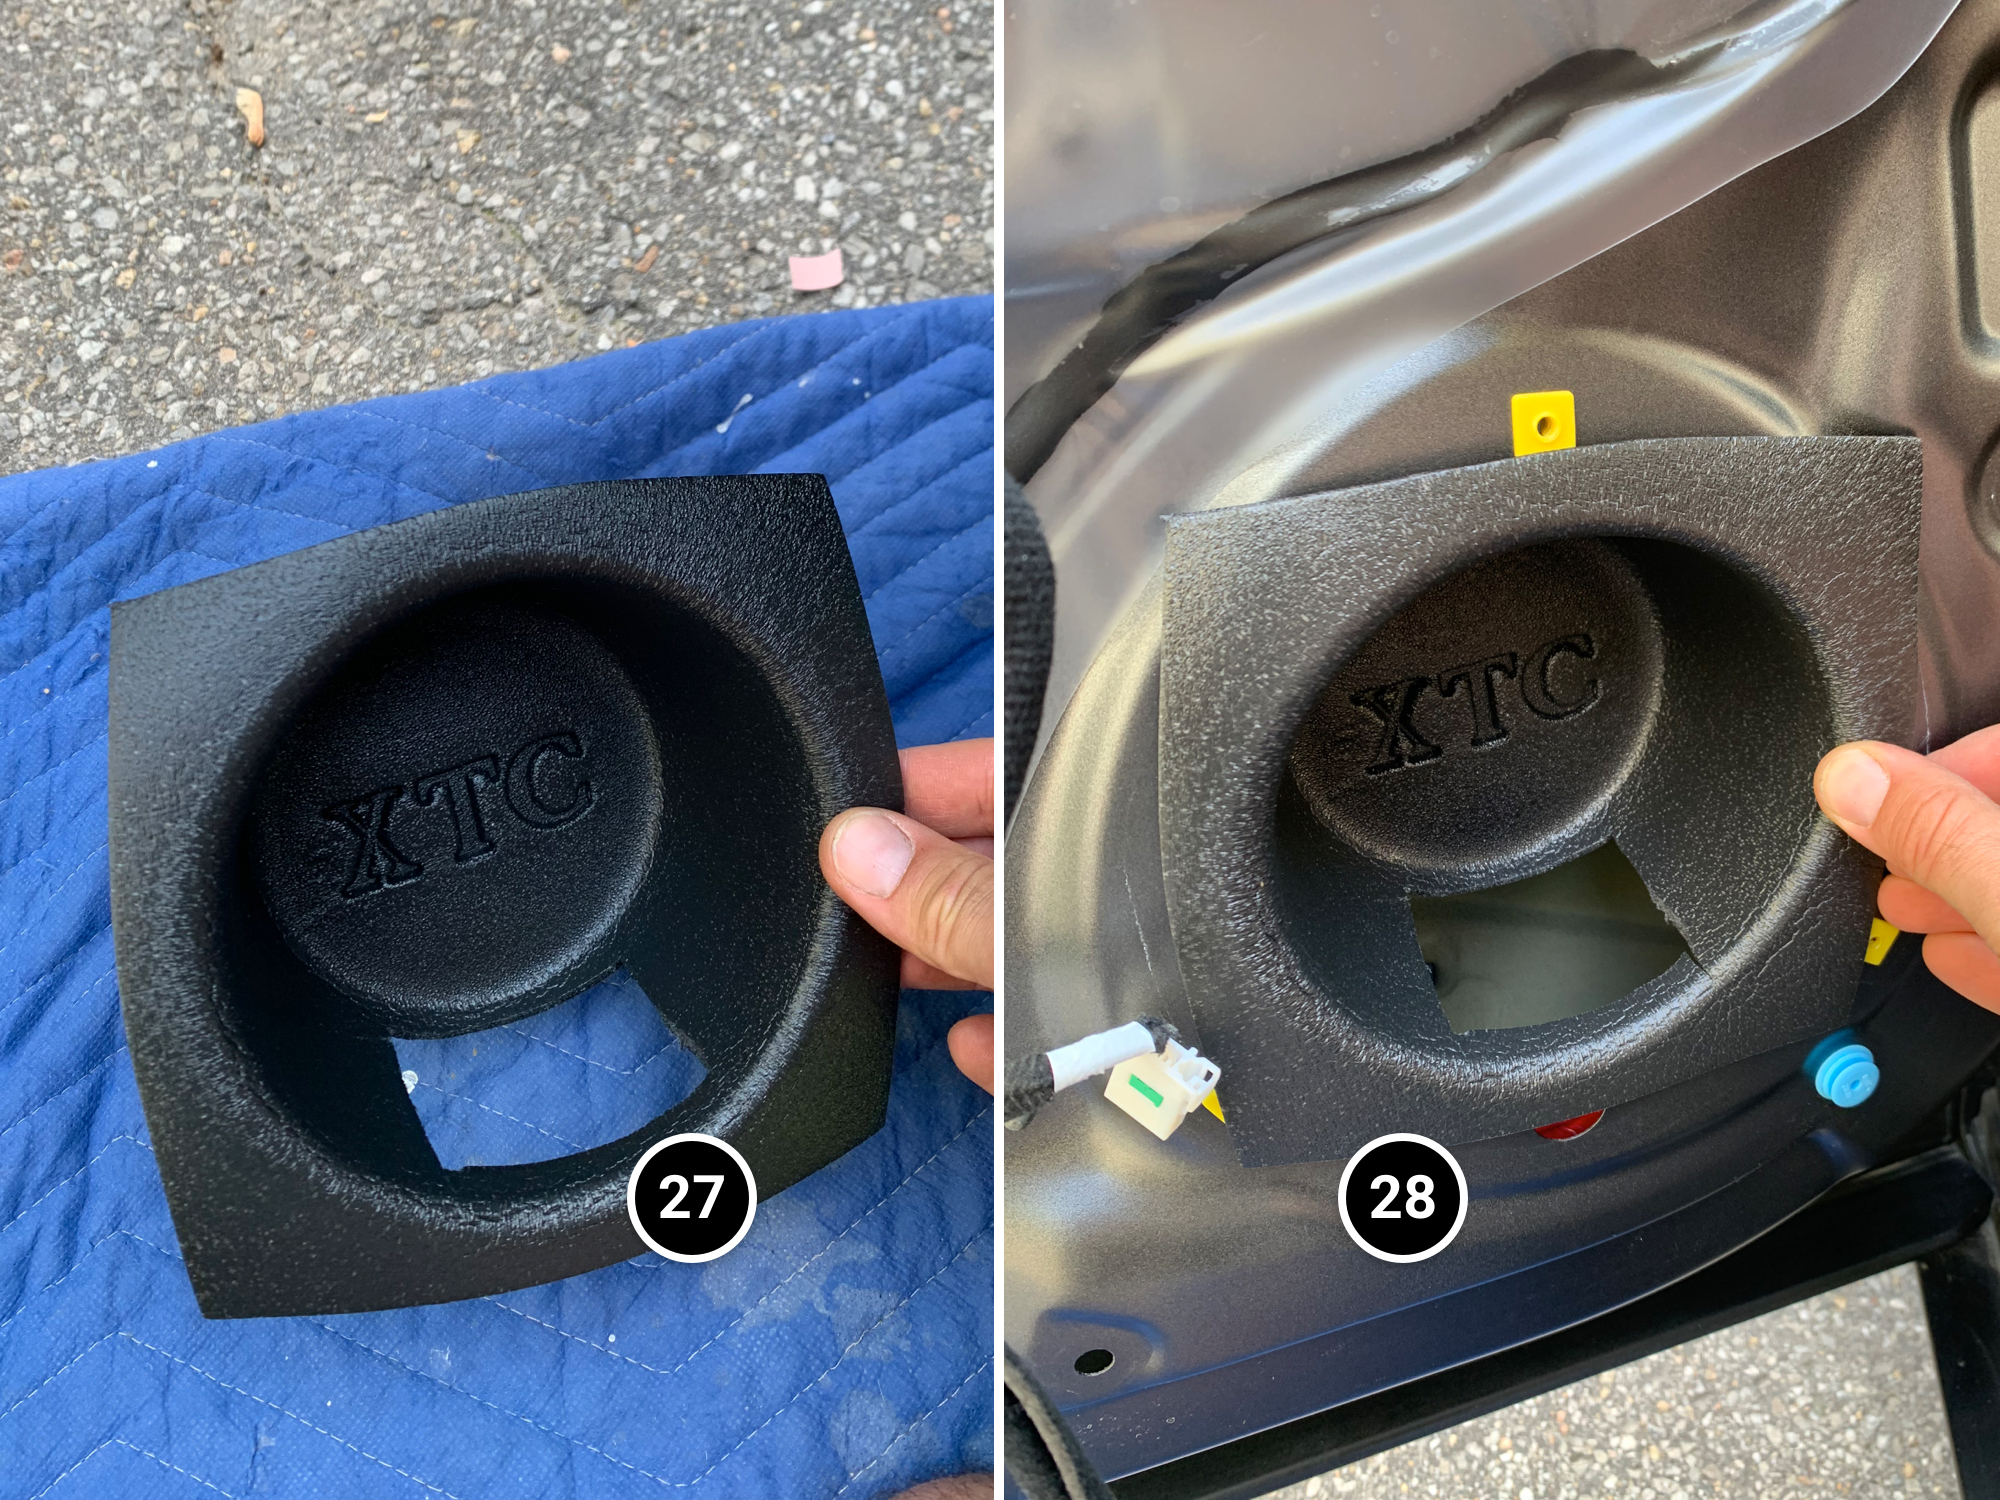
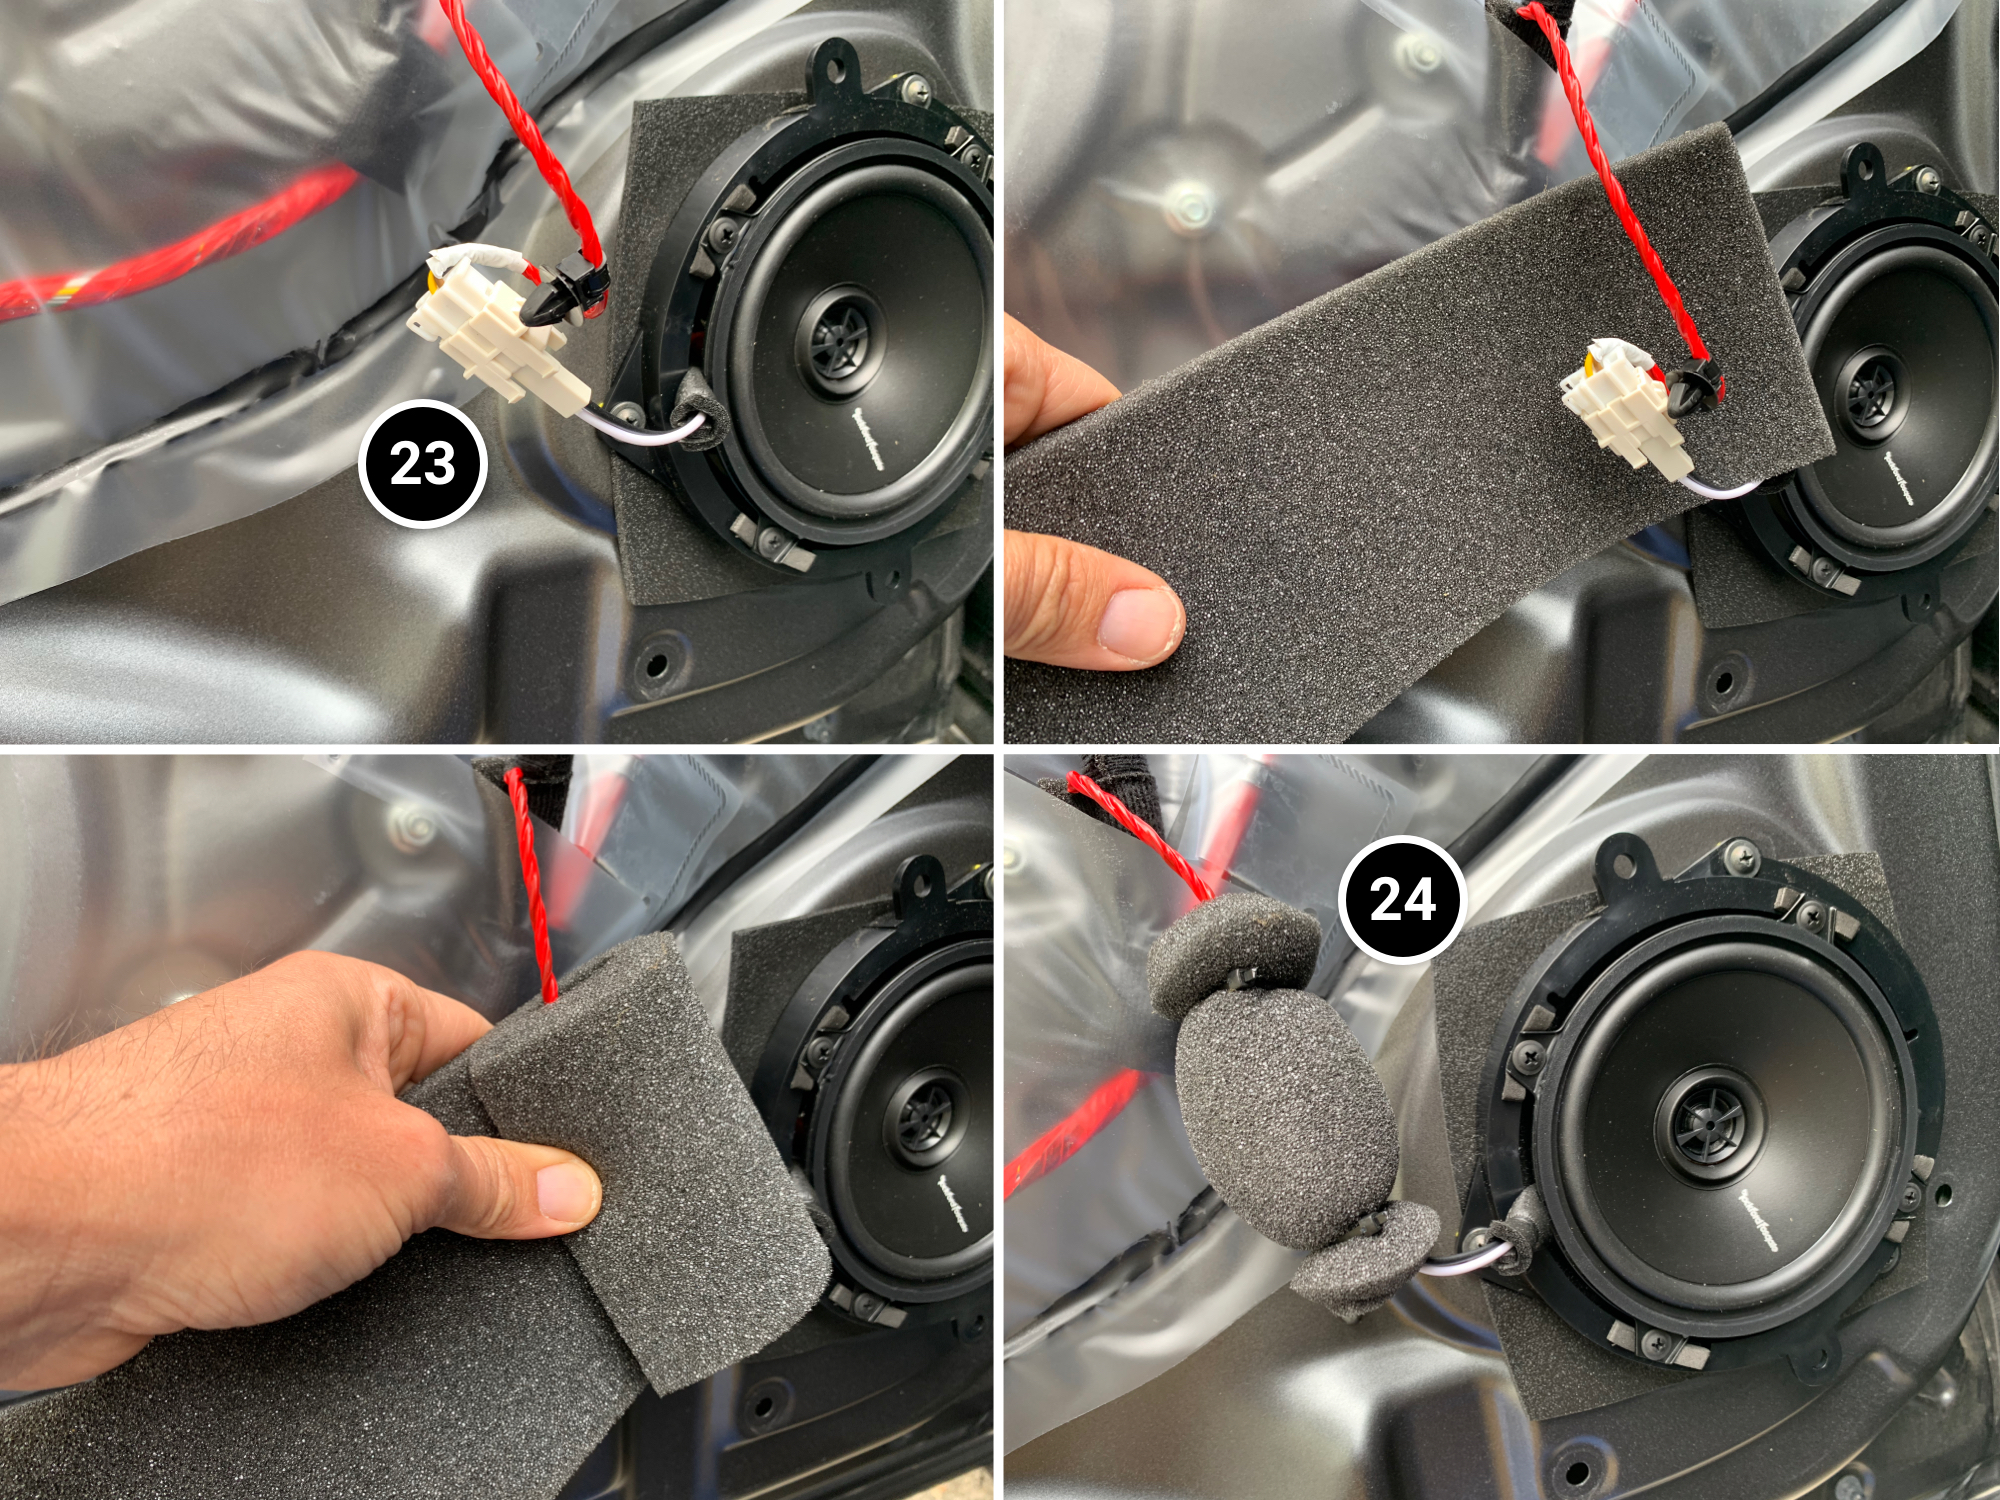
15- Unplug the connector.
16- Unscrew all the screws.
17- Remove the small clip that’s preventing you from pulling out the speaker.
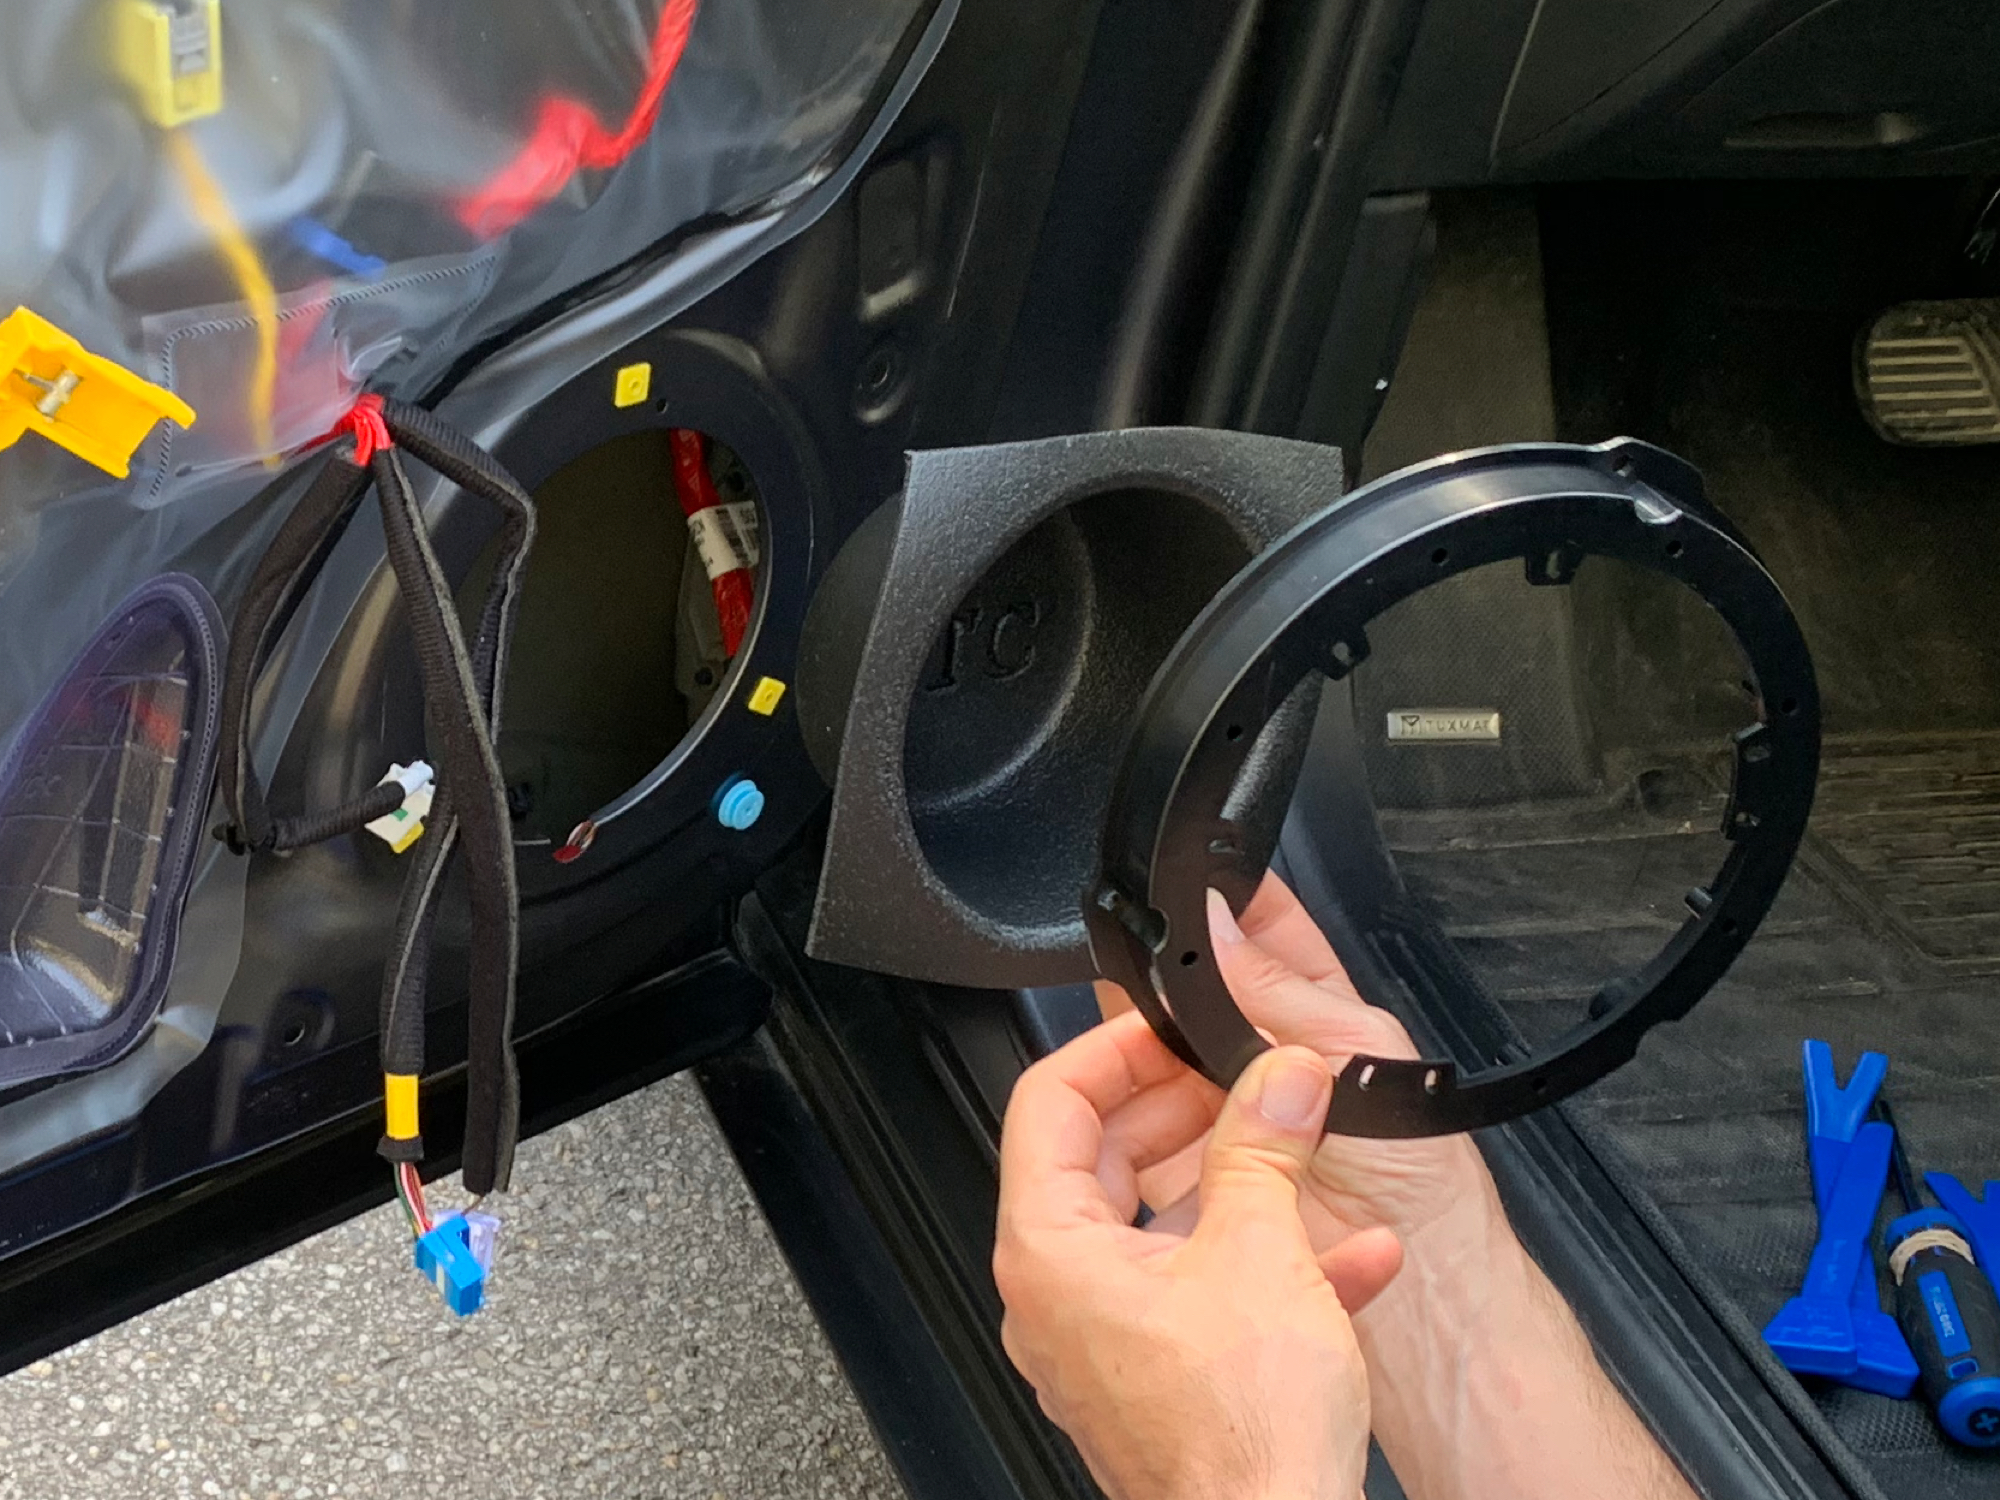
This image shows the correct installation order: deflector → mounting plate → speaker.

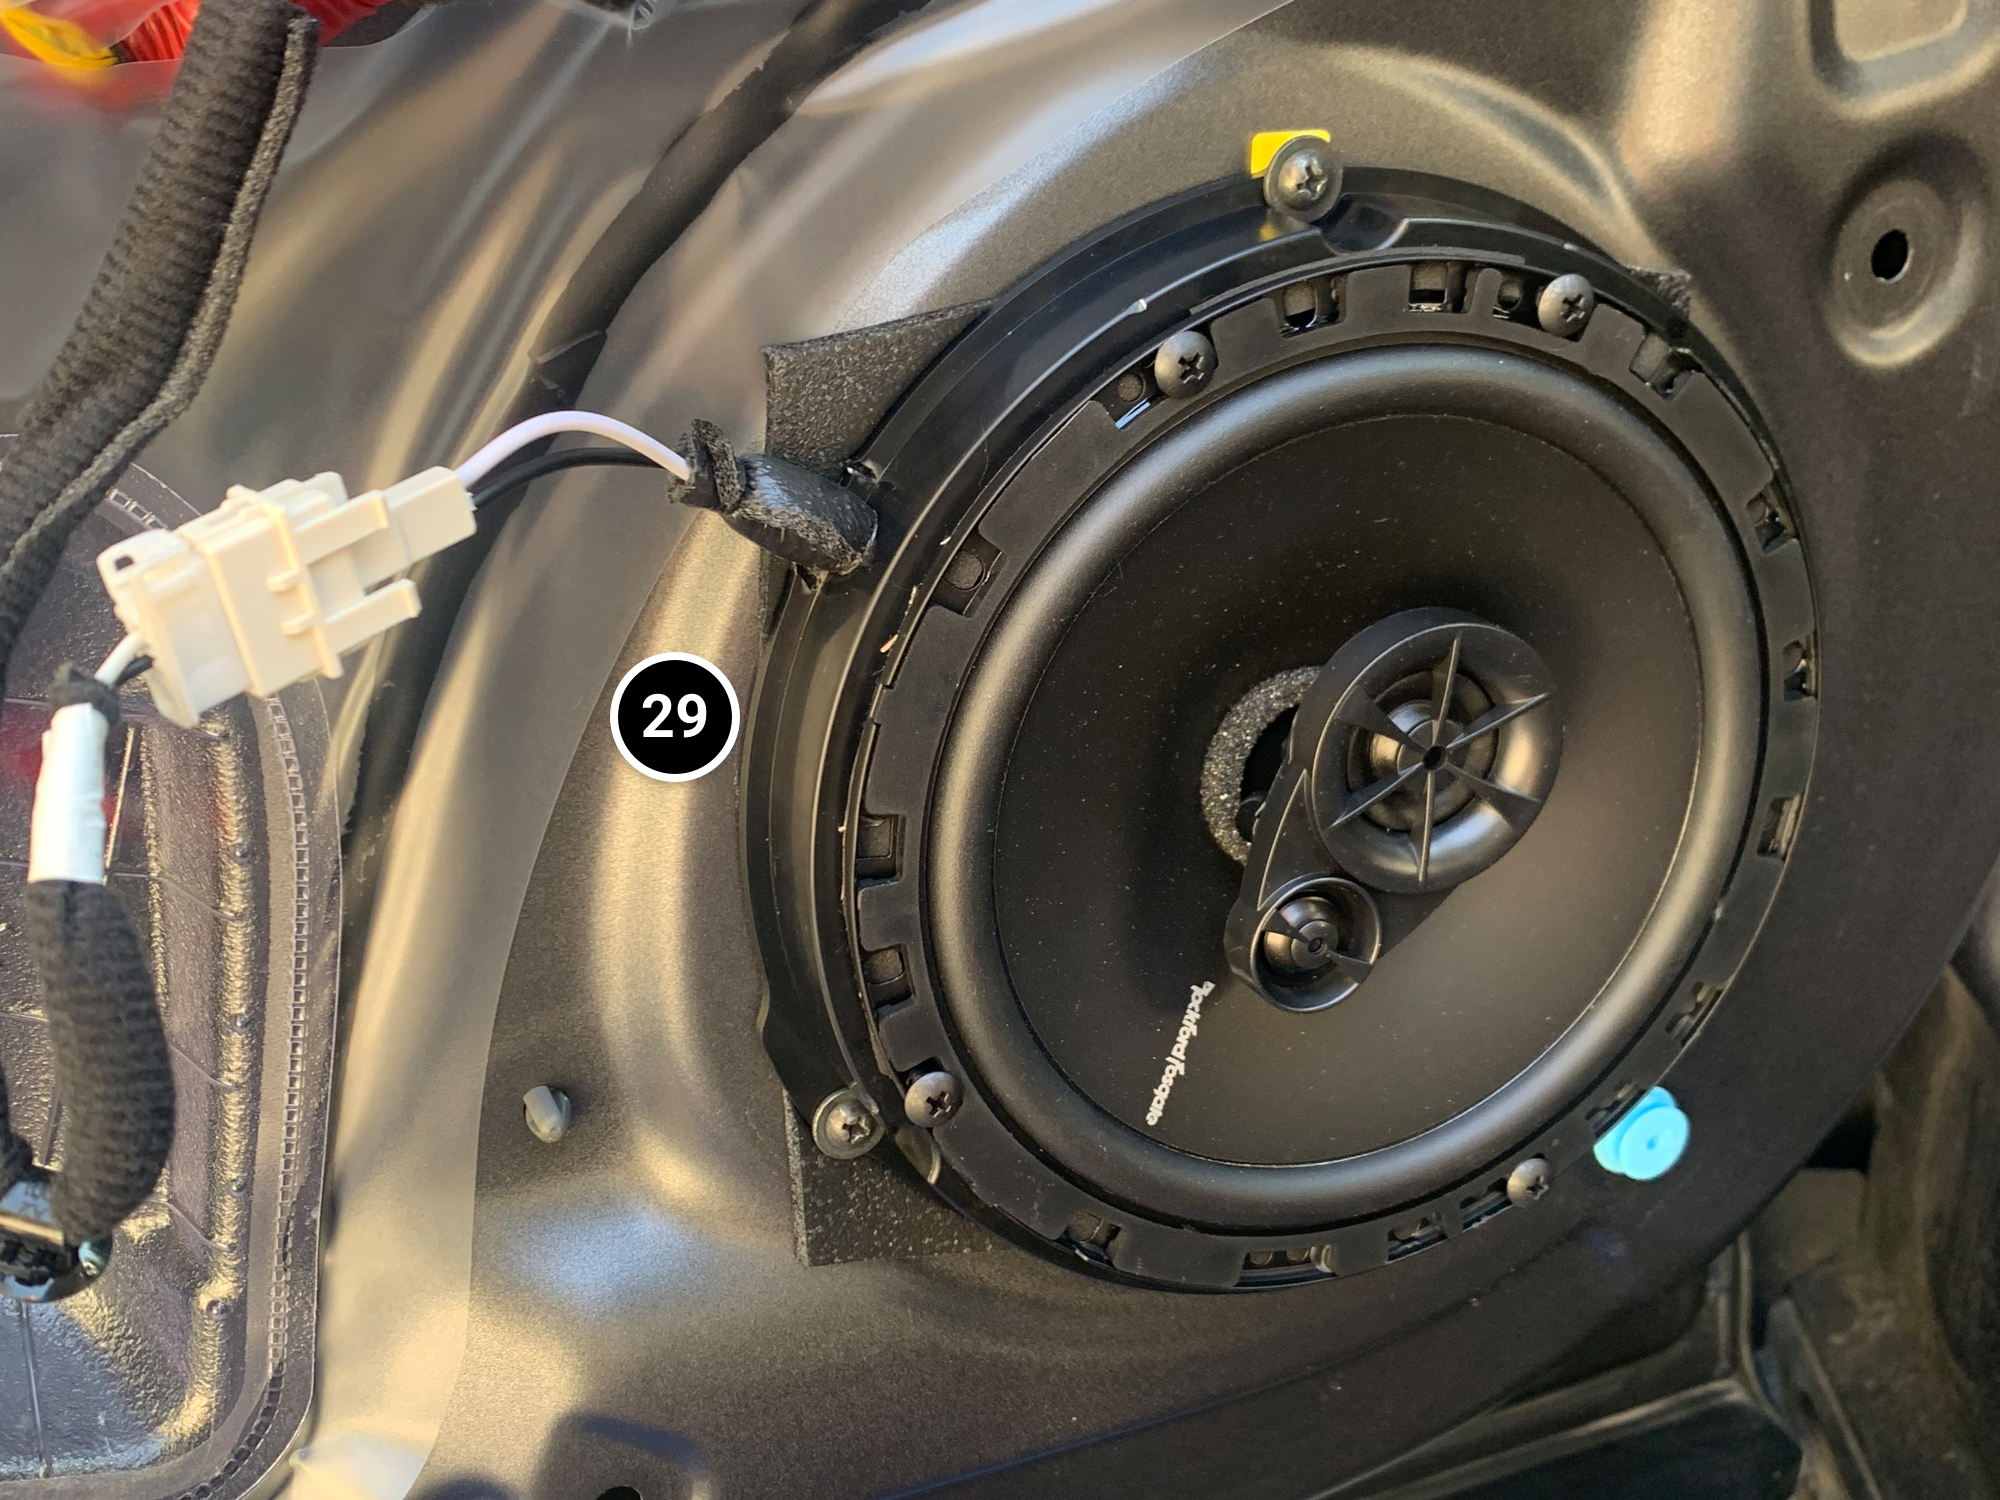
18- Connect the harness to the new speaker.
19- Black wire to black terminal, white wire to red terminal.
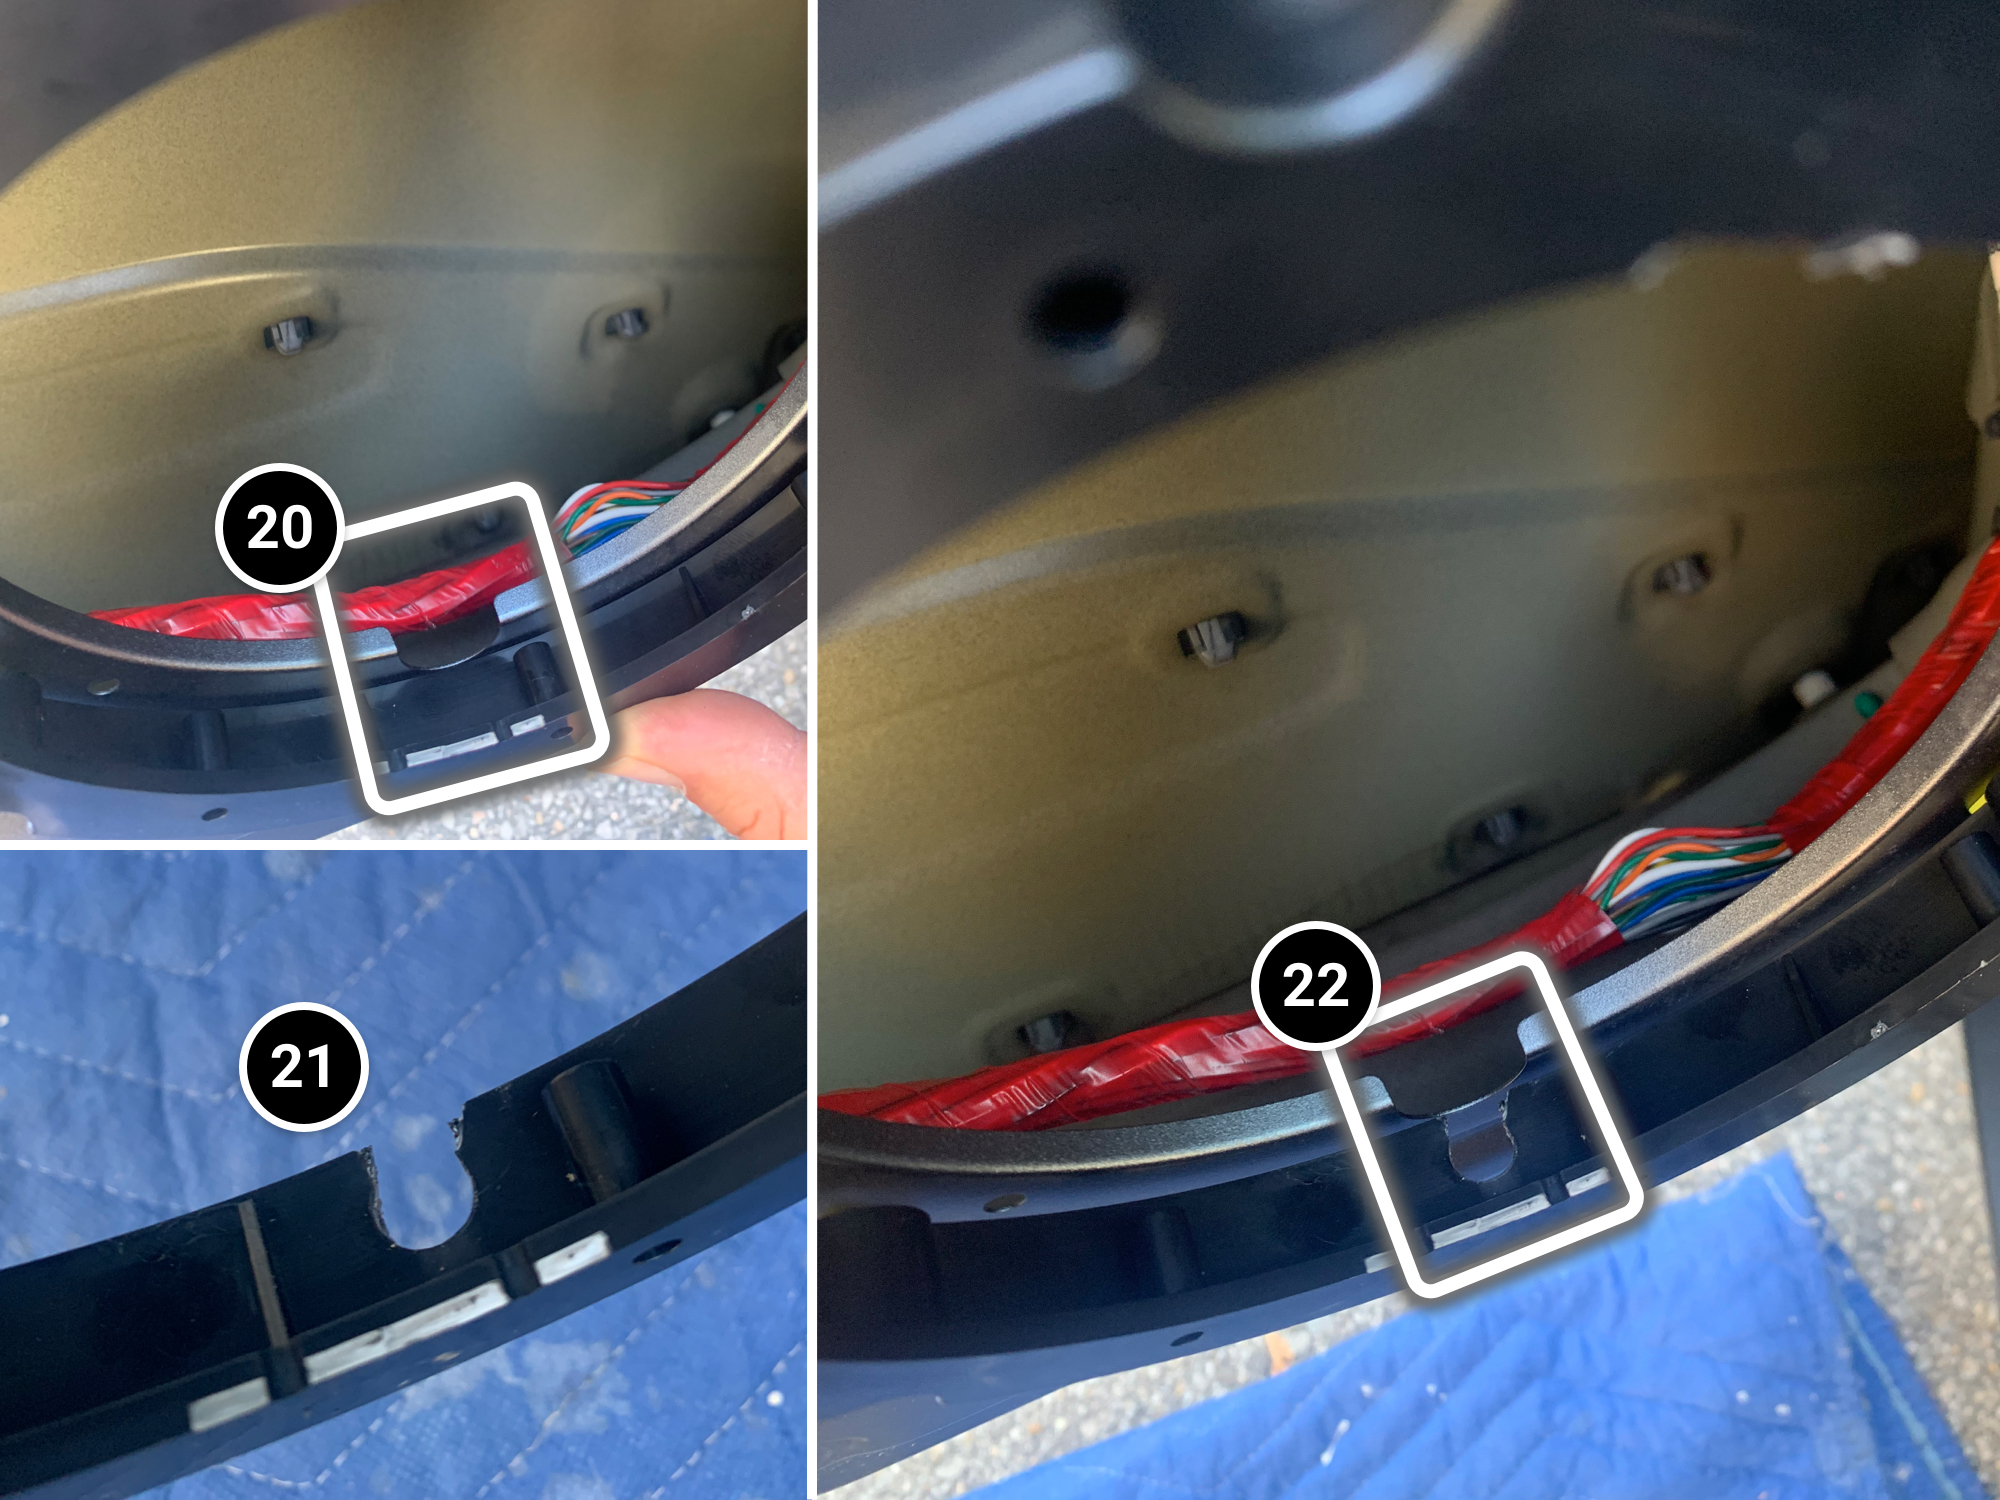
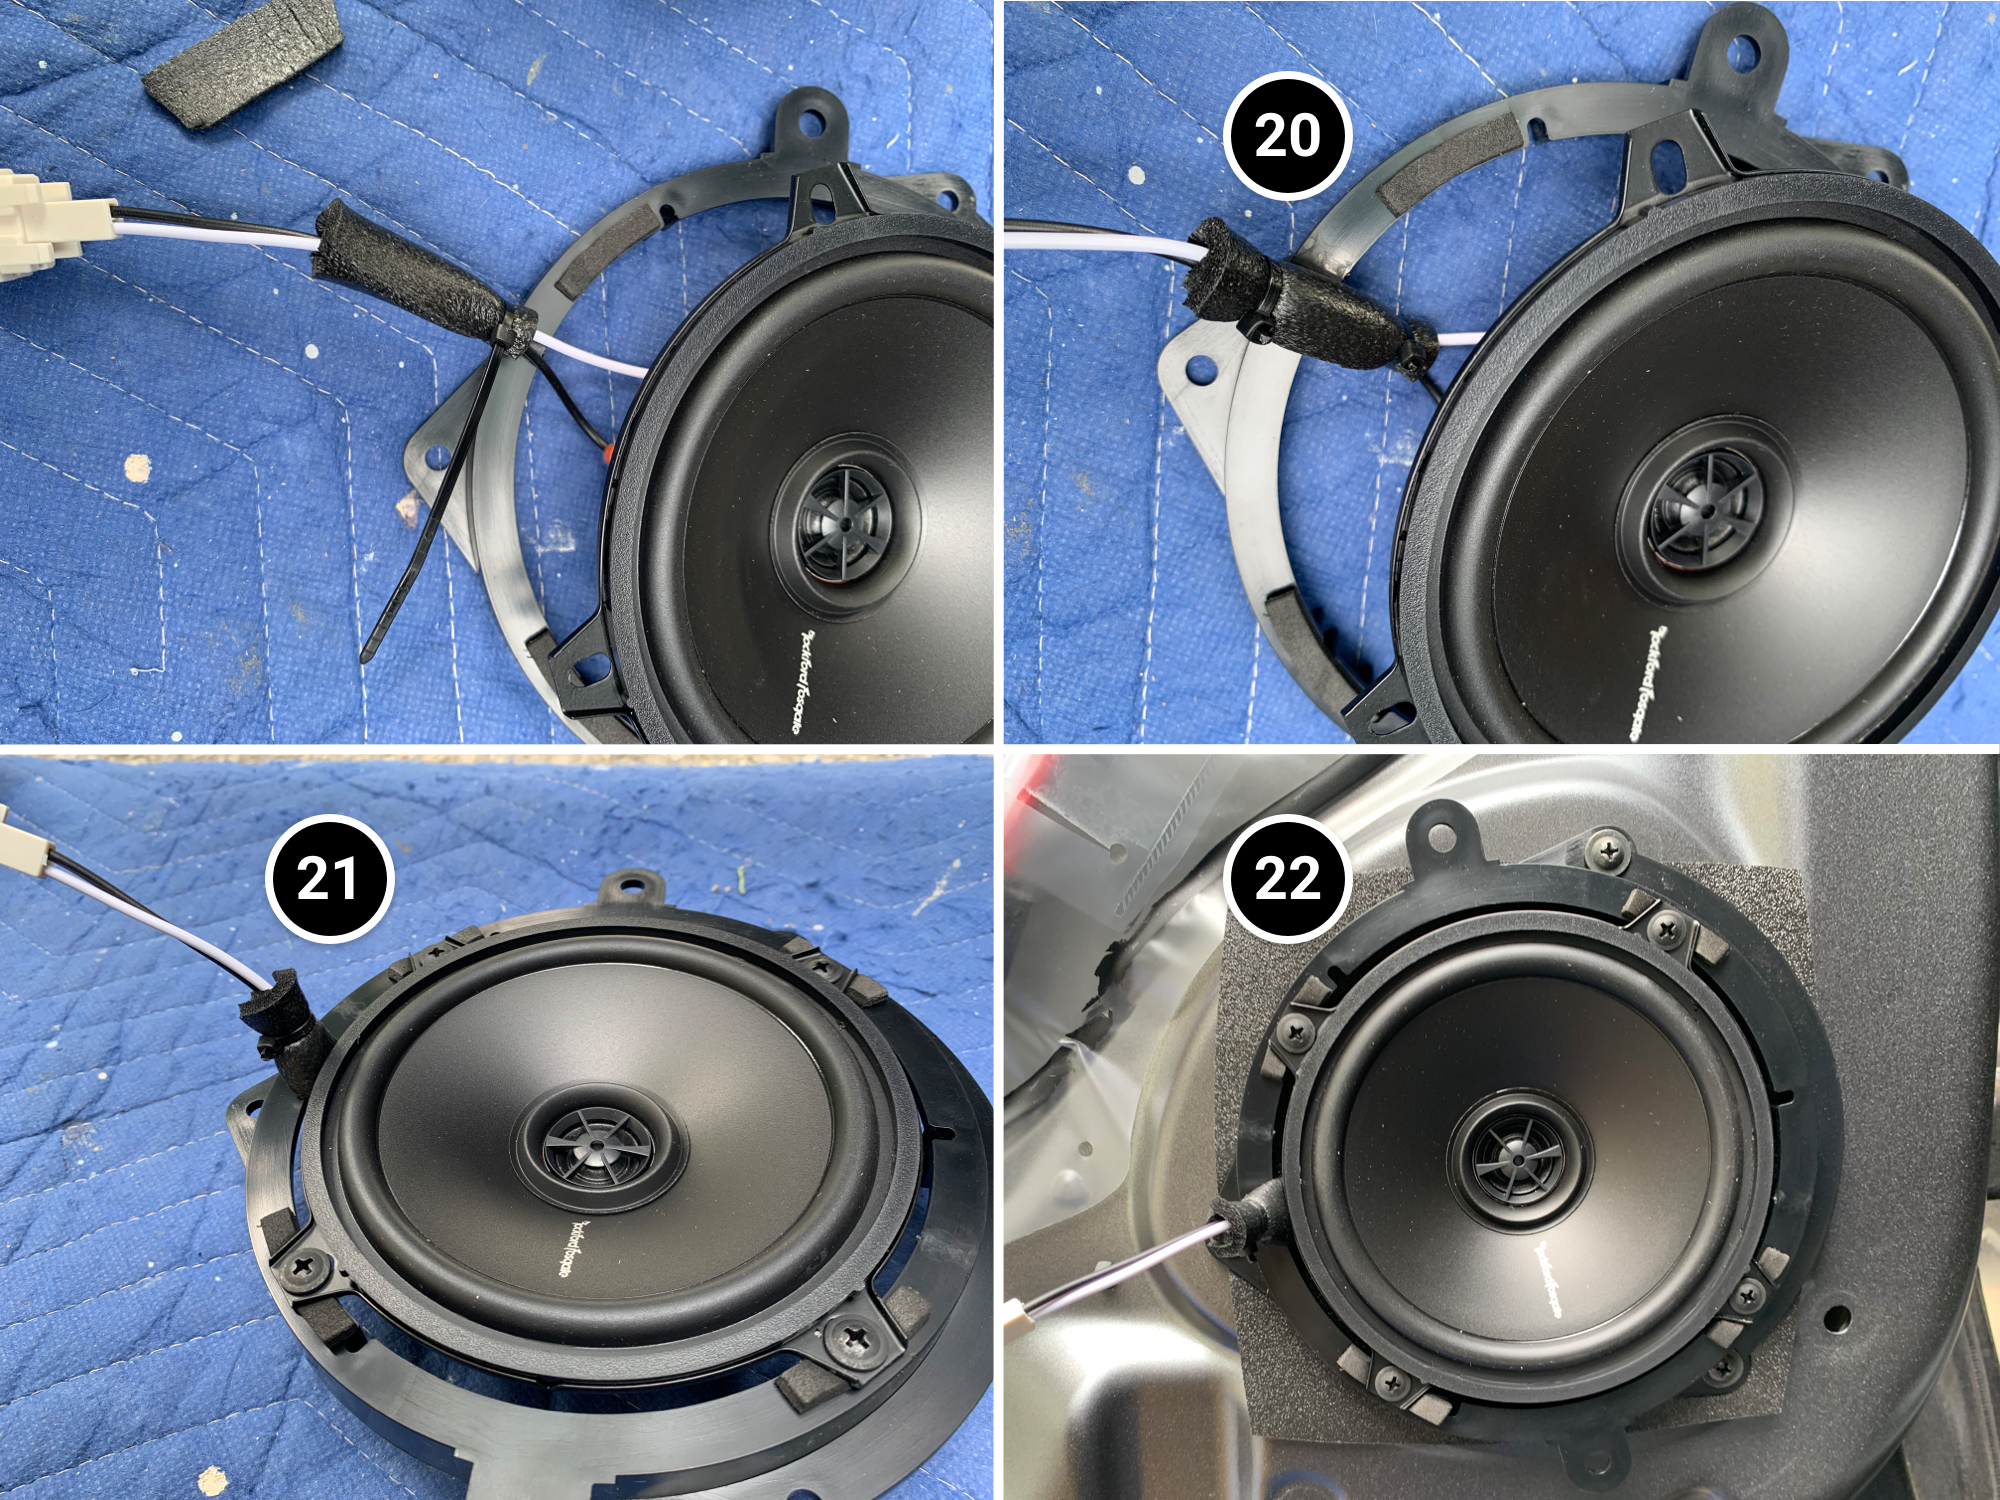
At this point, you’ll need to slightly modify the mounting plate to let the wires pass through.
20- The speaker harness wires need to pass through the plate, but there’s no gap.
21- Cut an opening (I first drilled a hole, then trimmed it wider with a knife).
22- Once the opening is made, pass the wires through.
Installing the New Speaker
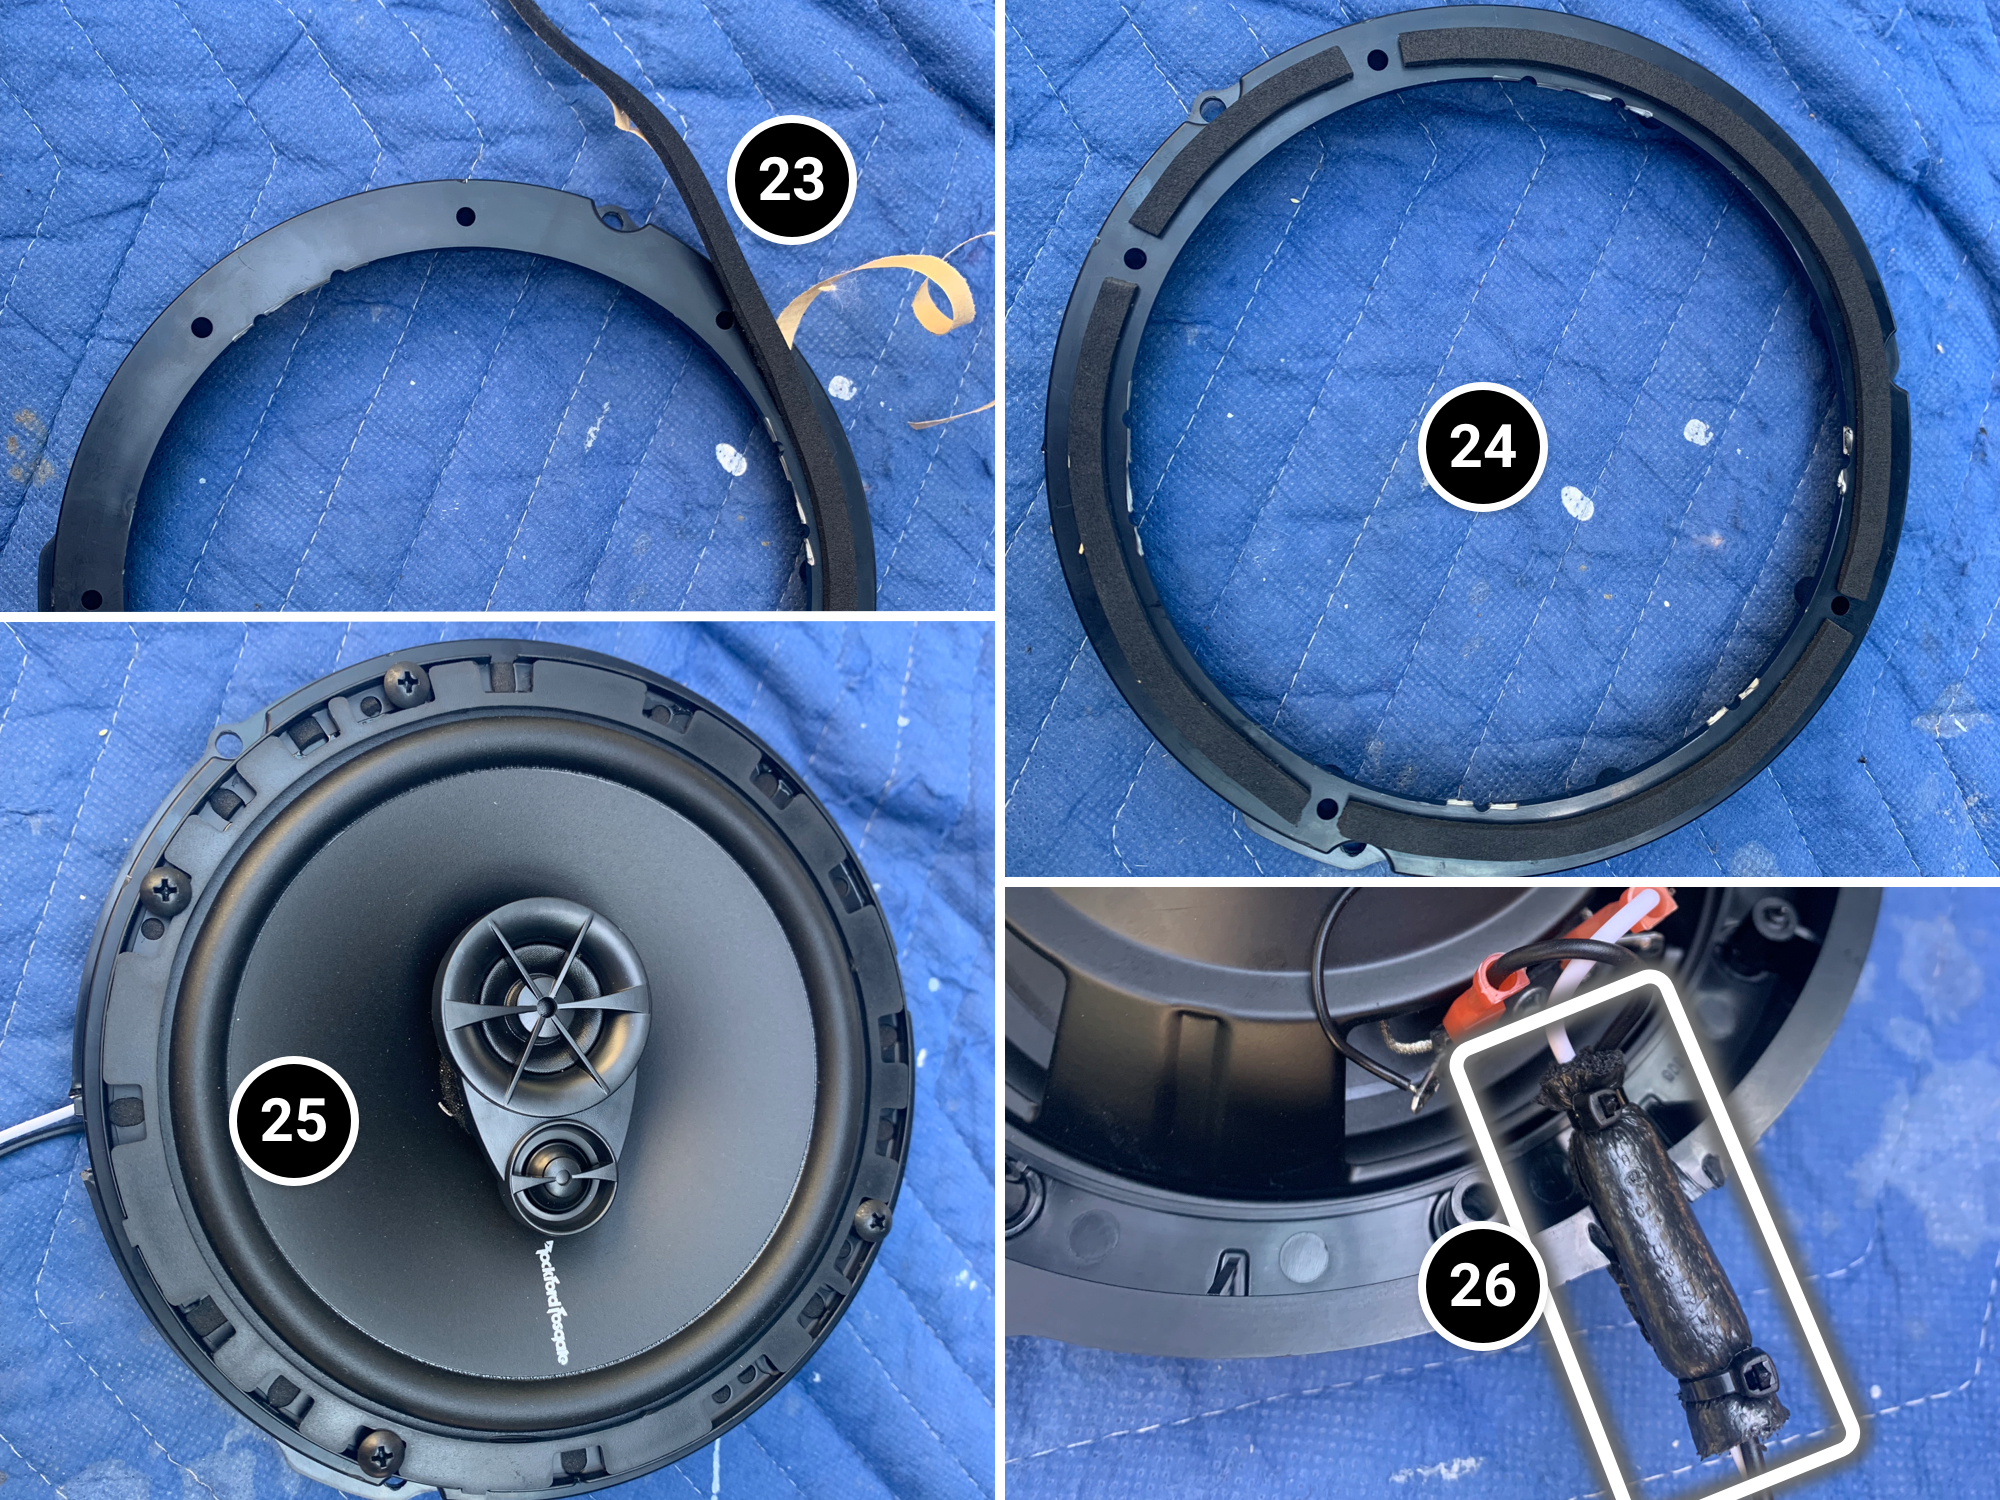
23- Apply the adhesive weather stripping in sections.
24- Cover the entire perimeter, leaving the screw holes clear.
25- Screw the speaker into the plate.
26- I added some foam around the wires, secured with zip ties, to prevent vibration noise.
27- Use scissors to cut an opening in the deflector.
28- Place it in the speaker opening.
29- Screw in the speaker + plate and connect the harness (it’s compatible with the factory one).
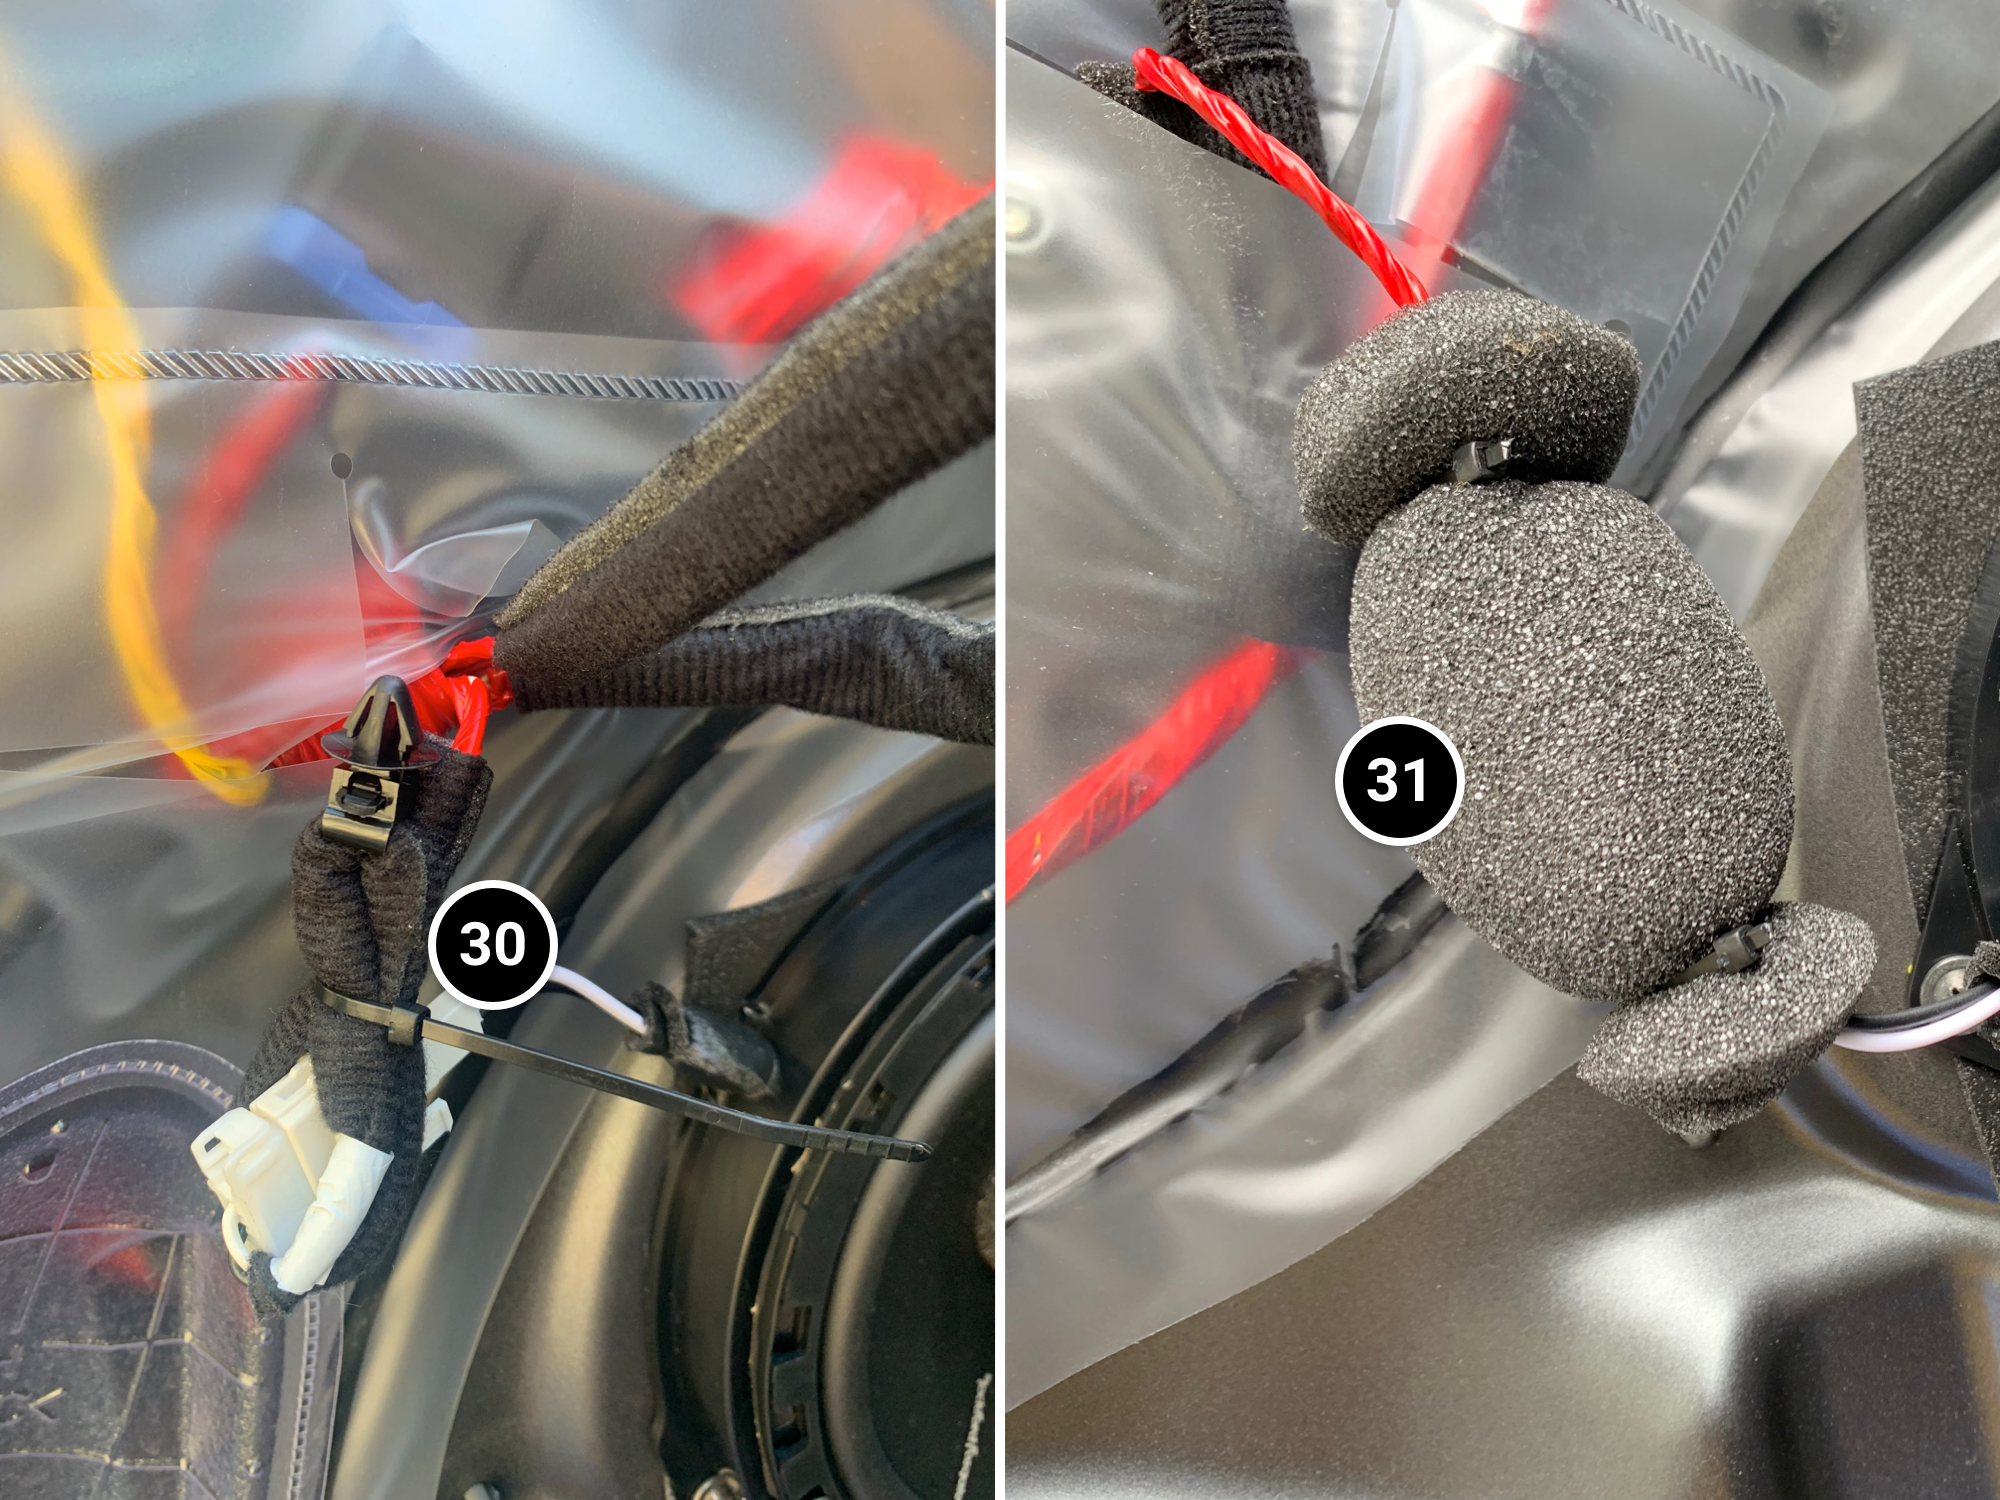
30- Bundle up any extra cable to keep it from moving around.
31- Wrap it in a piece of foam (as shown in the image).
The speaker installation is complete. Just reverse the steps to reassemble the door panel and tweeter cover. It looks more intimidating than it is — once started, it goes quickly.
Rear Speakers
The process for replacing the rear door speakers is very similar to the front.
1- Insert the plastic tool at the top of the trim and pull gently.
2- There’s only one clip to remove.
3- Open the small flap.
4- Remove the first screw.
5- Remove the second screw.
6- Insert a tool where it’s clearly marked.
7- Add a second tool if needed.
8- When possible, insert your fingers to pull more effectively.
9- Go around the edge and unclip the entire panel.
Visual map of the 11 clips to help you pull the panel off strategically.
10- Once the panel is off, hold it with one hand and detach the yellow door latch mechanism.
11- Then, a bit trickier, reach lower and unplug the connector.
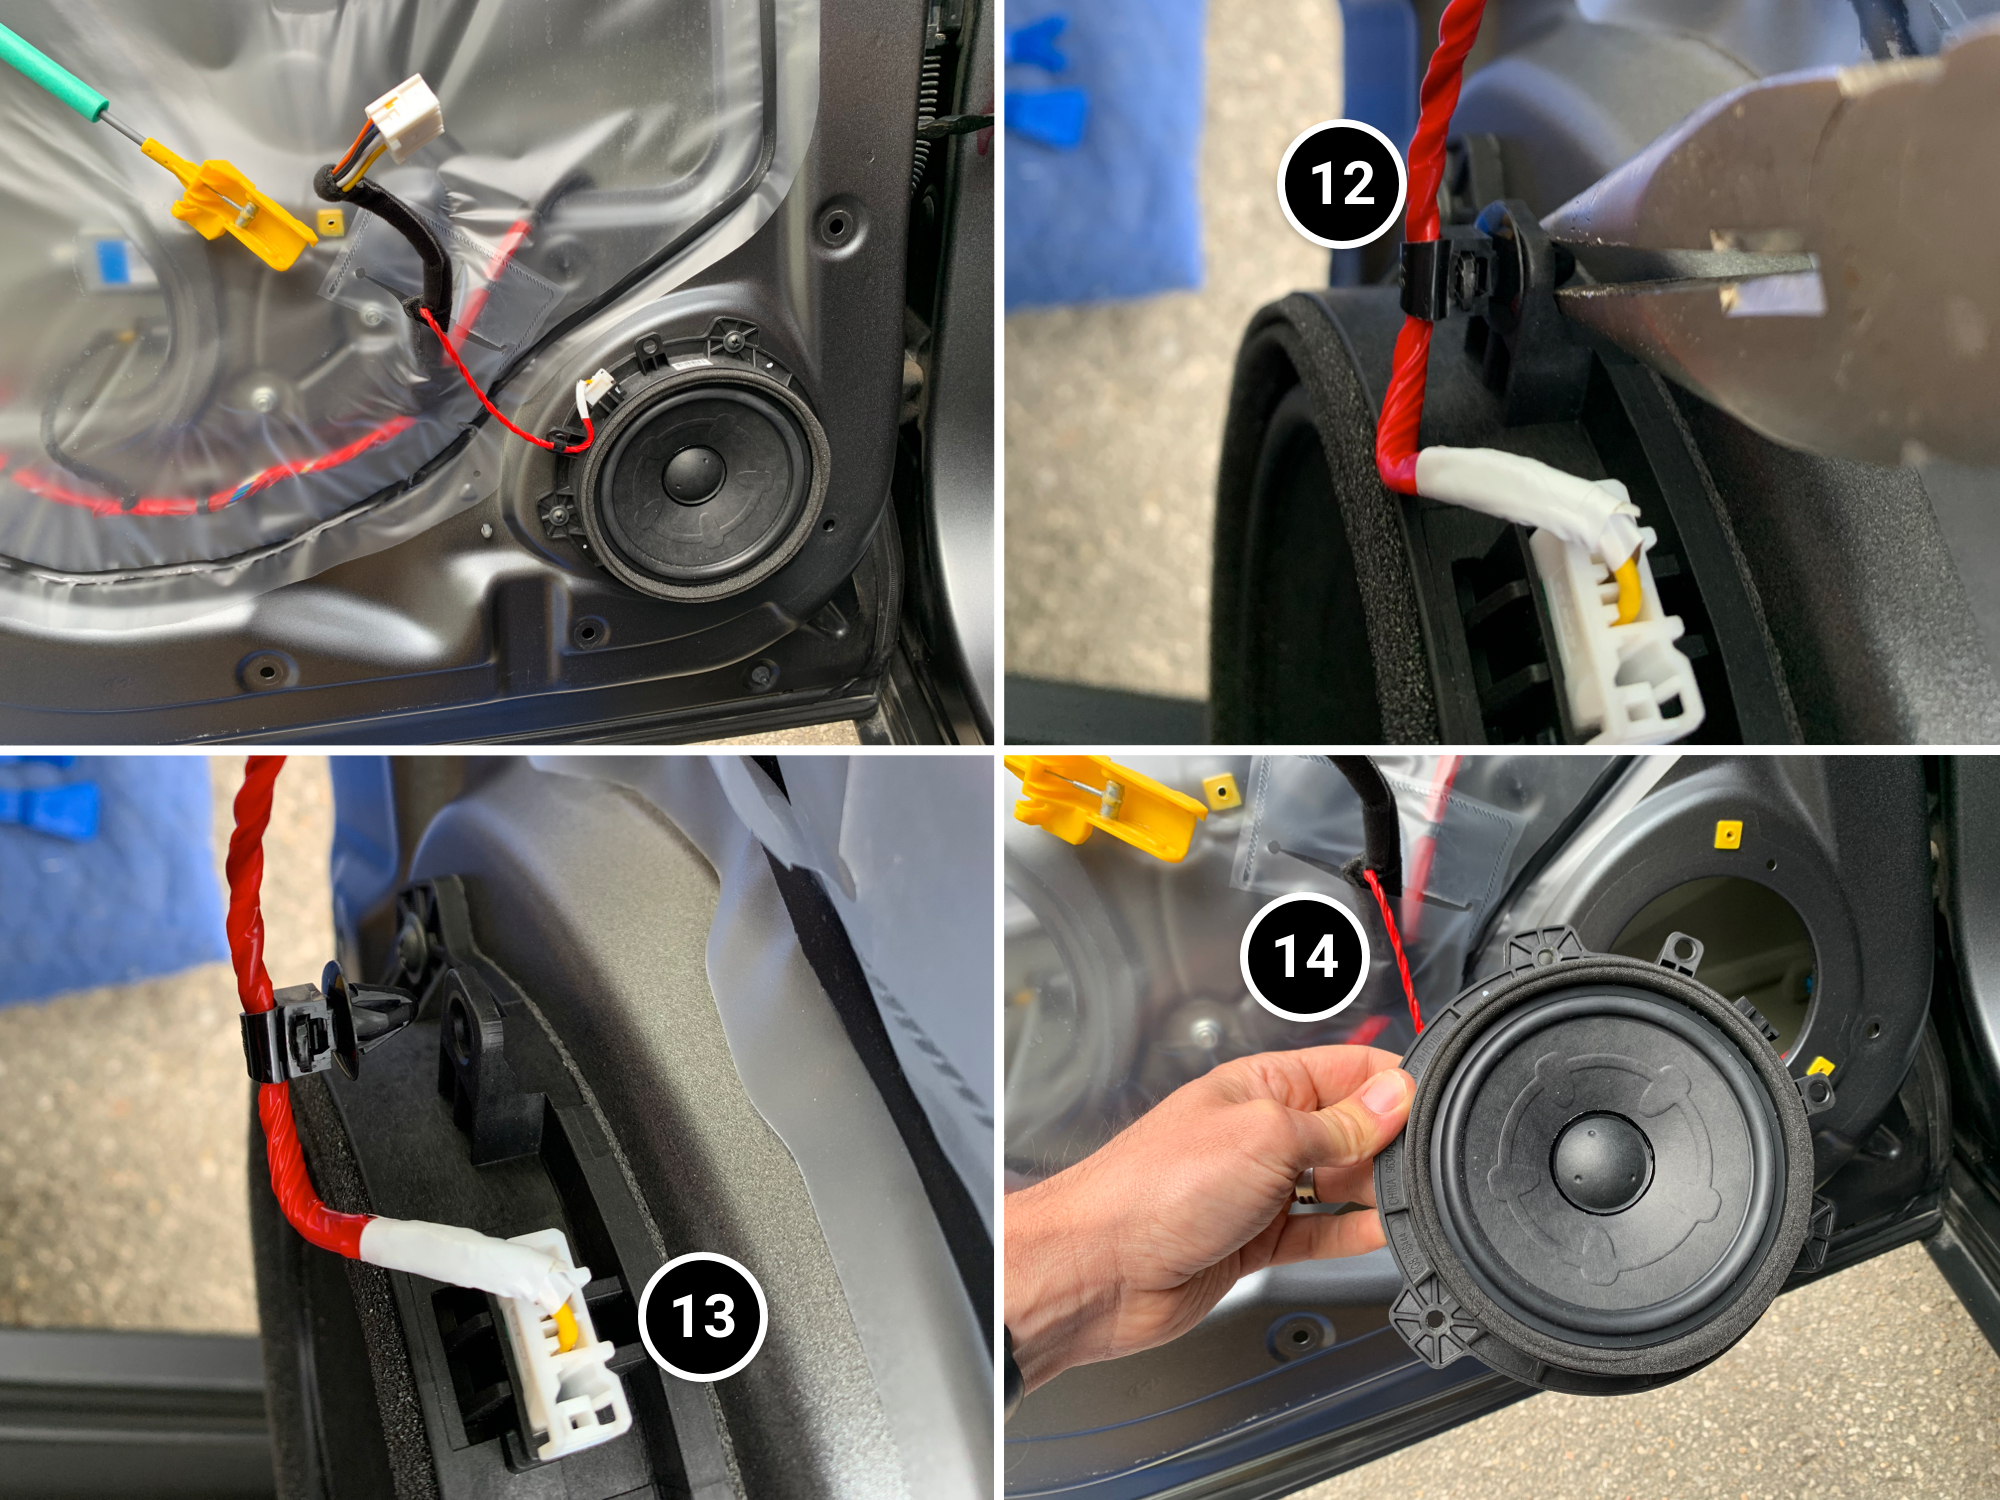
Removing the Rear Speaker
12- Unplug the red wire. Use pliers if needed.
13- Unplug the speaker connector.
14- Unscrew and remove the speaker.
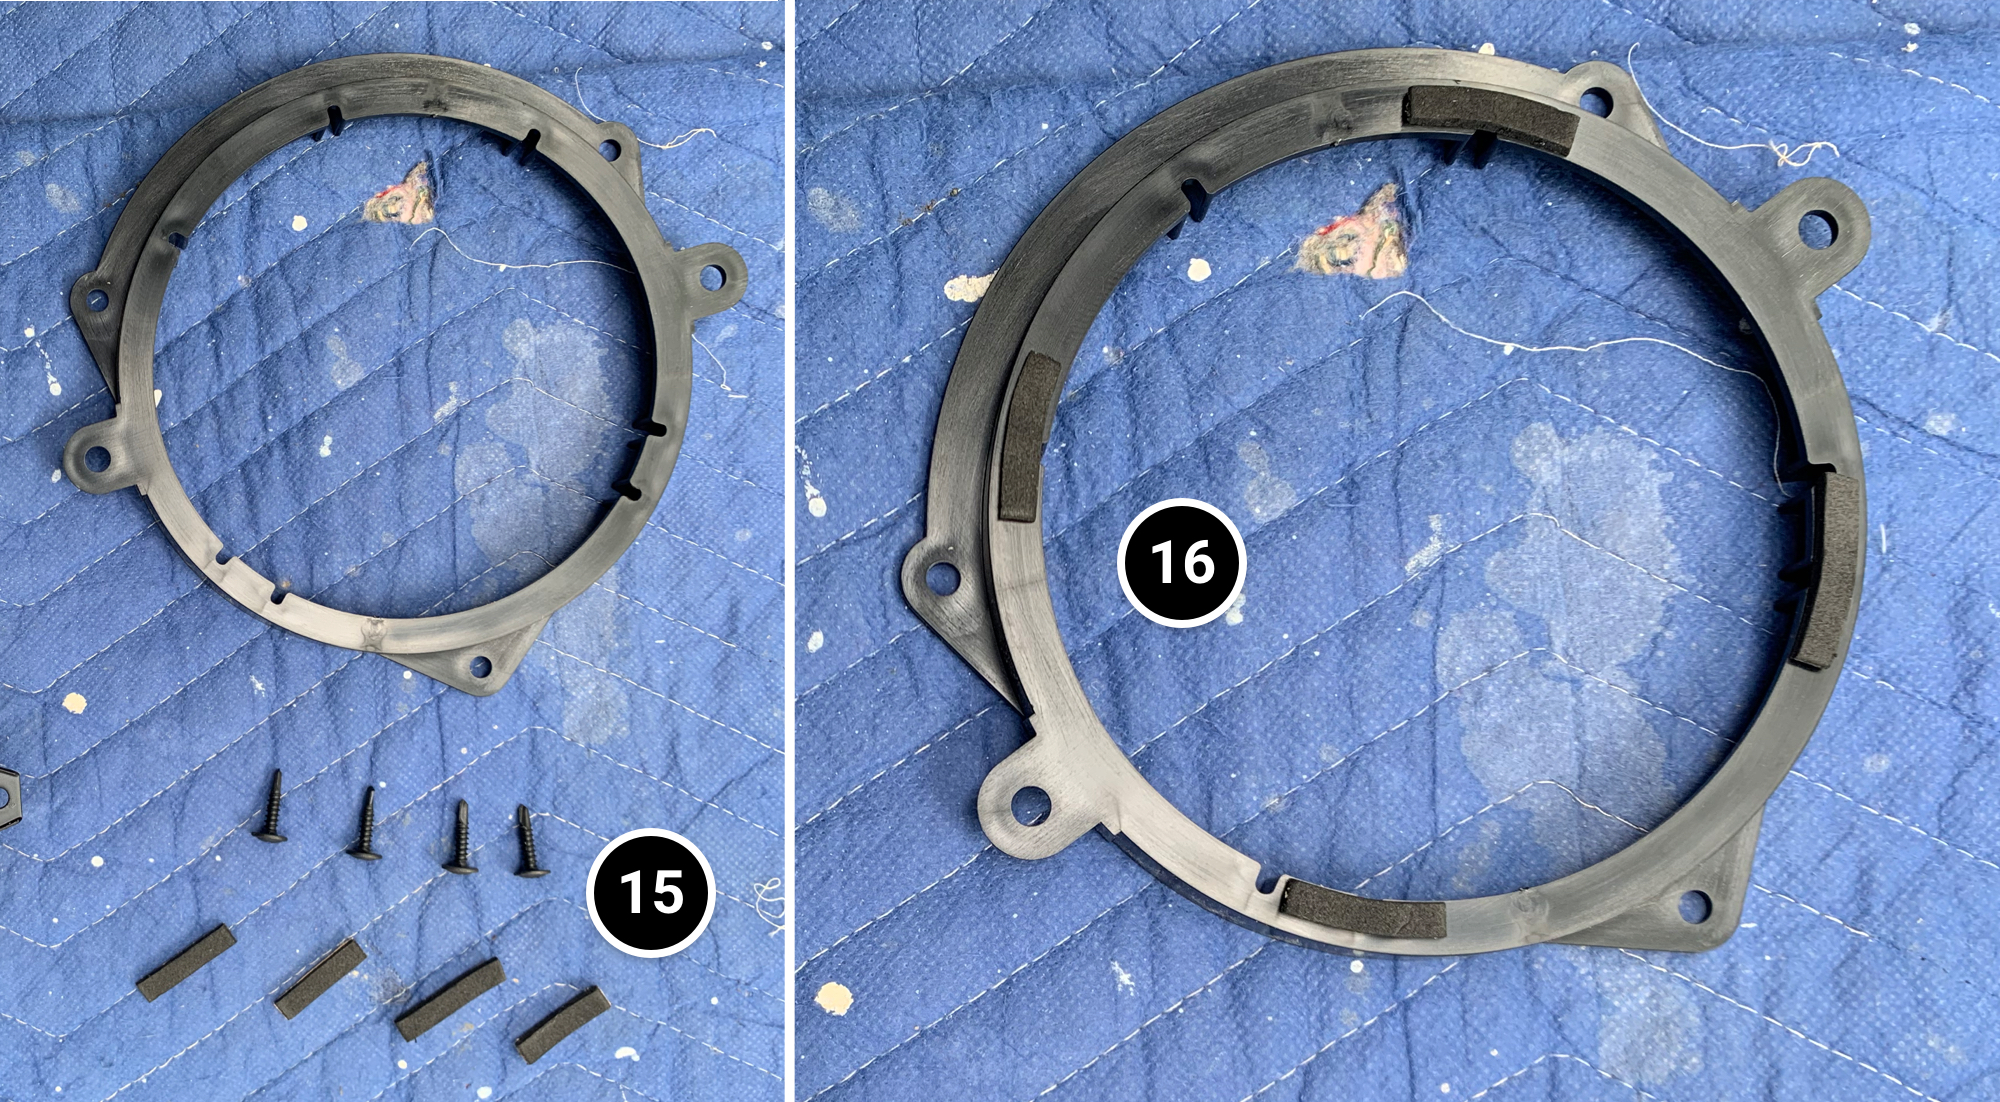
15- Cut four pieces of adhesive weather stripping.
16- Stick them to the mounting plate.
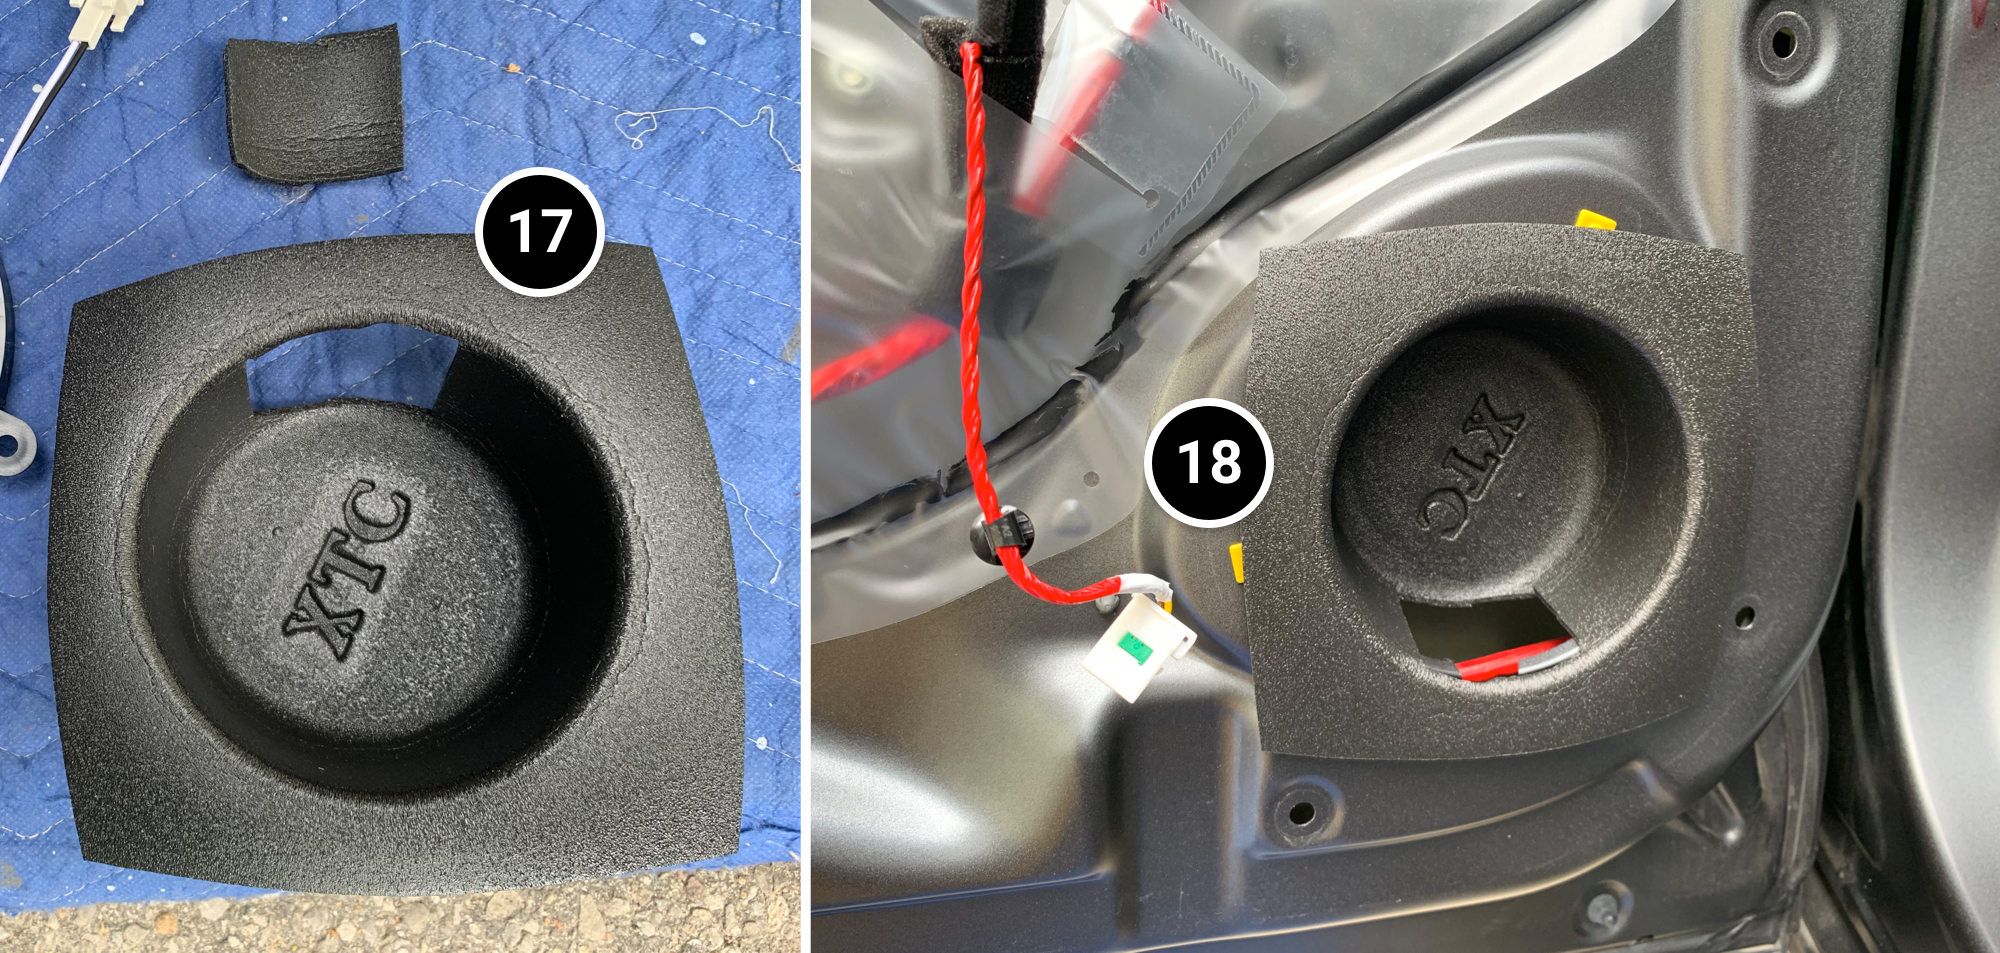
17- Cut an opening in the deflector. (Keep the leftover piece.)
18- Insert the deflector into the speaker opening.
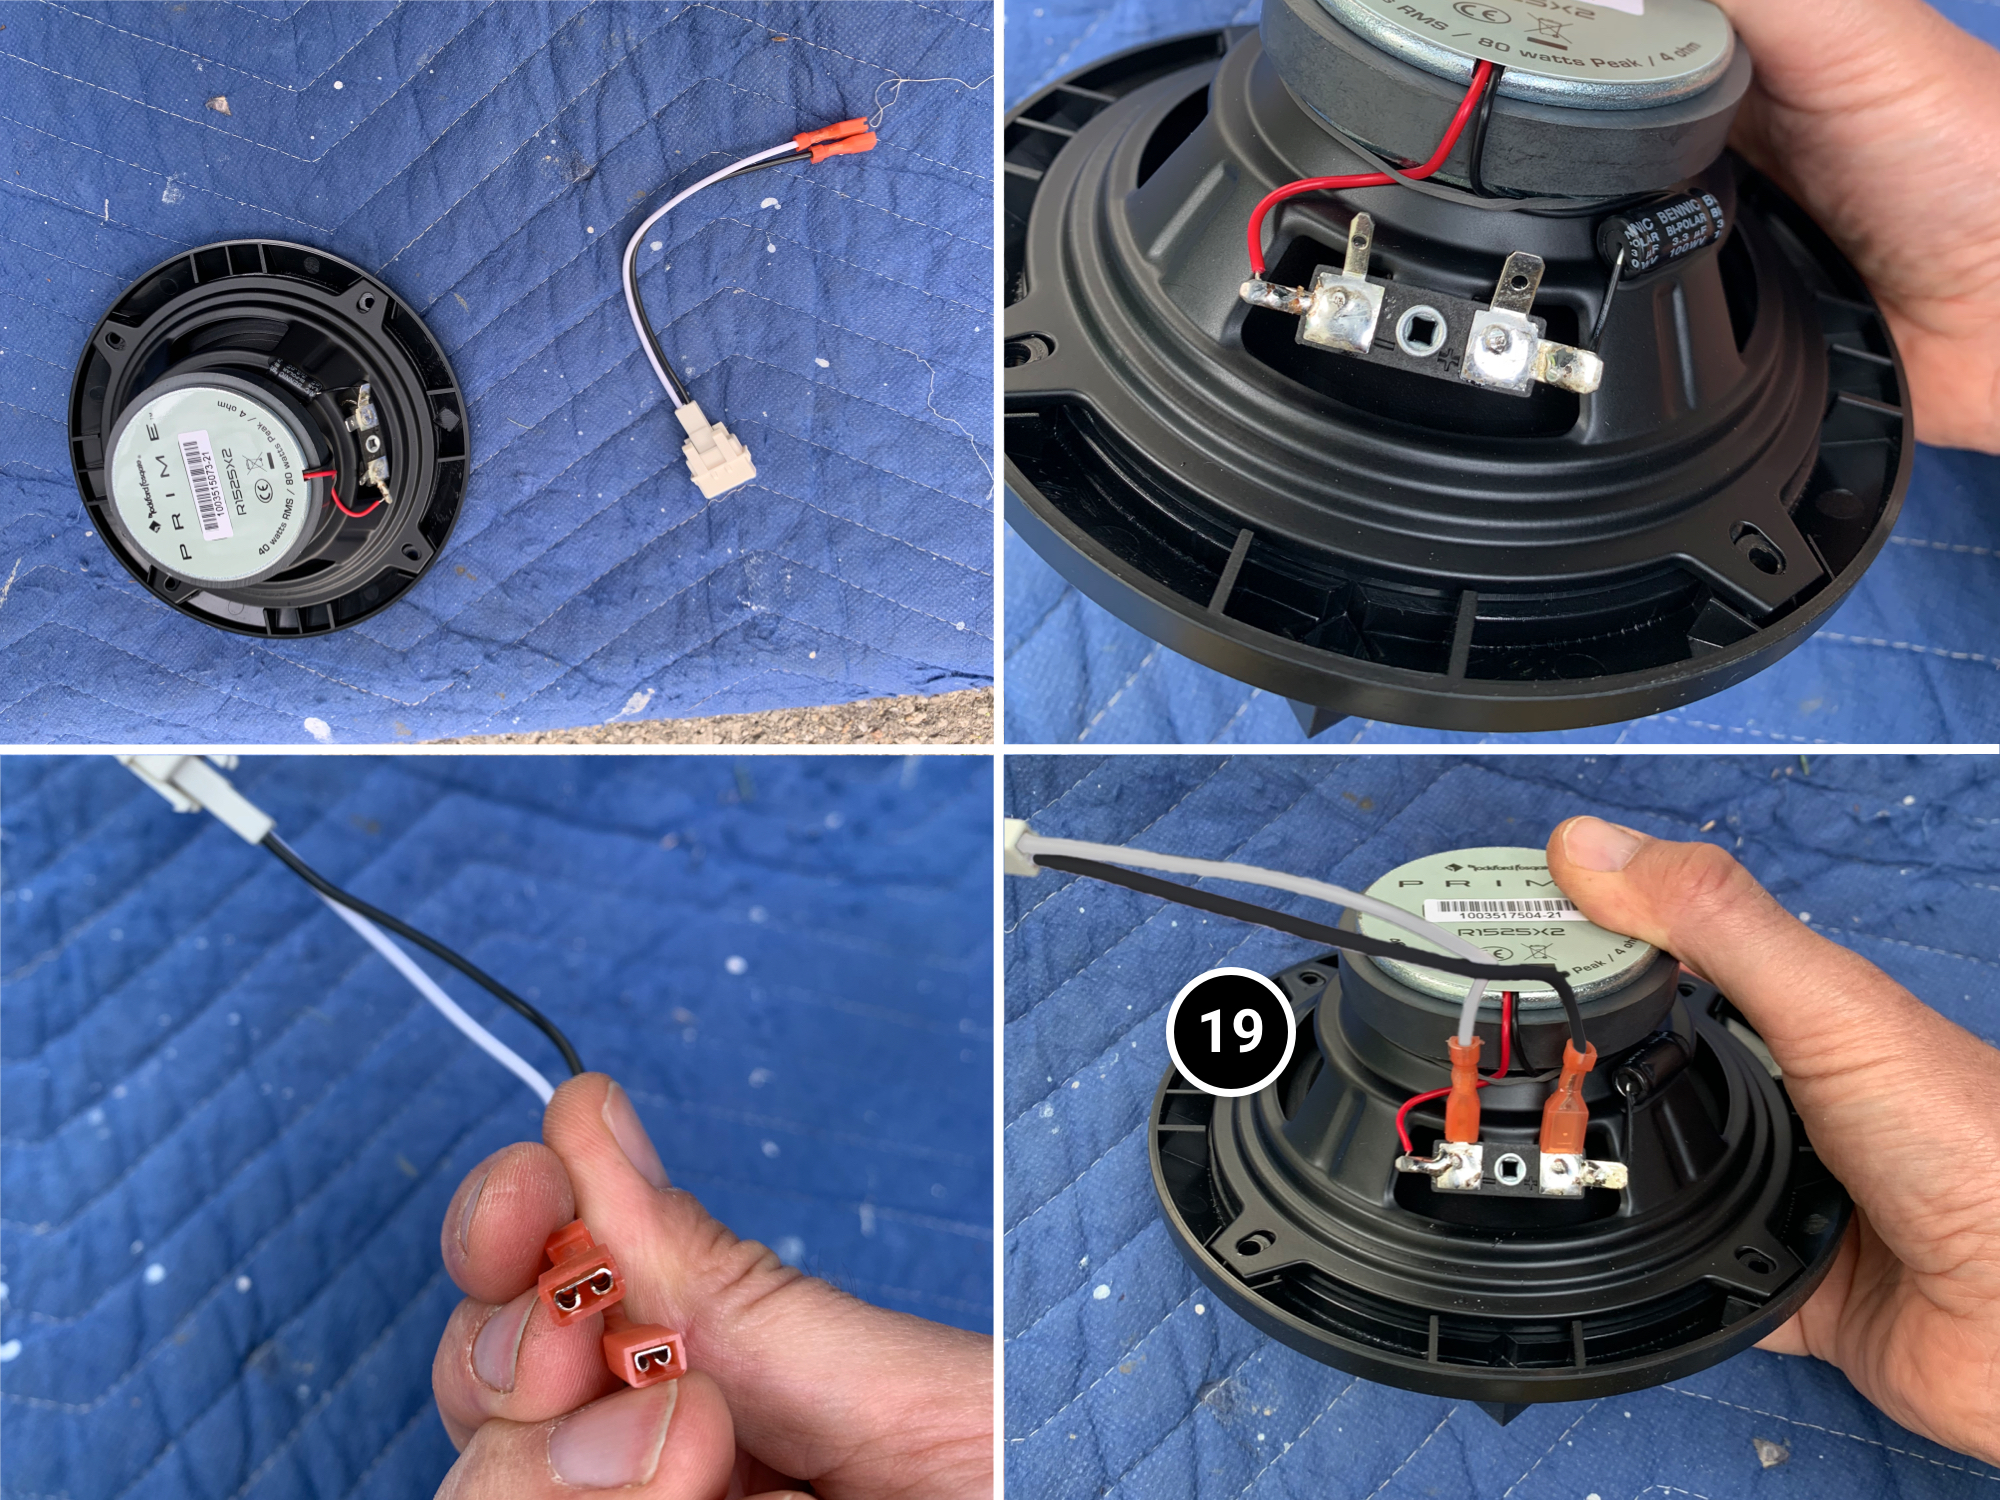
19- Connect the harness to the new speaker.
20- Wrap part of the deflector scrap around the wires and secure it with zip ties to prevent vibrations.
21- Screw the speaker onto the plate.
22- Screw the whole assembly into the door.
23- Plug in the speaker.
24- Wrap the extra wire in foam, like the piece I used in the photo.
The new rear speaker is installed. Just reverse the steps to reassemble the door and trim panel.
Some of the items referenced in this article can be found by following the links below.
FRONT Components
– Speakers – Rockford Fosgate R165X3 Prime 6.5-Inch Full-Range 3-Way – https://amzn.to/452P2R5
– Wall Plate – Metra Electronics 82-5605 – https://amzn.to/4eGz4Al
– Harness – Metra 72-7302 – https://amzn.to/4kswkHV
– Baffle – VXT65 – https://amzn.to/4kP0BRL
REAR Components
– Speakers – Rockford Fosgate R1525X2 Prime 5.25-Inch – https://amzn.to/3In1WBr
– Wall Plate – https://www.crutchfield.com/S-deh01qibx1m/p_142SAKA656/Scosche-SAKA-656-Speaker-Mounting-Brackets.html
– Harness – Metra 72-7302 – https://amzn.to/4kswkHV
– Baffle – VXT52 – https://amzn.to/4kzuG7J
Tools and Accessories
– Installation Kit – https://www.crutchfield.com/p_120SPHKC/Install-Bay-SPHKC-Speaker-Installation-Kit.html
– Tools – https://amzn.to/4kARhke
*By using my links to order from Amazon, you help me cover hosting costs and keep this blog ad-free. Thank you!